Black Christmas nails are bold, unique and totally festive! I love how a matte black base can transform into a holiday masterpiece with just a few clever accents.
No matter if you prefer gold tips, glittery snowflakes or cute little snowmen, there is an option with your nail on it… Plus, they’re a guaranteed conversation starter at any holiday party.
Curious about how to create these stunning designs? Let me share some fun ideas that’ll have you rocking your festive look in no time!
- Start with clean, dry nails and apply a base coat before using matte black polish for a festive look.
- Enhance matte black nails with seasonal designs like glittery snowflakes, silver stars, or red bows for a holiday touch.
- Use a thin brush or dotting tool for detailed designs, ensuring precision and creativity in your nail art.
- Consider adding gold tips or glitter accents to elevate the elegance of your black Christmas nails.
- Seal your designs with a top coat and allow ample drying time to prevent smudging and maintain a polished finish.
Black Christmas Nails
I hope you’re feeling inspired to try out some black Christmas nails! They’re not just a pretty sight, but they also let you shine like a star in the holiday crowd.
It’s the little things that can make a big splash… so let’s check these gorgeous black nails for this season!
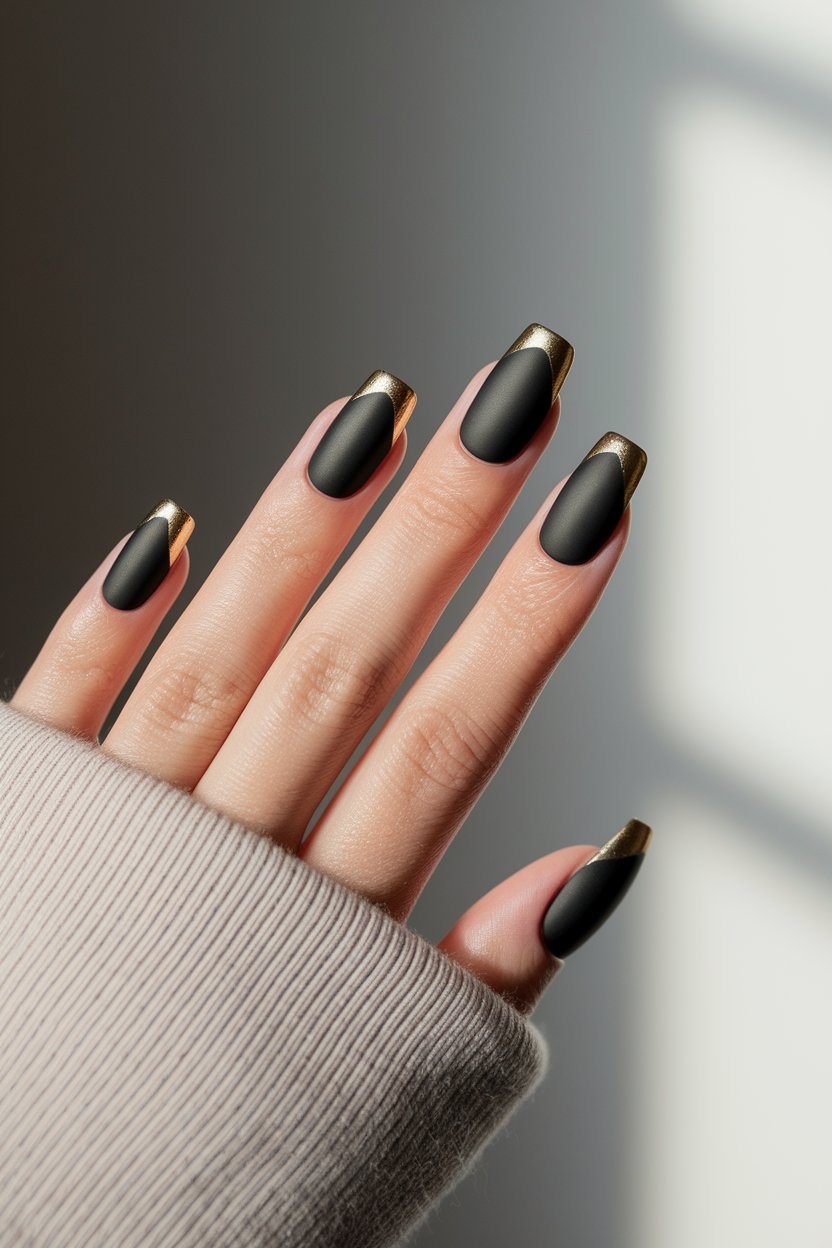
Matte Black With Gold Tips
Matte Black Nail Polish | Gold Tip Nail Polish
How to Create This Look:
- Start with clean, dry nails and apply a base coat to protect your nails.
- Once the base coat is dry, apply two coats of matte black polish for a smooth, even finish.
- After the black polish is fully dry, use a thin nail brush or nail tape to carefully apply gold tip polish to the tips of your nails.
- Allow the gold tips to dry completely before applying a top coat to seal the design.
- For an extra touch, consider adding a few gold glitter accents on one or two accent nails! Enjoy your chic holiday nails!
Glittery Black Snowflakes
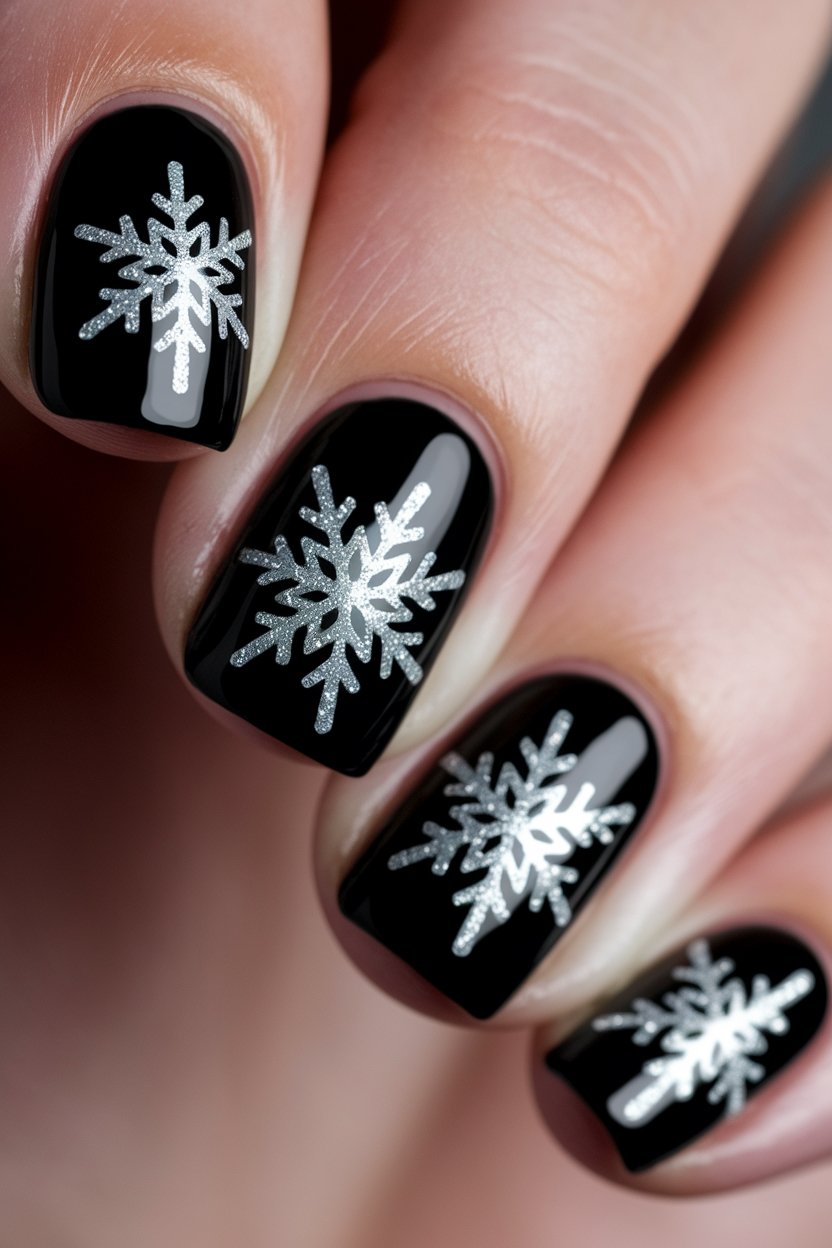
Silver Nail Polish | Black Nail Polish
How to Create This Look:
- Start with a clean and filed set of nails.
- Apply one coat of the black matte polish and let it dry completely.
- Once dry, carefully paint the tips of your nails with the gold tip polish.
- After the gold tips have dried, use a dotting tool or a thin brush to apply the glittery black snowflakes on top of the matte base.
- Finish with a top coat for added shine and protection. Enjoy your festive nails!
Matte Black With Red Bows
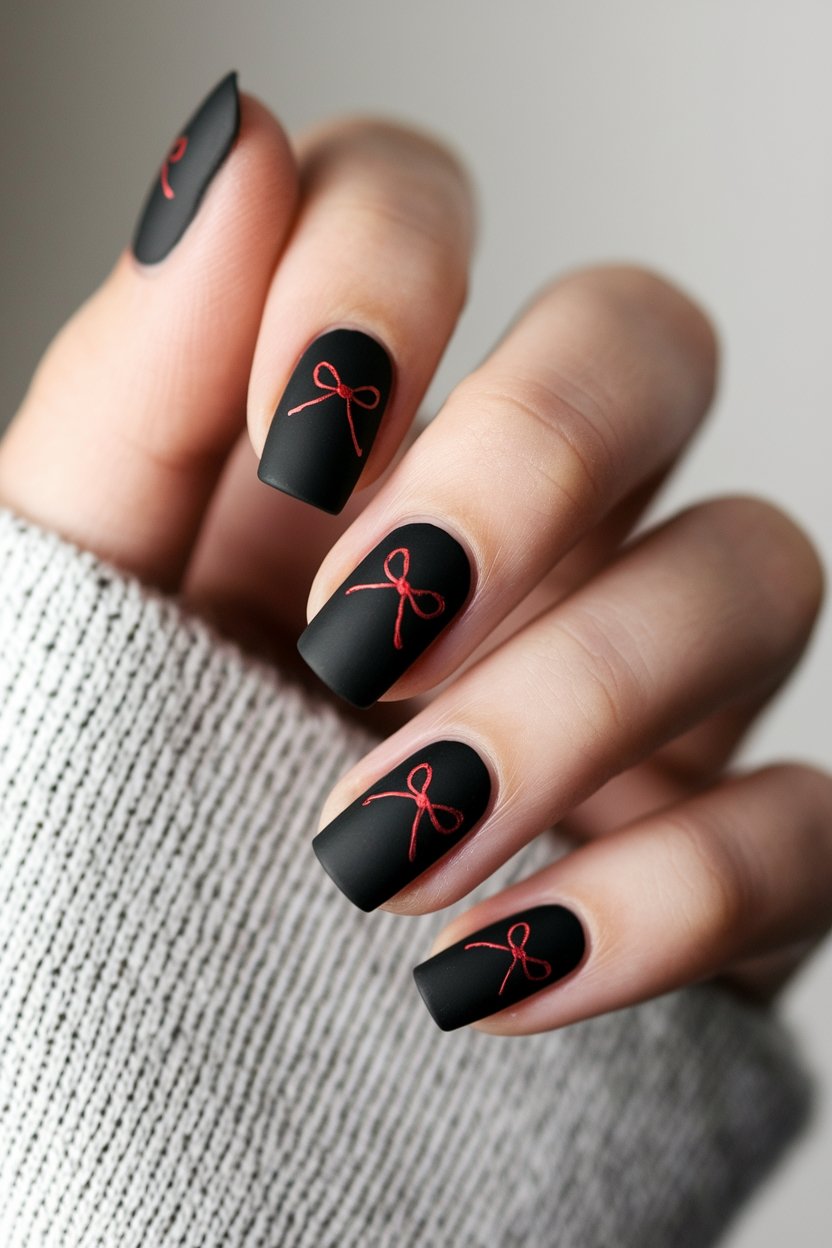
Matte Black Nail Polish | Red Nail Polish
How to Create This Look:
- Start with clean, dry nails and apply a base coat to protect your nails.
- Paint your nails with the matte black polish and let it dry completely.
- Using a small nail art brush or a toothpick, dip it into the red polish and carefully create small bow shapes on each nail.
- Allow the bows to dry, then seal the design with a glossy top coat for added shine.
- Finish with a quick-dry spray if desired to speed up the process.
Black Nails With White Snowmen
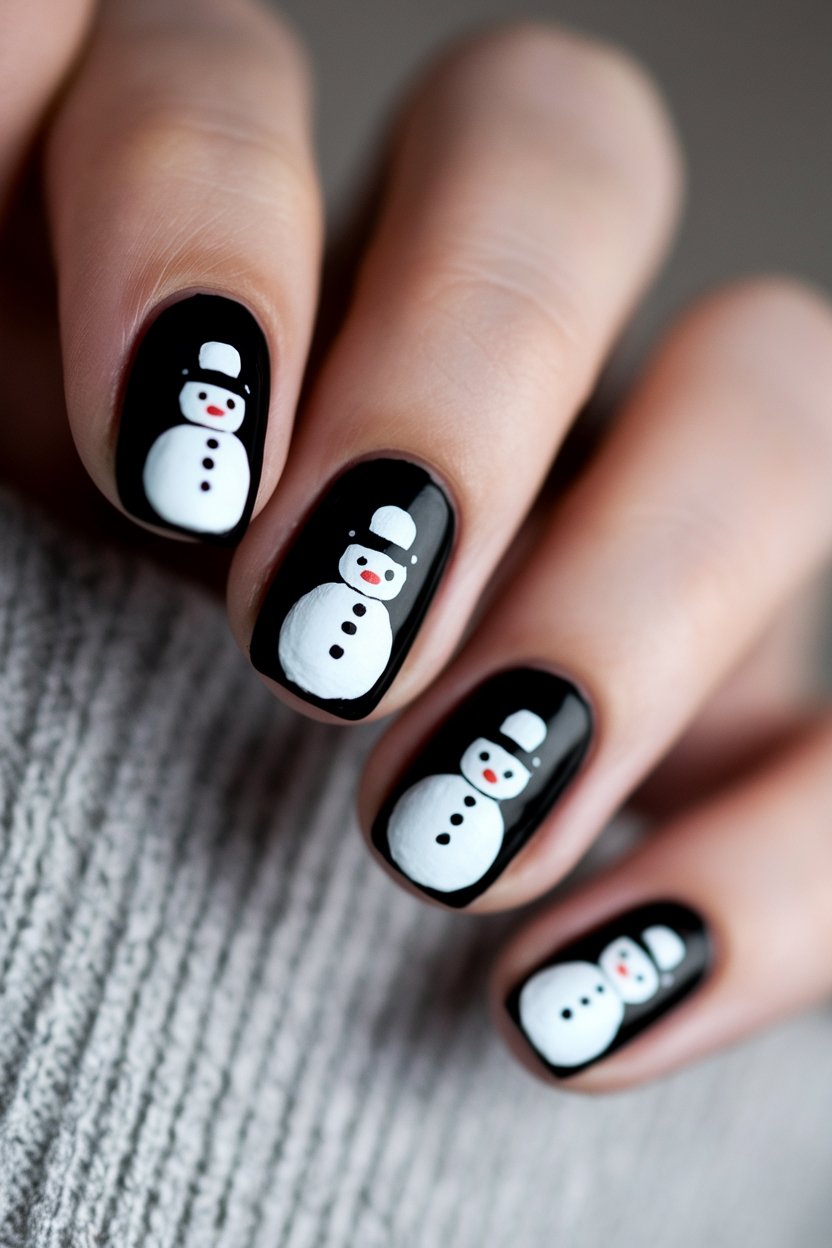
Black Nail Polish | White Nail Polish | Orange Nail Polish
How to Create This Look:
- Start with a base coat to protect your nails.
- Apply two coats of black polish to your nails for a sleek background.
- Once dry, use a dotting tool or a small brush to create snowmen with white polish on each nail.
- Add tiny orange dots for their carrot noses using the orange polish.
- Finish with fluffy hats by adding small blue or any colored dots at the top of each snowman.
- Seal your design with a top coat for shine and longevity!
Black nails with glitter tips
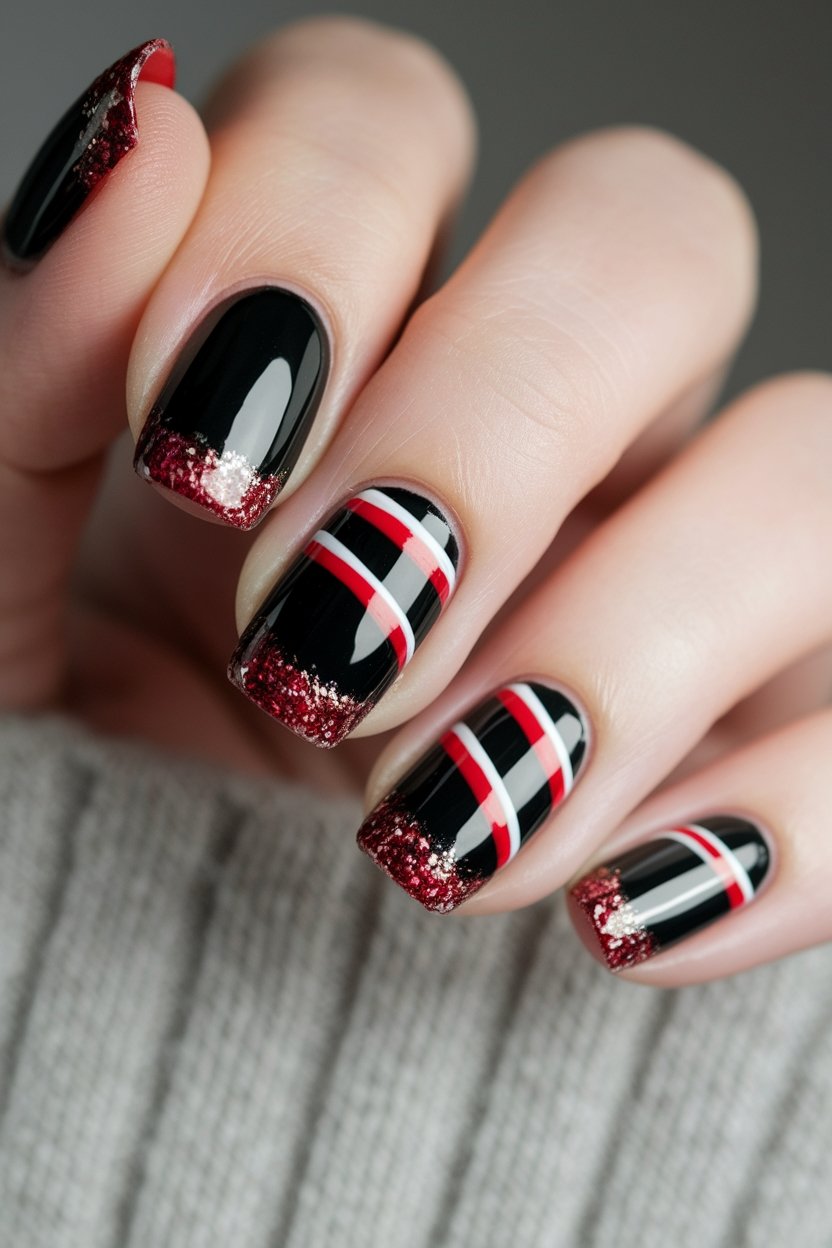
Black Nail Polish | Red Glitter Nail Polish | White Nail Art Striping Polish | Red Nail Art Striping Polish
How to Create This Look:
- Start with clean, dry nails and apply a base coat
- Apply two coats of black polish and let dry
- Use a striping brush to add red and white lines across the middle for a candy cane vibe
- Dab red glitter polish on the tips for that extra sparkle
- Finish with a glossy top coat to lock in the shine
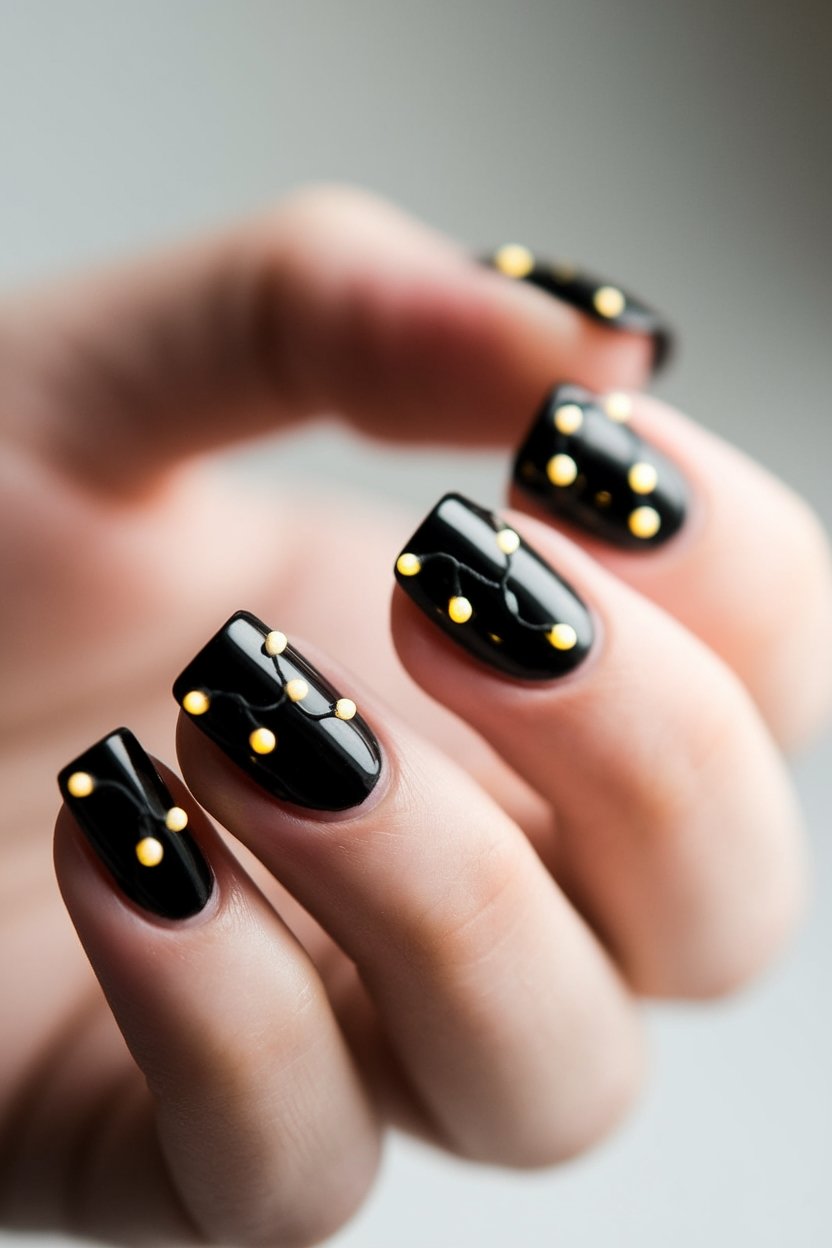
Black Nails With Gold Ornaments
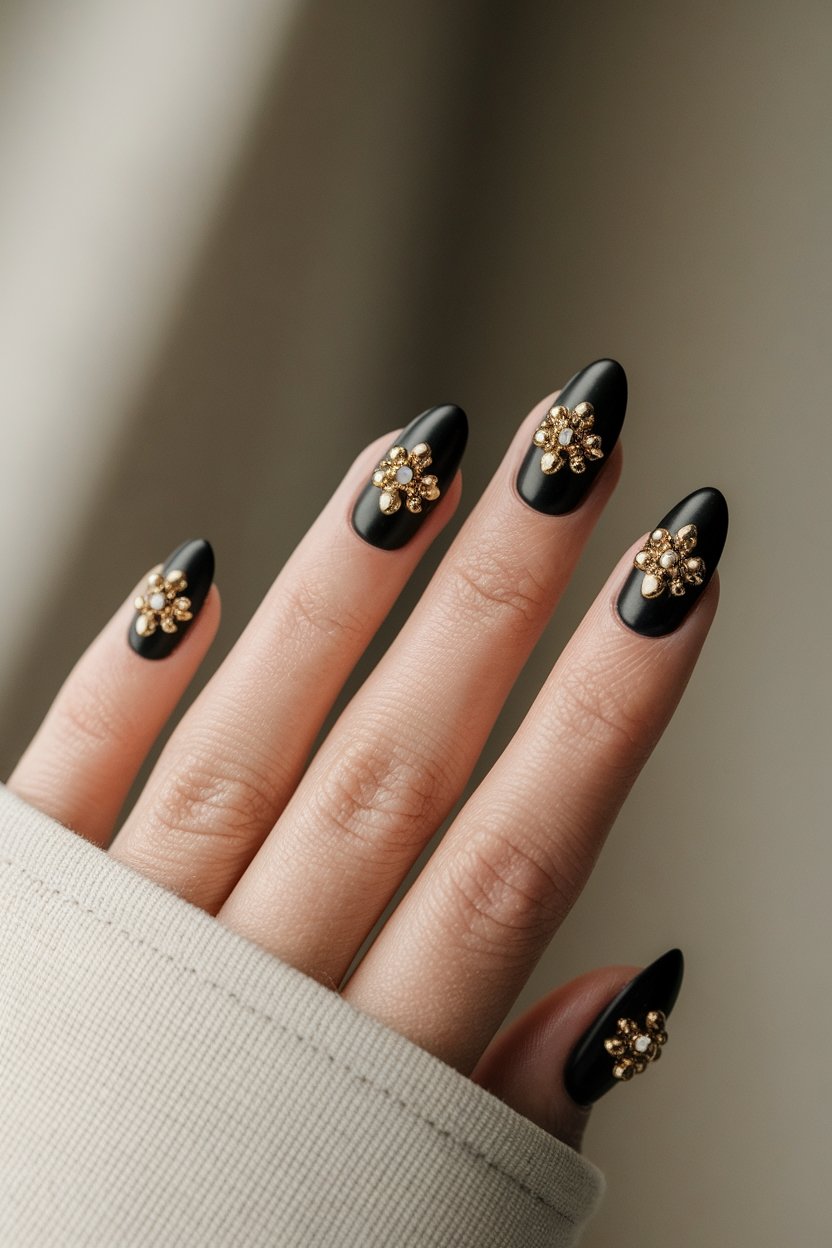
Black Nail Polish | Gold Nail Decals
How to Create This Look:
- Start with clean, dry nails and apply a base coat to protect them.
- Paint your nails with two coats of black polish, allowing each coat to dry completely.
- Once dry, use a gold glitter polish to add accents or create designs on your nails.
- For a professional finish, apply a clear top coat to seal your design and add shine.
- Let your nails dry fully, and enjoy your chic holiday look!
Matte Black With Silver Bells
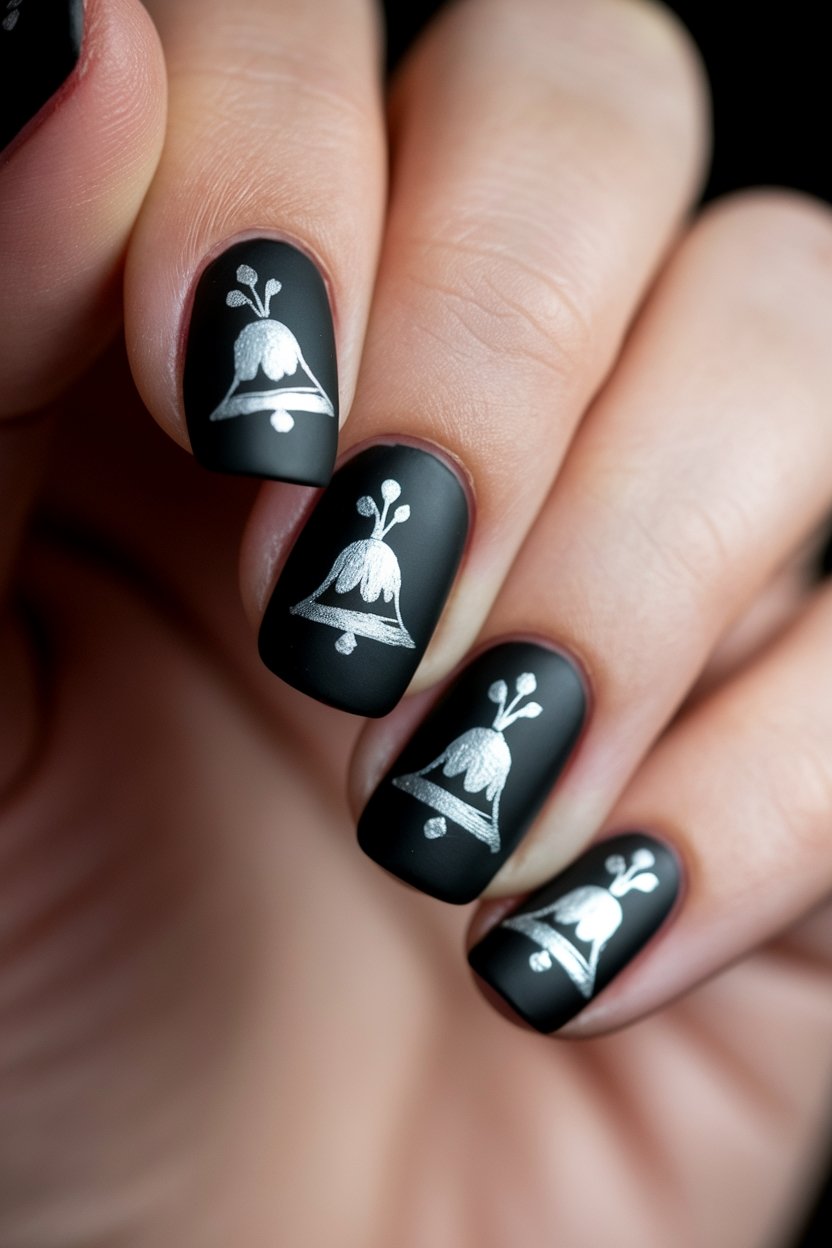
Matte Black Nail Polish | Silver Shimmer Nail Polish
How to Create This Look:
- Start with clean, dry nails and apply a base coat to protect them.
- Once the base coat is dry, apply two coats of matte black polish for a smooth, opaque finish.
- Allow the matte black polish to dry completely before moving on.
- Using a nail dotting tool or a fine brush, carefully add silver glitter polish in the shape of bells on your nails.
- For an extra touch, you can use a white polish to create small bows or accents on the bells.
- Finish with a top coat to seal your design and add longevity (if you prefer a glossy finish).
- Let everything dry, and you’re ready to show off your festive nails!
Matte Black With Red Glitter
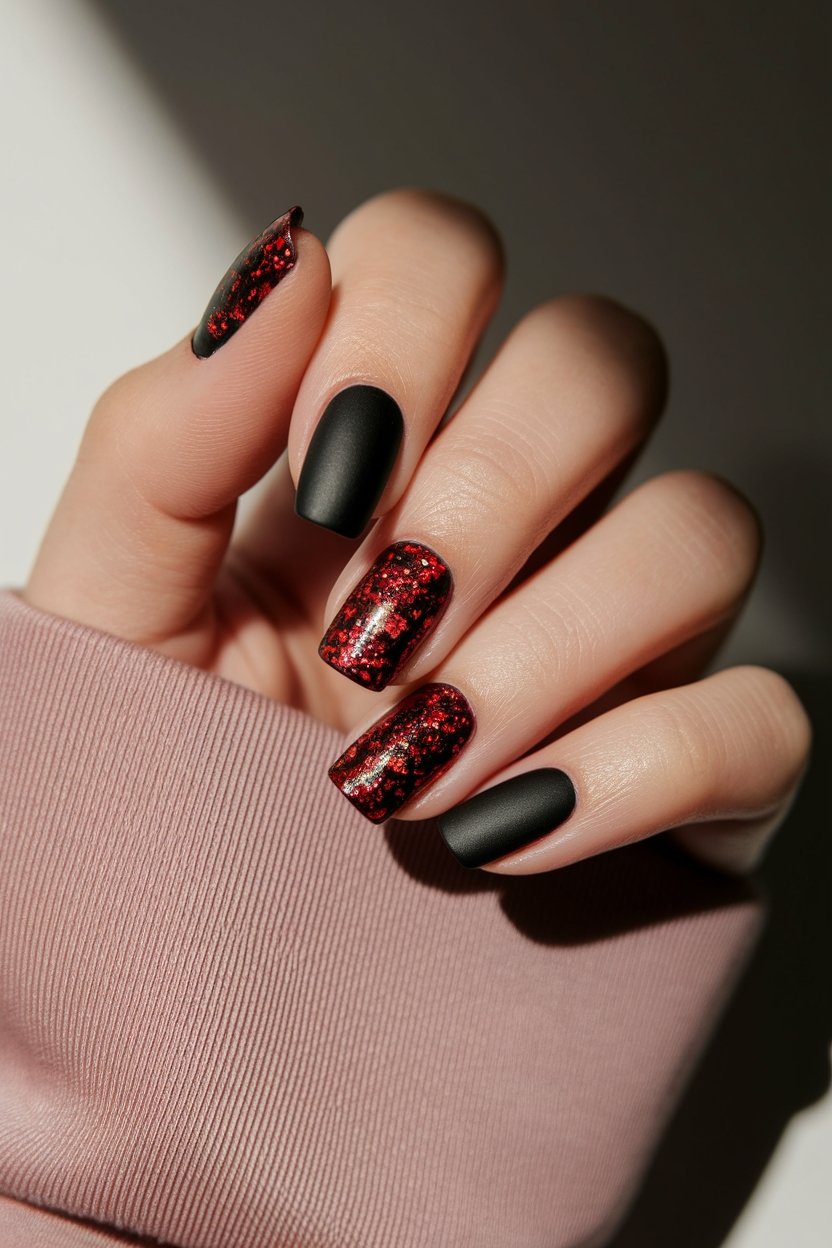
Matte Black Nail Polish | Red Glitter Nail Polish
How to Create This Look:
- Start with clean, dry nails and apply a base coat to protect your nails.
- Once the base coat is dry, apply two coats of matte black polish, allowing each coat to dry completely.
- After the black polish has dried, use a nail art brush or sponge to dab red glitter polish onto the tips or the entire nail for a festive touch.
- Finish with a top coat to seal in the glitter and add a smooth finish.
- Let your nails dry completely, and you’re ready to shine at any holiday gathering!
Matte Black With Silver Snowflakes
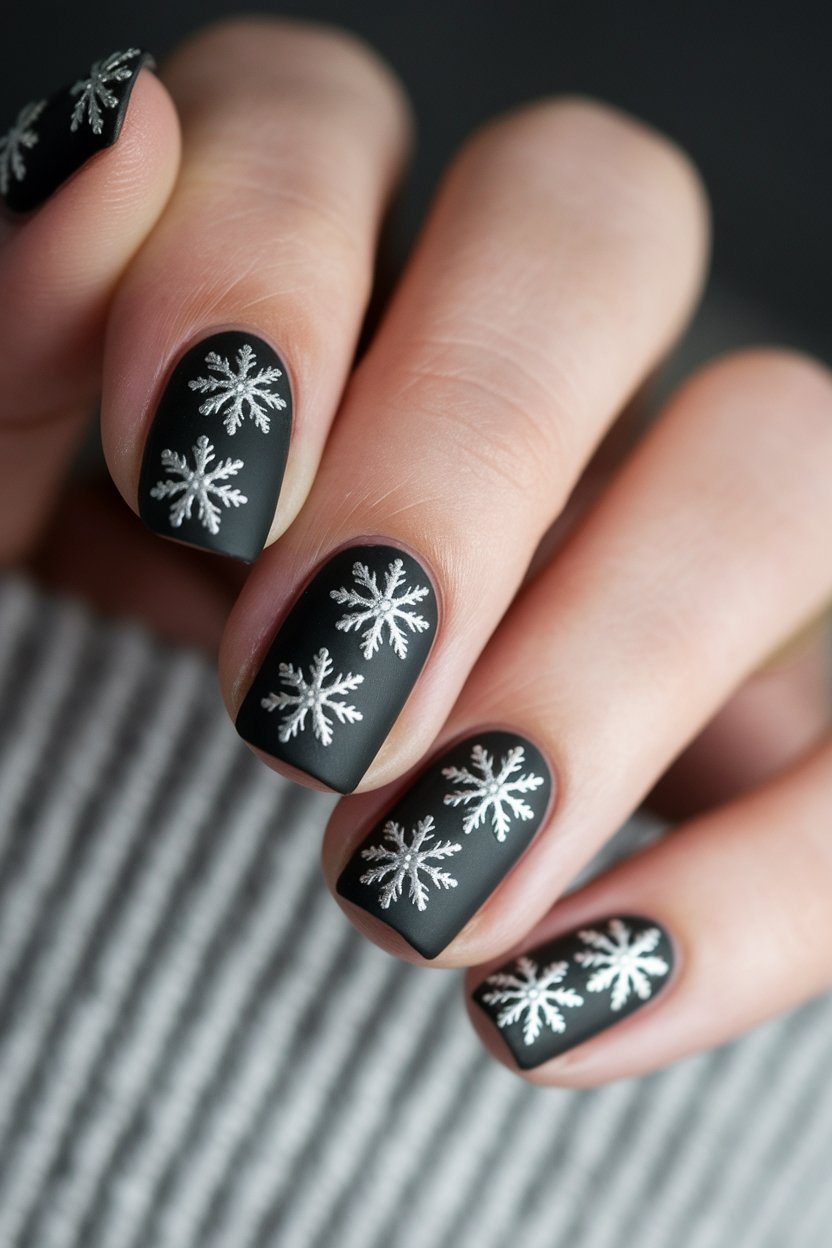
Matte Black Nail Polish | Silver Snowflake Nail Decals
How to Create This Look:
- Start with a clean nail surface and apply a base coat for protection.
- Once dry, paint your nails with the matte black polish and let it dry completely.
- Using the white nail art polish, carefully create tiny snowflakes on your nails. You can use a dotting tool or a thin brush for precision.
- After the snowflakes are done, add a touch of silver glitter polish for that extra sparkle.
- Finish off with a top coat to seal your design and enhance the matte look!
- Allow everything to dry, and enjoy your magical winter wonderland nails!
Matte Black With Green Holly
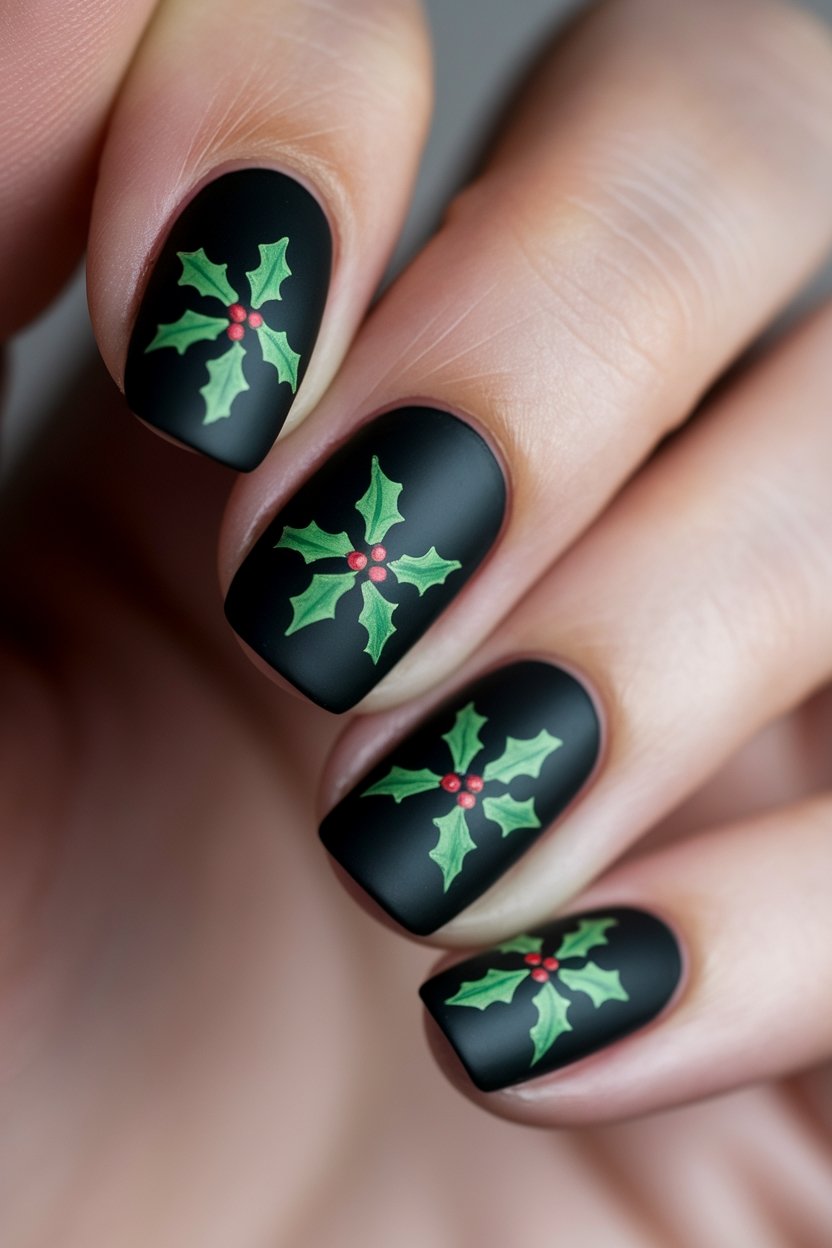
Matte Black Nail Polish | Forest Green Nail Polish | Red Nail Polish
How to Create This Look:
- Start with clean, trimmed nails and apply a base coat to protect them.
- Apply two coats of matte black polish for a sleek, base color. Let dry completely.
- Using a fine nail art brush or a dotting tool, create holly leaves with forest green polish on one or two accent nails.
- Add small white dots to represent the holly berries on the green leaves.
- Finish with a top coat to seal in your design and enhance durability. Enjoy your festive manicure!
Matte Black With Red Glitter
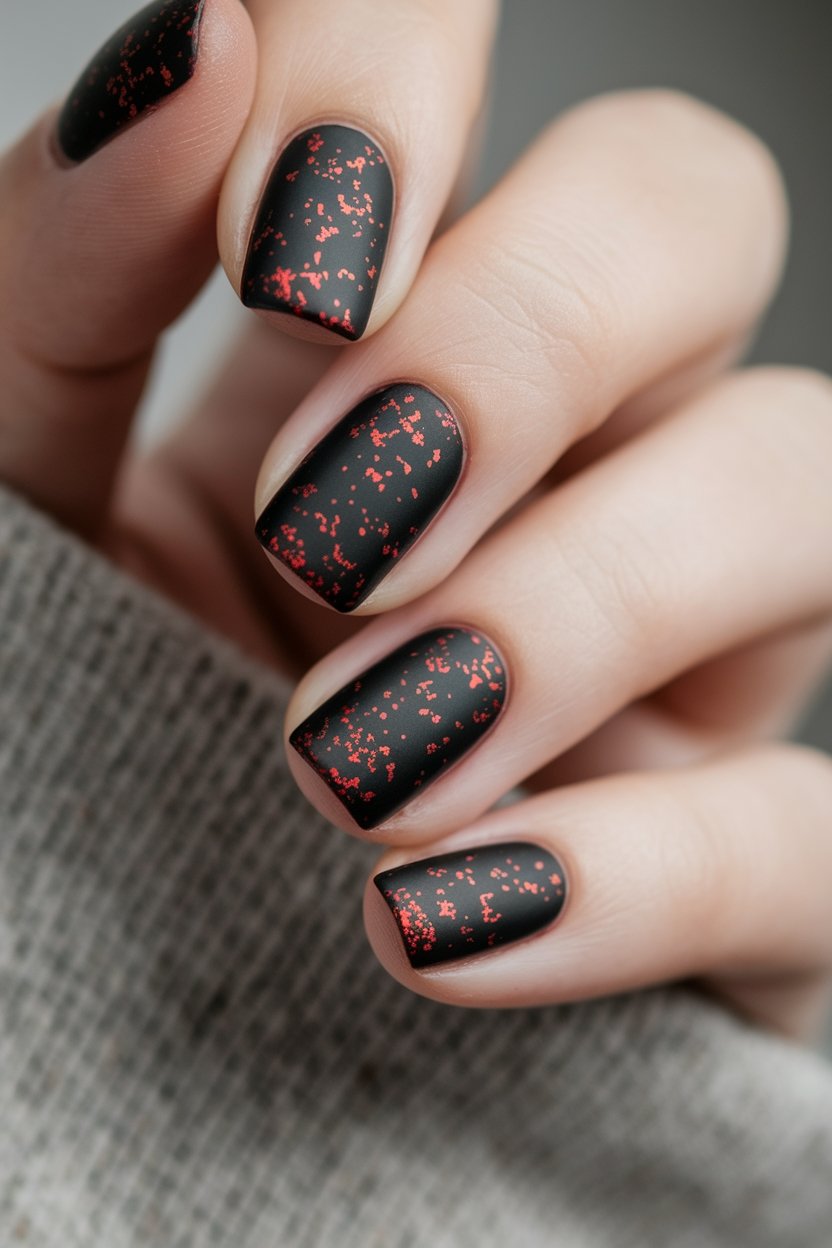
How to Create This Look:
- Start with clean, dry nails and apply a base coat to protect your nails.
- Apply one or two coats of matte black polish, allowing each layer to dry completely.
- Once the black polish is dry, gently apply red glitter polish to the tips or over the entire nail for a festive touch.
- Finish with a top coat to seal in the glitter and add extra shine (optional, as it may add gloss).
- Allow everything to dry thoroughly, and enjoy your sparkling holiday nails!
Matte Black With White Snowflakes
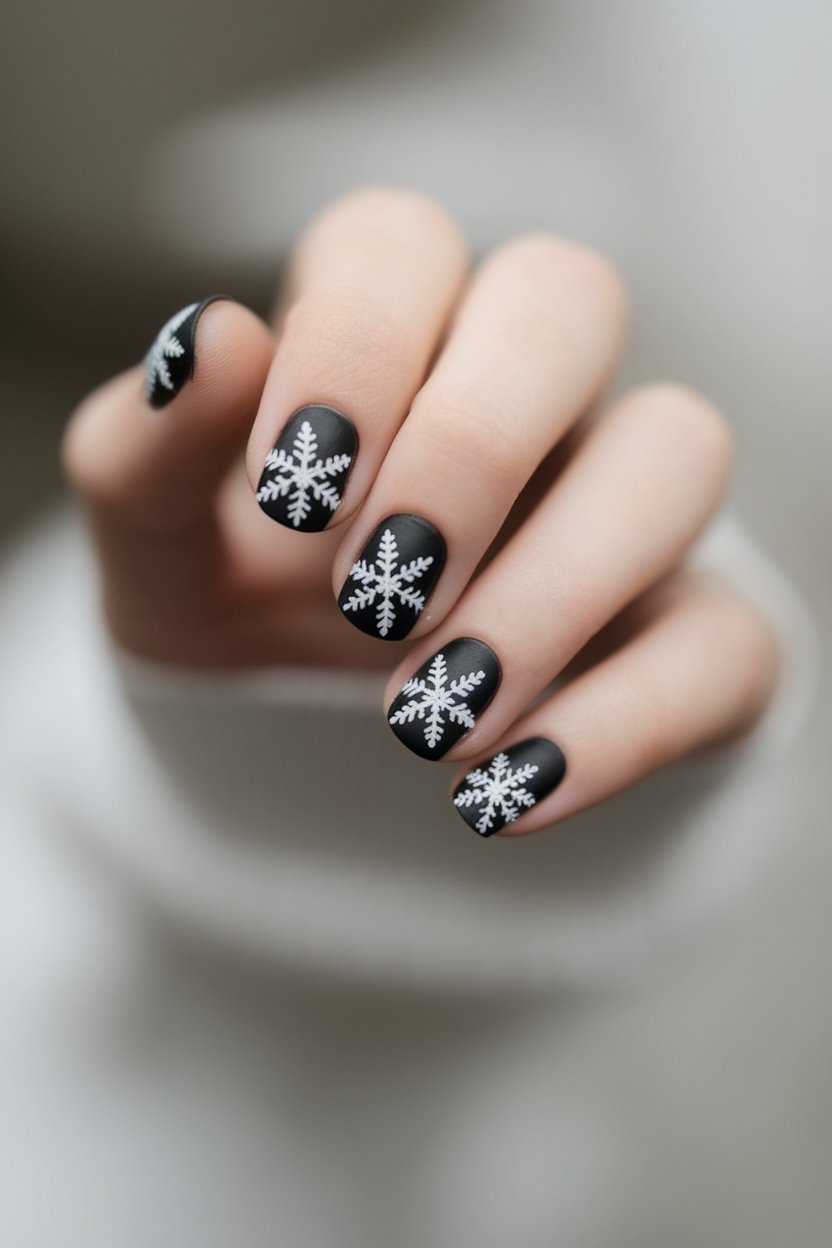
Matte Black Nail Polish | White Nail Polish
How to Create This Look:
- Start with clean, dry nails and apply a base coat for protection.
- Paint your nails with two coats of matte black polish, allowing each coat to dry completely.
- Using a nail dotting tool or a fine brush, carefully create snowflake designs on each nail with the white snowflake polish.
- Add a top coat for longevity if desired, but keep in mind that it may alter the matte finish.
- Let everything dry thoroughly and admire your festive winter wonderland nails!
Stars and Moon
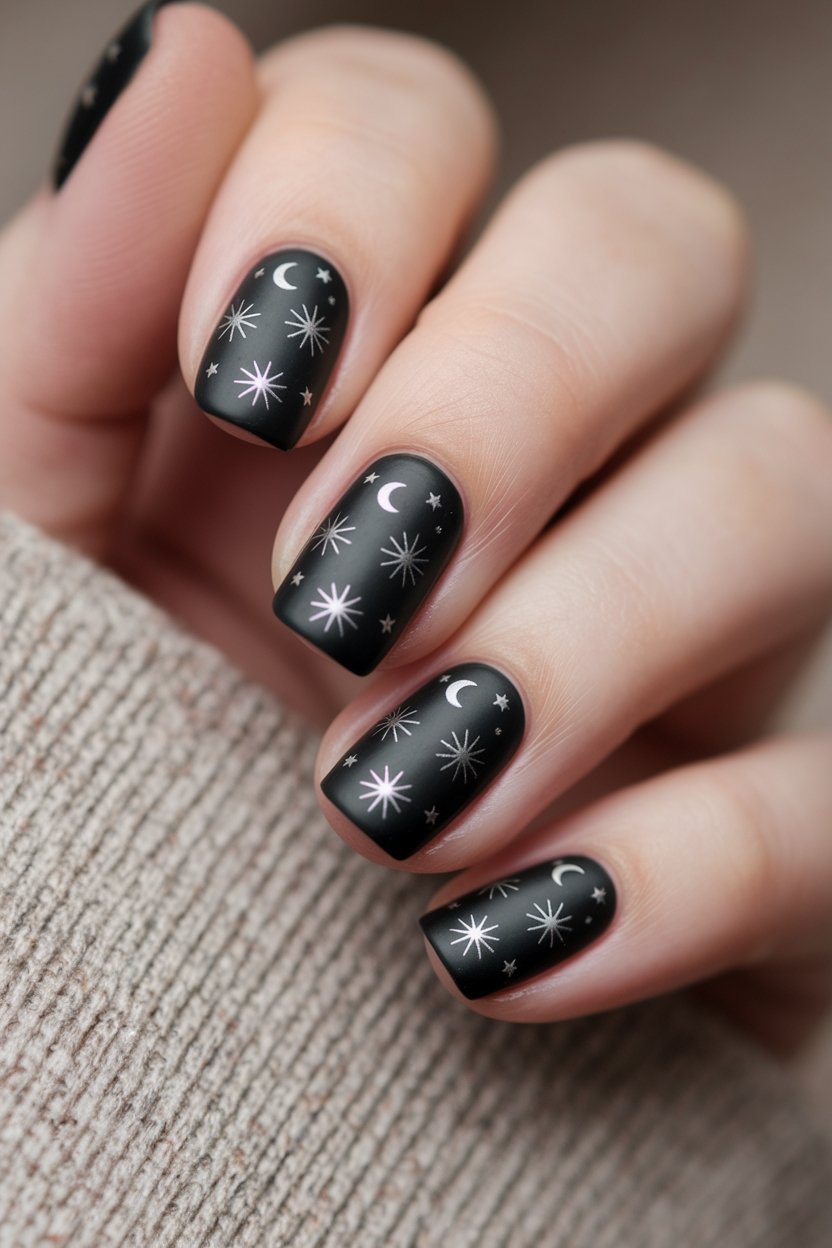
Matte Black Nail Polish | Moon and Star Nail Decals
How to Create This Look:
- Start with clean, dry nails and swipe on a base coat (we’re not skipping steps in 2025).
- Apply two coats of matte black nail polish and let it fully dry. This is your galaxy backdrop.
- Once dry, carefully place moon and star nail decals across each nail. Use tweezers if you’ve had coffee.
- Seal it in with a clear top coat, just one layer if you want to keep the matte vibe intact.
Snowmen and pine trees
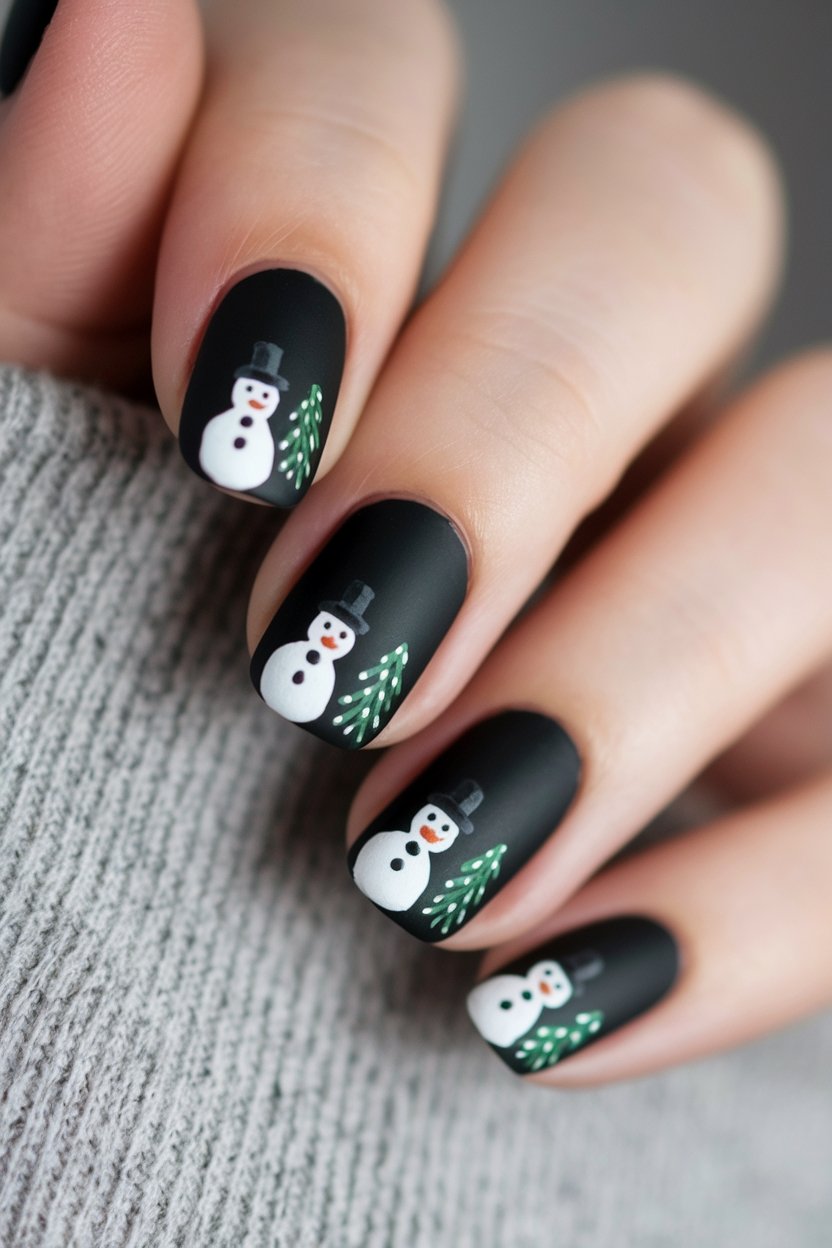
Matte Black Nail Polish | White Nail Polish | Green Nail Art Polish | Nail Art Brushes
How to Create This Look:
- Start with clean nails and apply a base coat
- Paint on two coats of matte black polish and let dry completely
- Use a dotting tool or brush to create white snowmen, then add hats, eyes and buttons with black and orange polish
- Paint small pine trees beside each snowman using green polish and a fine detail brush
- Seal with a matte top coat to keep that cozy winter look on point
Abstract Gold Foil Nail Art
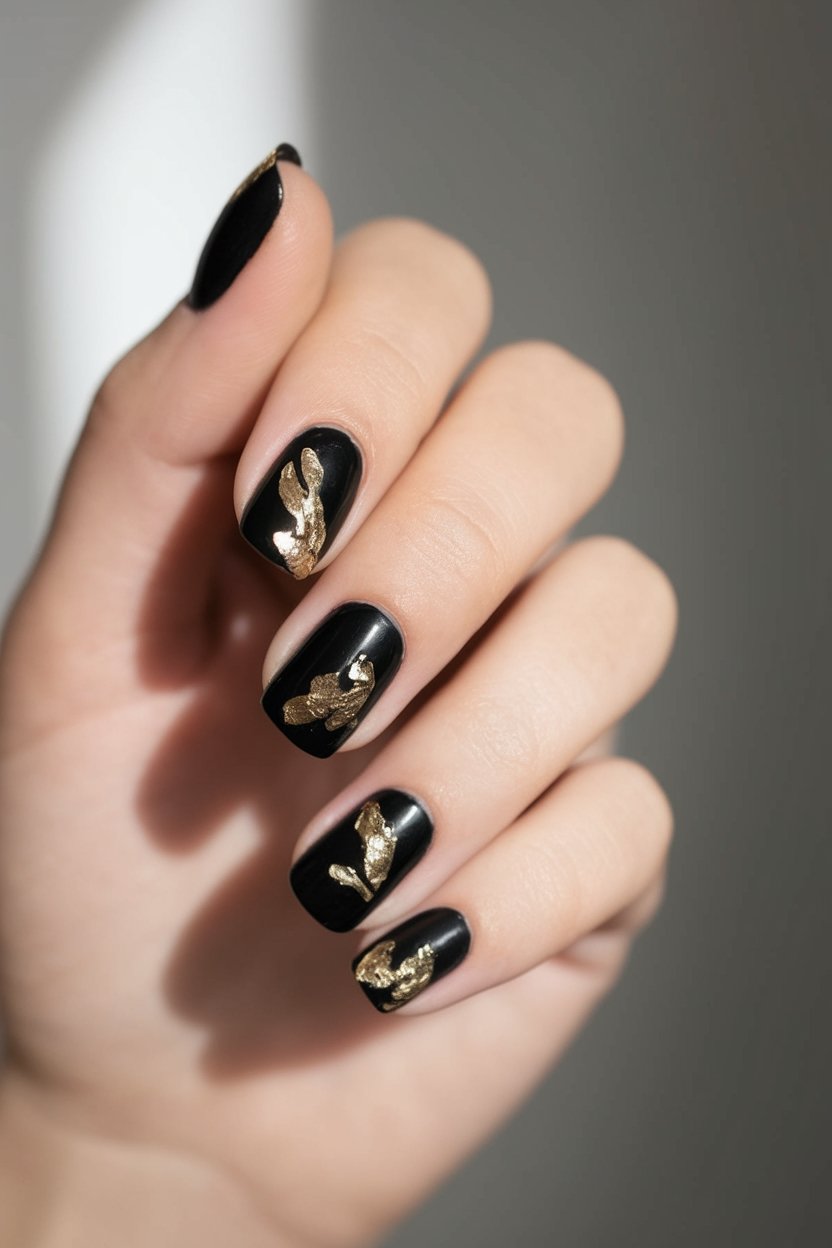
Glossy Black Nail Polish | Gold Foil Nail Art | Clear Top Coat
How to Create This Look:
- Start with clean nails and a base coat
- Apply two coats of glossy black nail polish and let fully dry
- Use tweezers to place pieces of gold foil onto each nail randomly for an abstract, luxe vibe
- Gently press the foil to secure it, then seal everything in with a clear top coat
- Let dry and enjoy your nails looking like a holiday cocktail dress
Glossy black nails with white Nordic sweater patterns
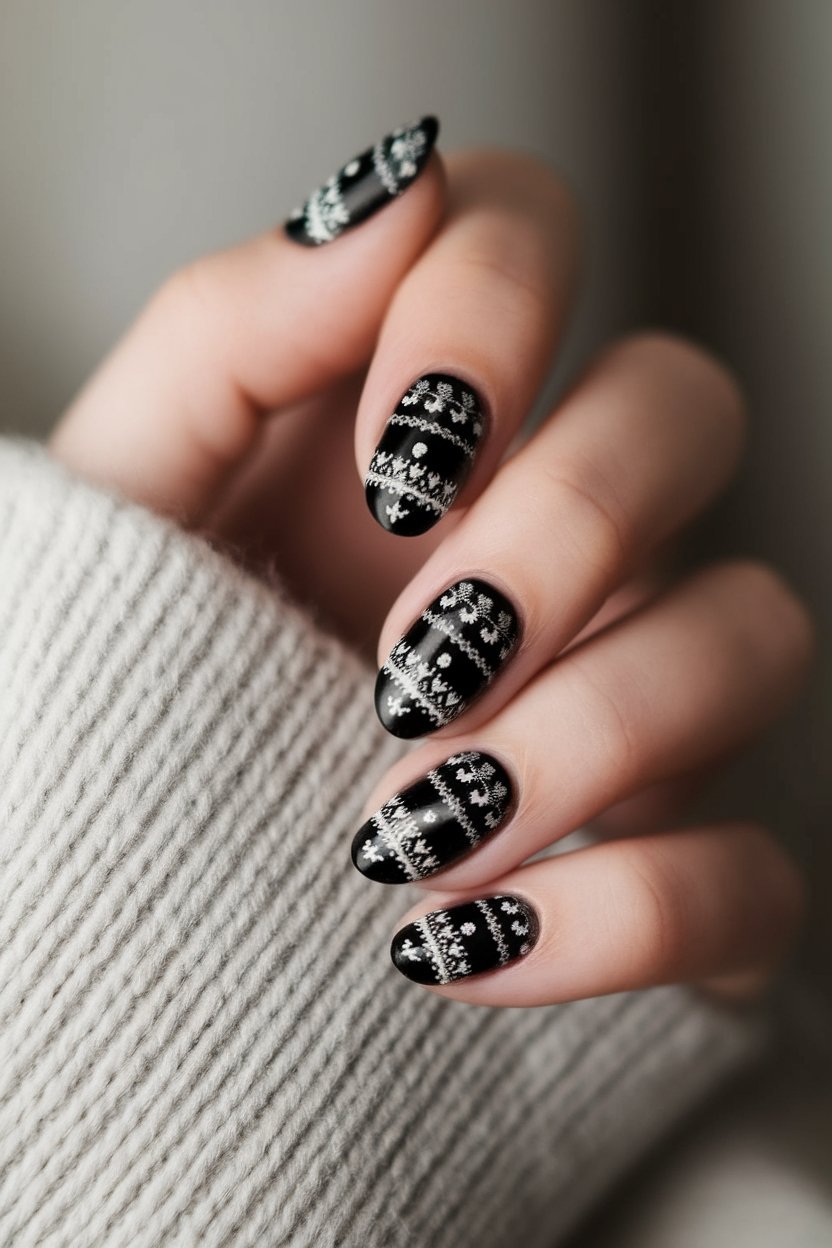
Glossy Black Nail Polish | Sweater Nail Stamp | Clear Top Coat
How to Create This Look:
- Start with a clean nail base and apply a solid layer of base coat
- Paint on two coats of glossy black polish and let it fully dry
- Apply white Nordic-style nail stickers or decals across each nail—line ’em up like your holiday sweaters wish they could
- Seal it with a shiny top coat to keep the pattern crisp and long-lasting
Mini Christmas lights
Black Nail Polish | Dotting Tool Set | Colored Nail Polishes (for bulbs) | Clear Top Coat
How to Create This Look:
- Start with clean, filed nails and apply a base coat
- Paint two layers of glossy black polish and let dry
- Use a striping brush or a thin brush to draw the “wire” lines across the nails
- Dot on little Christmas bulbs using bright colors and a dotting tool
- Finish with a top coat so your lights look freshly plugged in
Frosty edges
Black Nail Polish | White Nail Polish | Sponge Nail Art Tool | Top Coat
How to Create This Look:
- Apply base coat on clean nails and follow with two coats of black polish
- Once dry, use a sponge to dab on a frosty white edge at the tips—go light so it looks airbrushed
- Add a layer of sparkle or shimmer if you want that snow-dusted feel
- Seal with top coat for icy perfection
Silver tinsel details
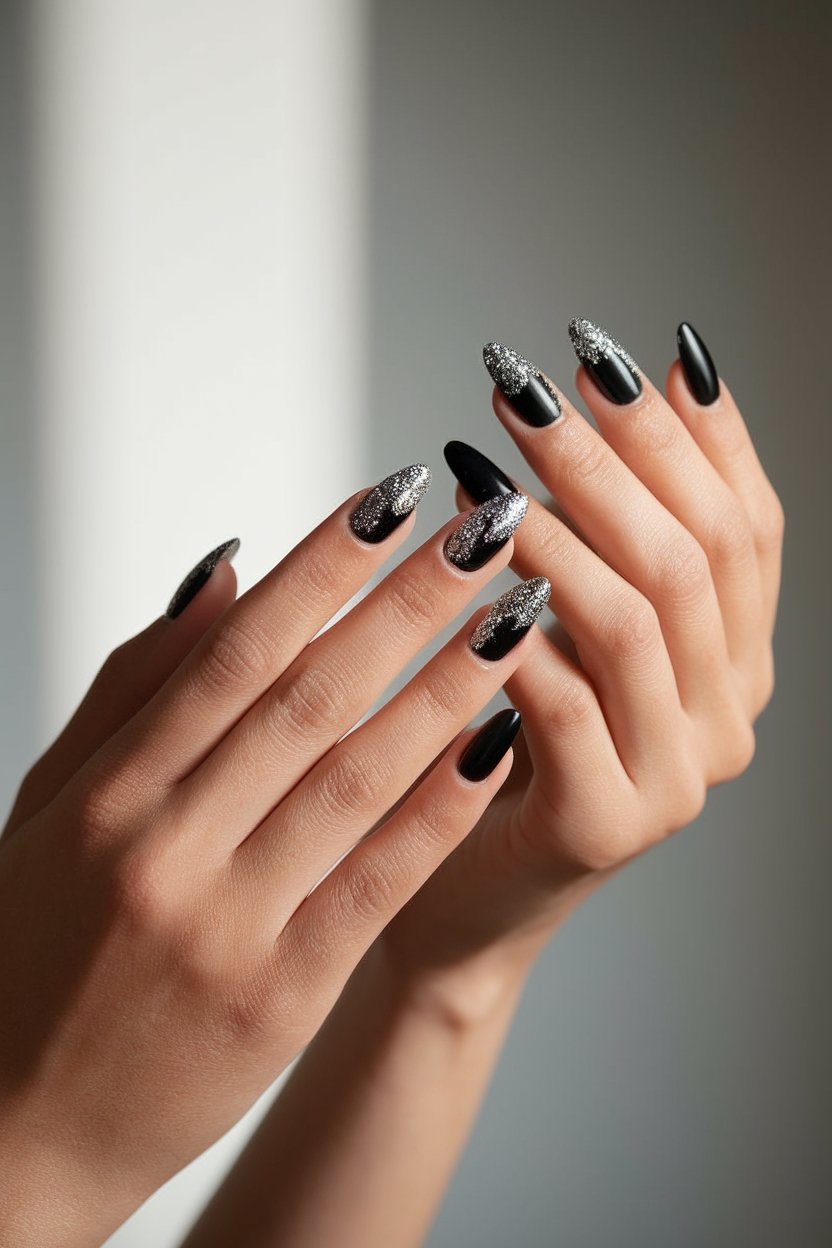
Black Nail Polish | Silver Glitter Nail Polish | Sponge Nail Art Tool | Top Coat
How to Create This Look:
- Start with a base coat and two coats of black polish
- Once dry, sponge silver glitter polish from the tips down about halfway
- Blend the glitter into the black so it fades naturally—like sparkles melting into the night
- Seal it with a glossy top coat and you’re officially NYE-level glam
Minimal black nails with one accent snowflake
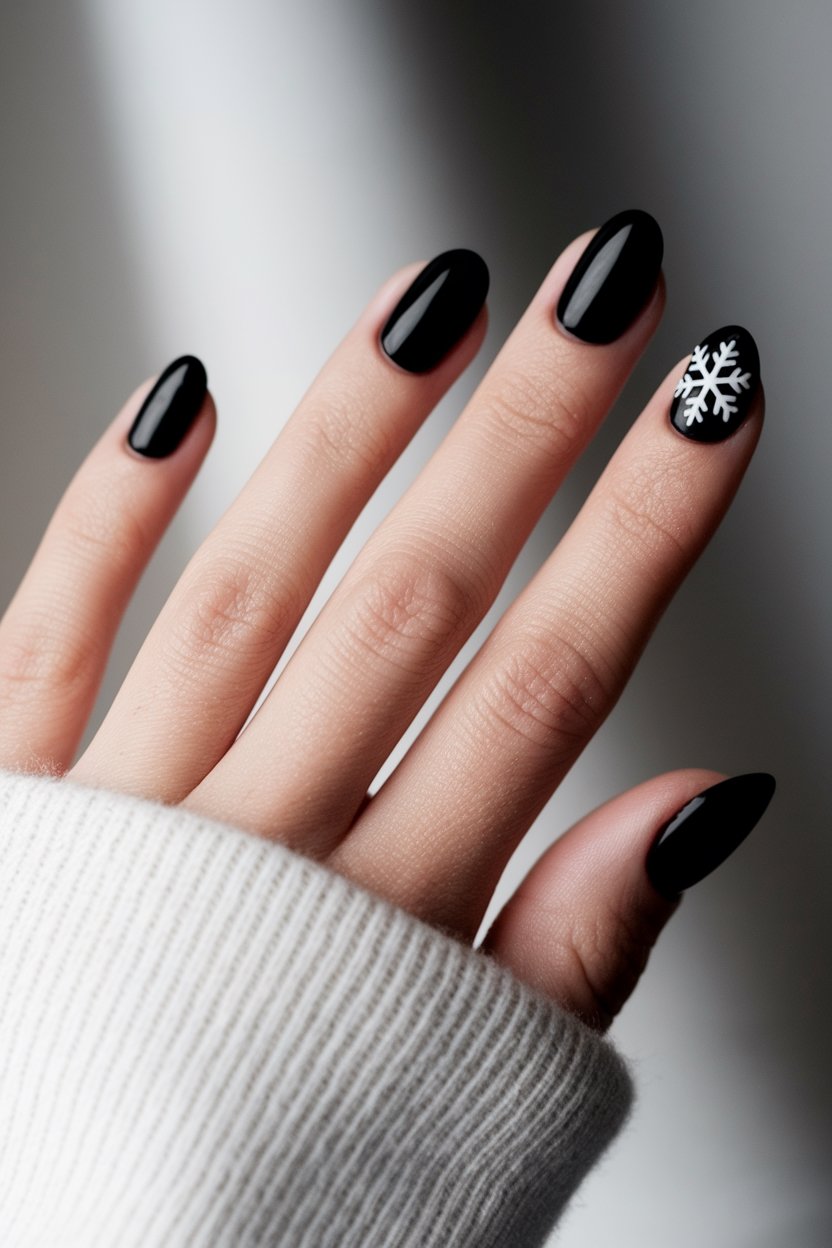
Black Nail Polish | White Snowflake Nail Stickers | Clear Top Coat
How to Create This Look:
- Apply two coats of black polish and let it dry completely
- Pick your accent nail (thumb or ring finger works best)
- Apply one white snowflake sticker—just one, because less is more
- Top it all off with a glossy top coat to lock it in and add shine
Tiny wrapped gift box art
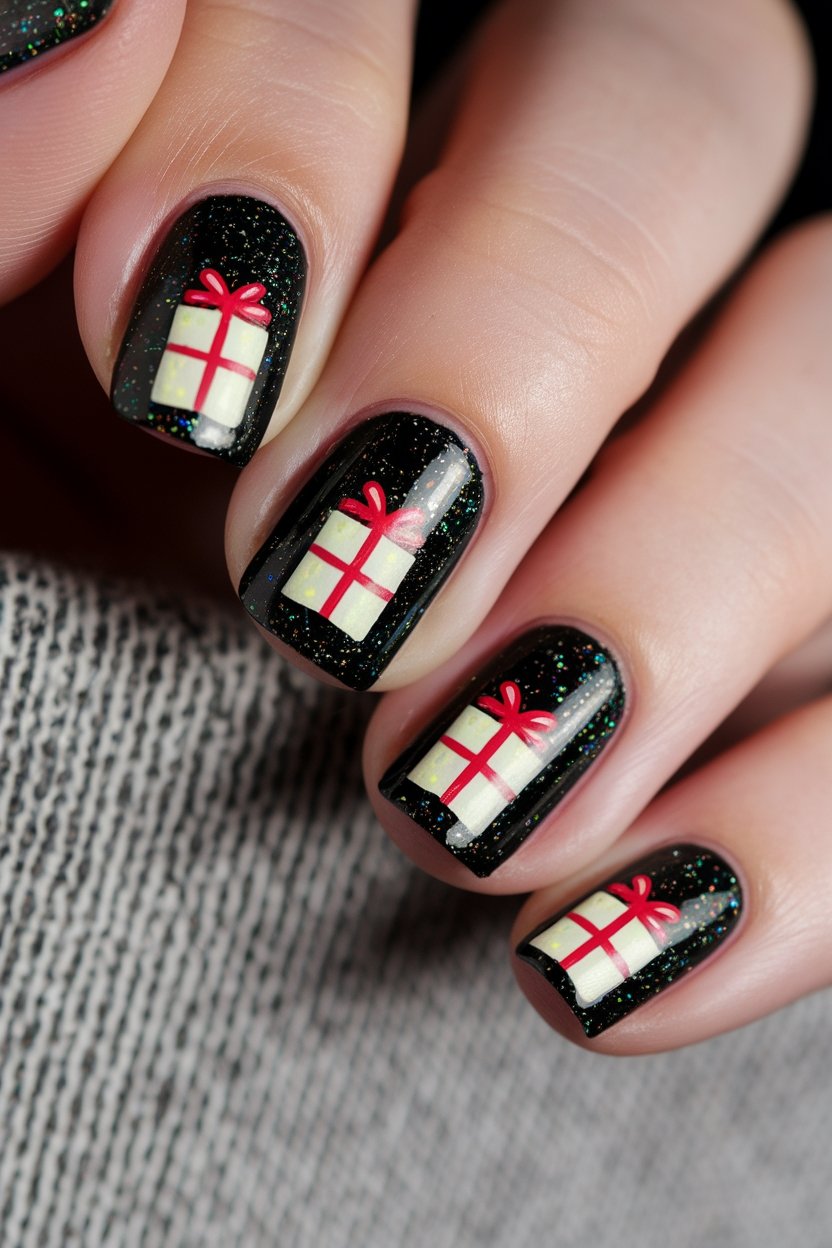
Black Glitter Nail Polish | White Nail Art Polish | Red Nail Art Polish | Top Coat
How to Create This Look:
- Start with clean nails and paint on a black glitter base coat
- Use white polish to create tiny gift box shapes—square and centered
- Add red bows on top using a nail art brush or toothpick
- Let everything dry, then seal with a clear top coat so your presents don’t peel
Matte Black With Gold Snowflakes
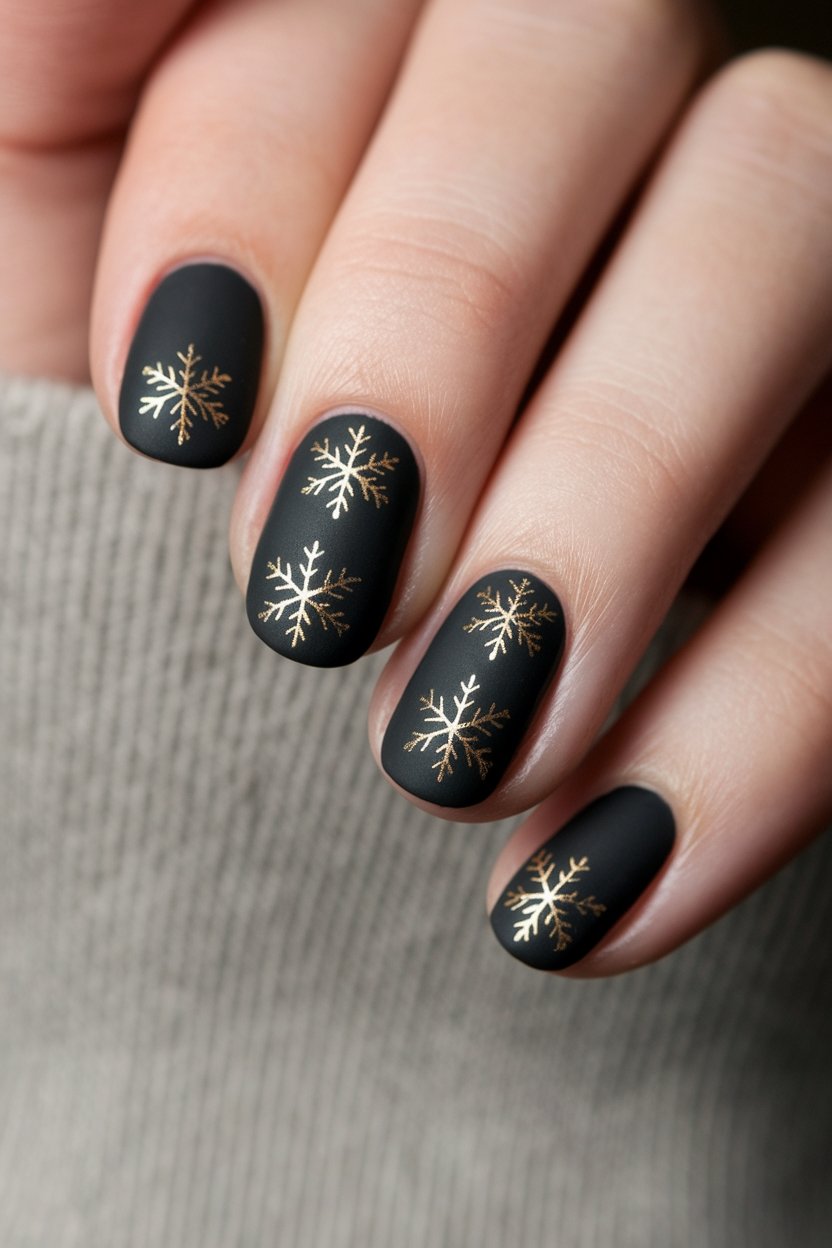
Matte Black Nail Polish | Gold Snowflake Nail Stencil
How to Create This Look:
- Start with clean, shaped nails and apply a base coat to protect your nails.
- Once the base coat is dry, apply two coats of matte black polish and let them dry completely.
- Using a gold snowflake stencil or nail art brush, carefully apply gold polish to create snowflake designs on each nail.
- Allow the gold snowflakes to dry, then finish with a clear top coat to seal in your design and add shine.
- Enjoy your festive nails, perfect for any holiday celebration!
Reindeer silhouettes
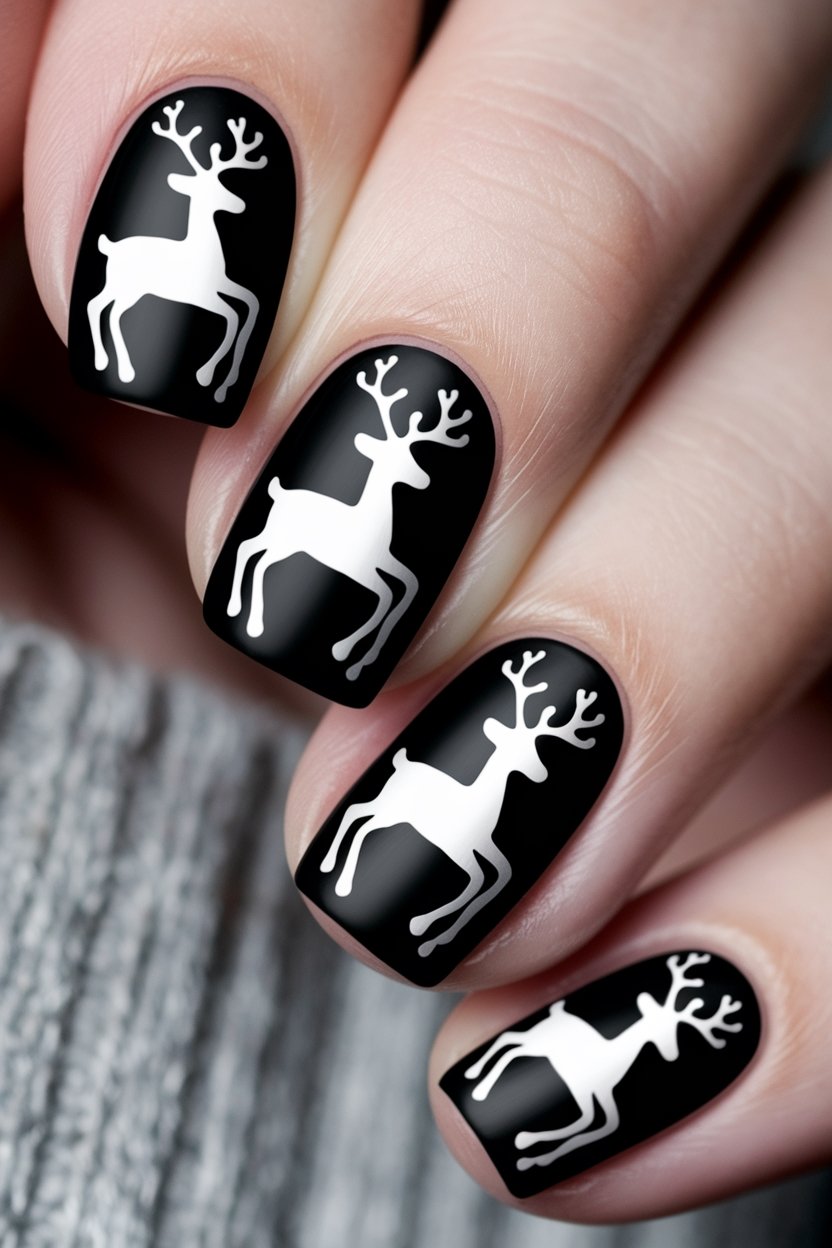
Matte Black Nail Polish | White Reindeer Nail Stickers | Matte Top Coat
How to Create This Look:
- Start with clean, dry nails and apply a base coat
- Paint on two coats of matte black polish and let it dry
- Apply white reindeer stickers front and center—don’t stress about perfect placement
- Lock it in with a matte top coat to keep the whole vibe chill and frosty
Ombré nails
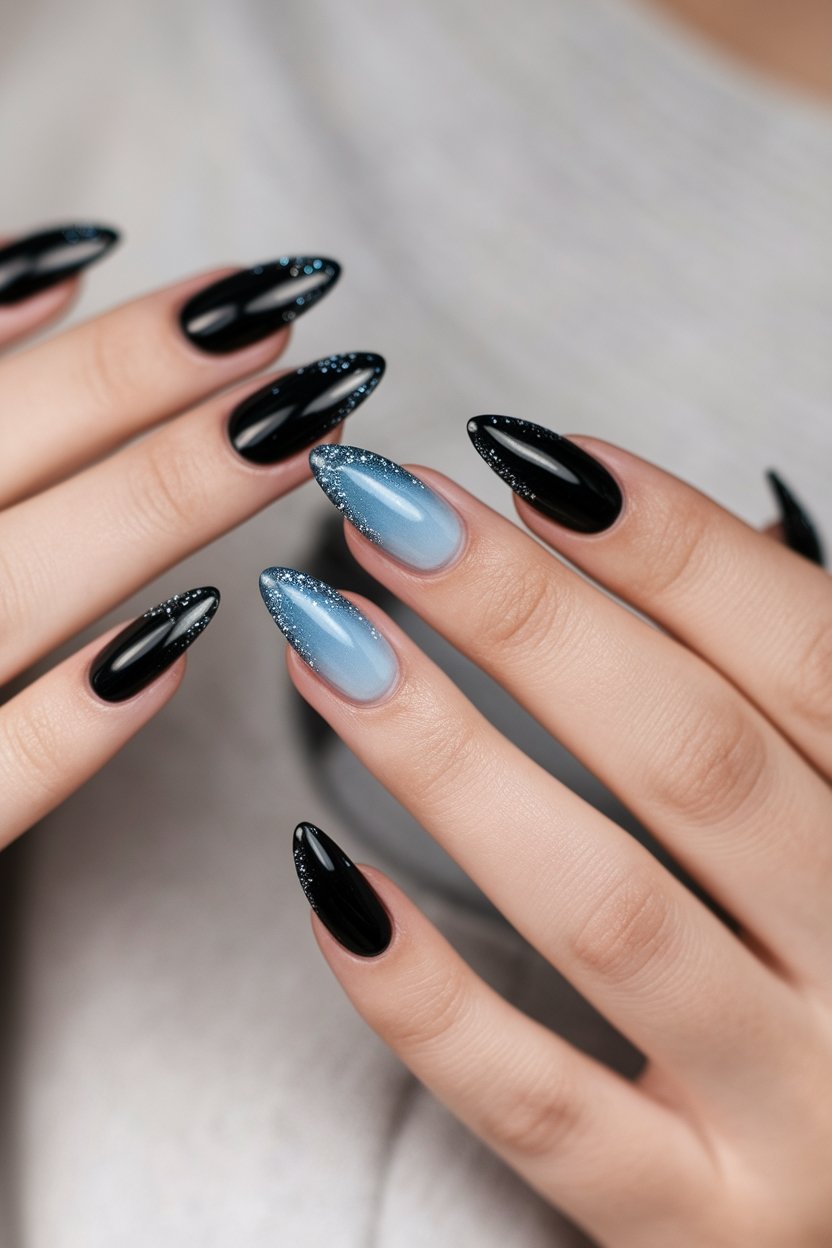
Black Nail Polish | Icy Blue Nail Polish | Silver Glitter Polish | Sponge Nail Art Tool
How to Create This Look:
- Start with a base coat, then paint alternating nails black and icy blue
- Use a sponge to lightly blend the blue into black for a soft ombré effect on feature nails
- Add silver glitter polish on the tips or cuticle line for a little frozen sparkle
- Finish with a top coat so everything melts together just right
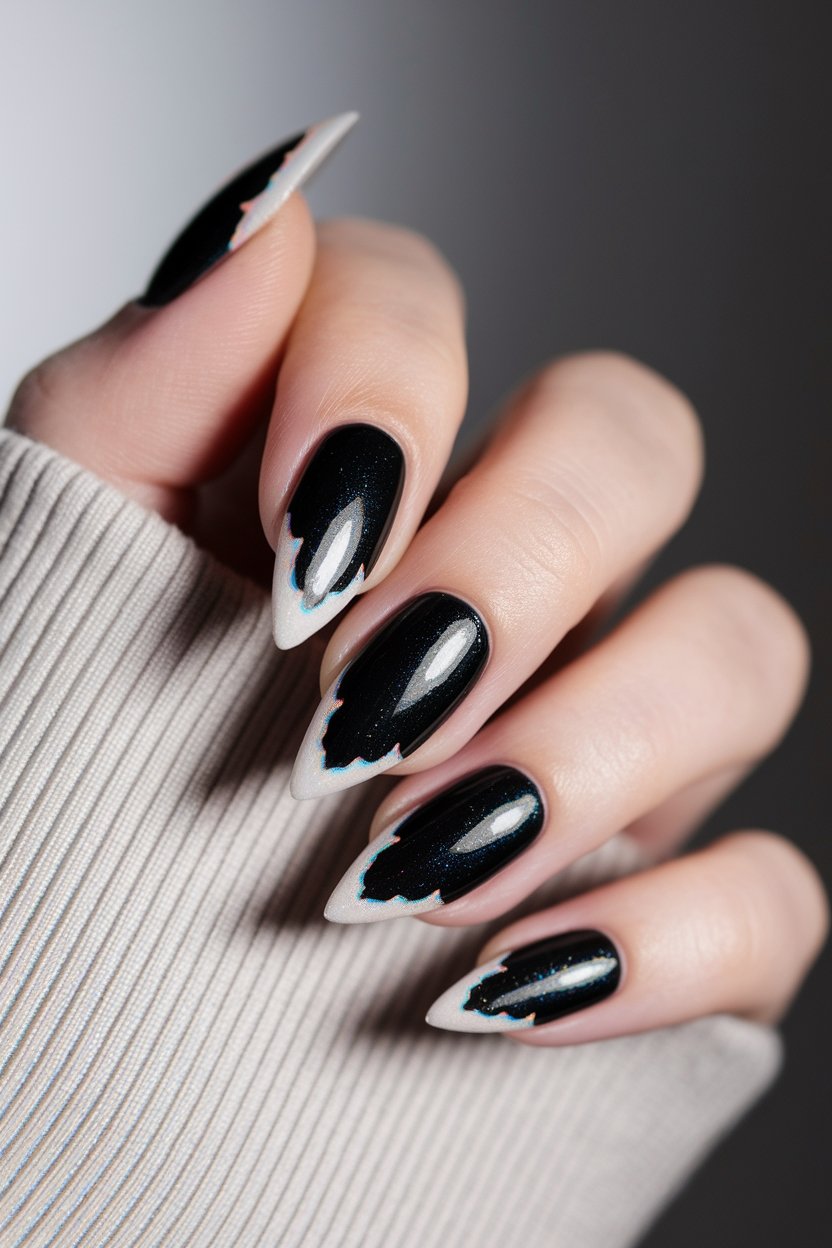
Ombre and white nails with glitter gradients

Nude Nail Polish | Black Nail Polish | Silver Glitter Polish
How to Create This Look:
- Apply a nude polish base and let it dry completely
- Use a sponge to apply the French Black tips
- While the black is still tacky, dab silver glitter at the border for that snow-dusted gradient
- Top coat it to make the sparkle pop and last through party season
Black glitter French tips on a nude base
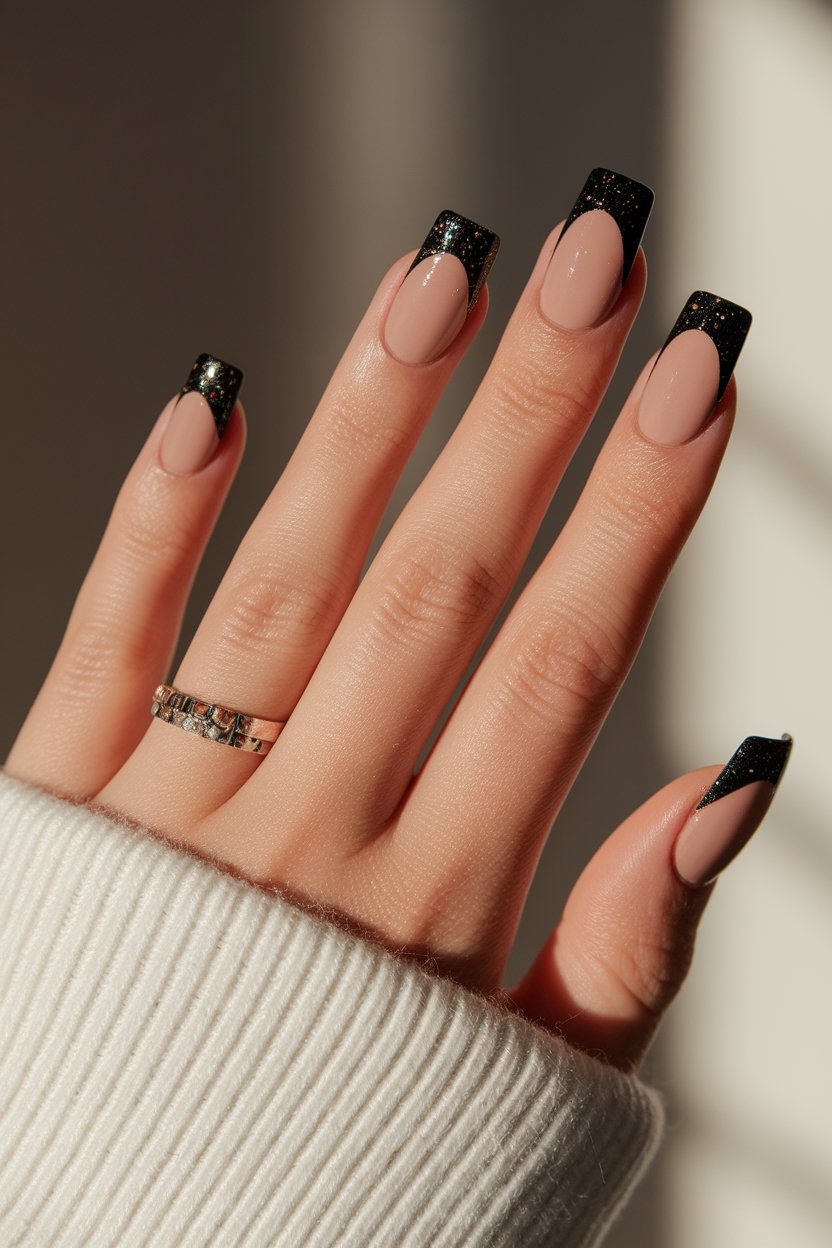
Nude Nail Polish | Black Glitter Nail Polish | French Tip Guides | Top Coat
How to Create This Look:
- Apply a base coat, then two coats of nude polish
- Once dry, use French tip guides to shape out the tips
- Fill in the tips with black glitter polish—clean edges make it look pro
- Finish with a glossy top coat and voilà, elevated minimalism
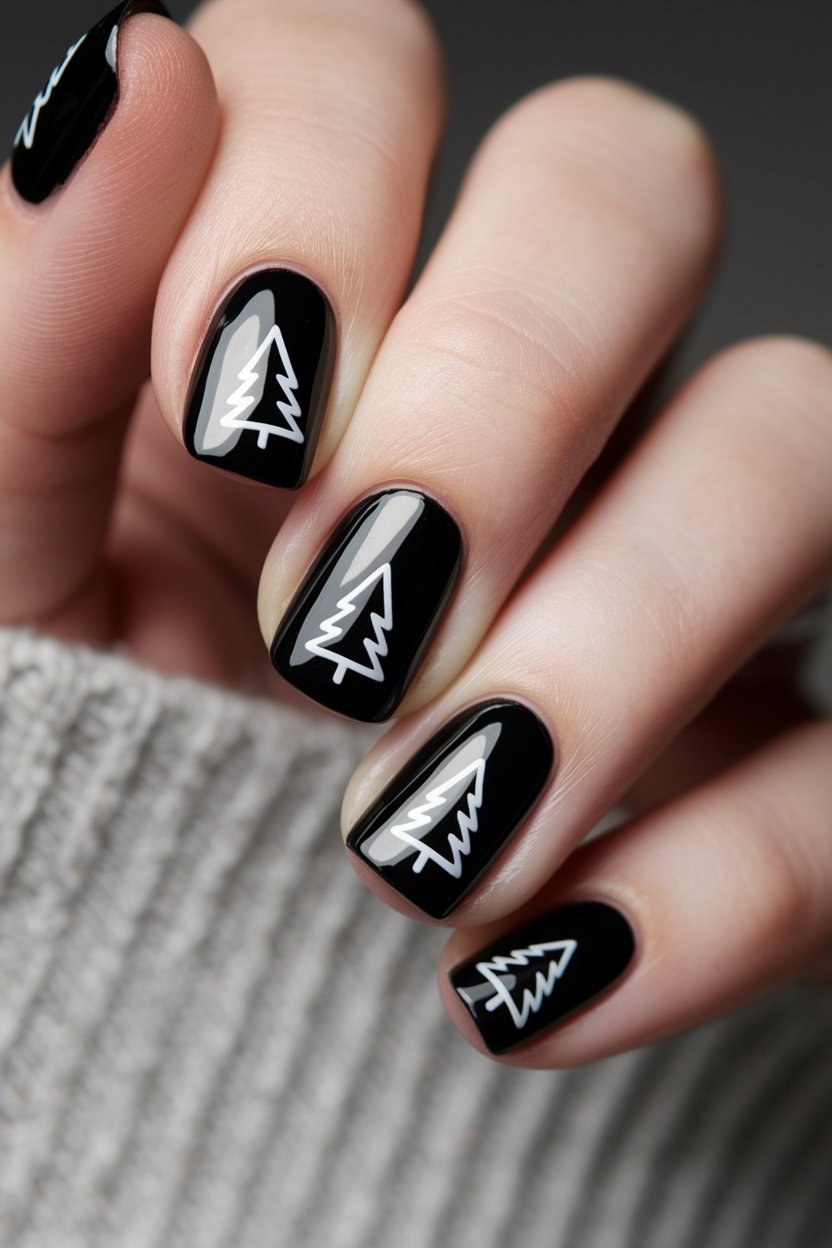
Metallic black nails adorned with white simple Christmas tree designs
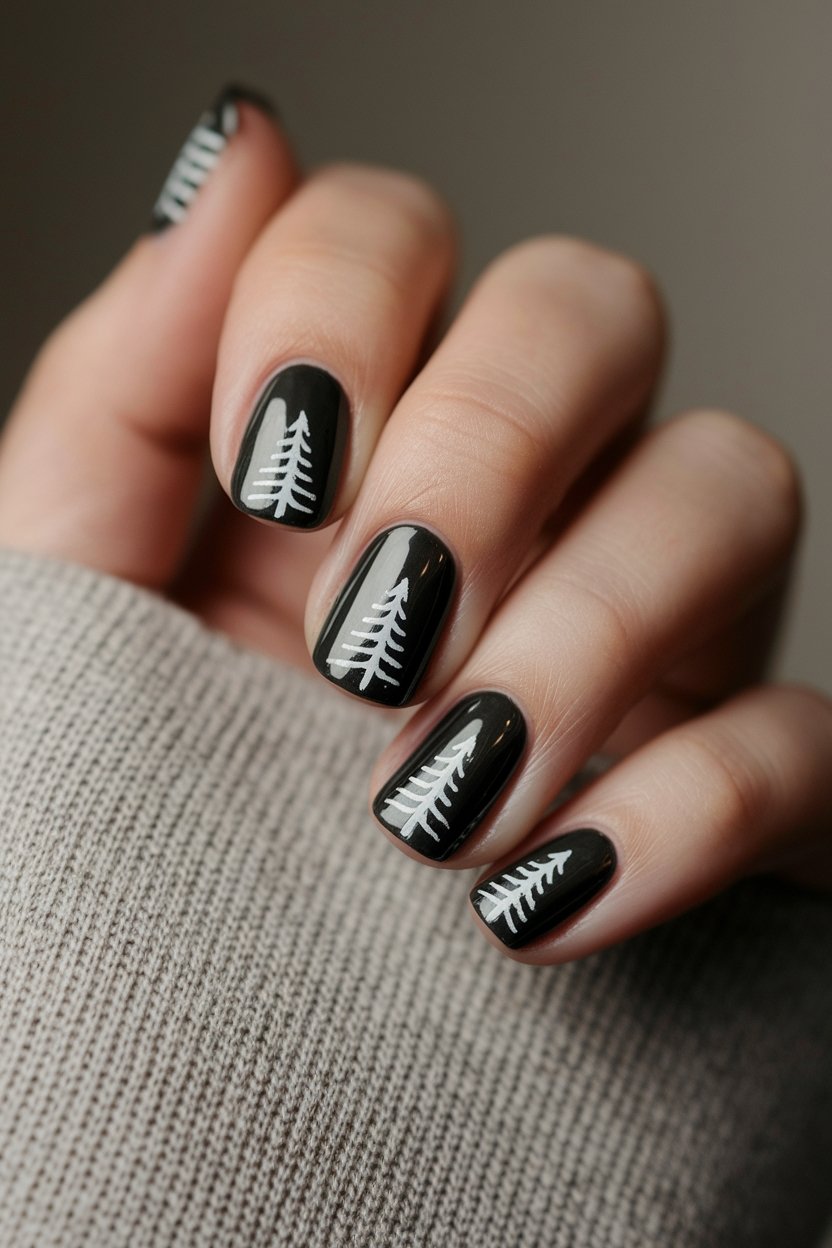
Black Nail Polish | White Nail Art Polish | Nail Art Brush Set | Top Coat
How to Create This Look:
- Paint two coats of black polish and let it dry fully
- Use a thin brush and white polish to paint minimalist trees—just a few lines, don’t overthink it
- Add a dot on top if you’re feeling fancy (hello, star)
- Seal with a top coat to make it shine like a Christmas card
Shimmering black gel nails

Black Glitter Gel Polish | Gel Top Coat | UV Nail Lamp
How to Create This Look:
- Start with clean nails and apply your base coat
- Brush on two coats of black glitter gel polish and cure each under a UV lamp
- Finish with a gel top coat and cure again for long-lasting sparkle
- These are low-effort, high-impact… basically the dream
Black nails with ornament accents on one finger
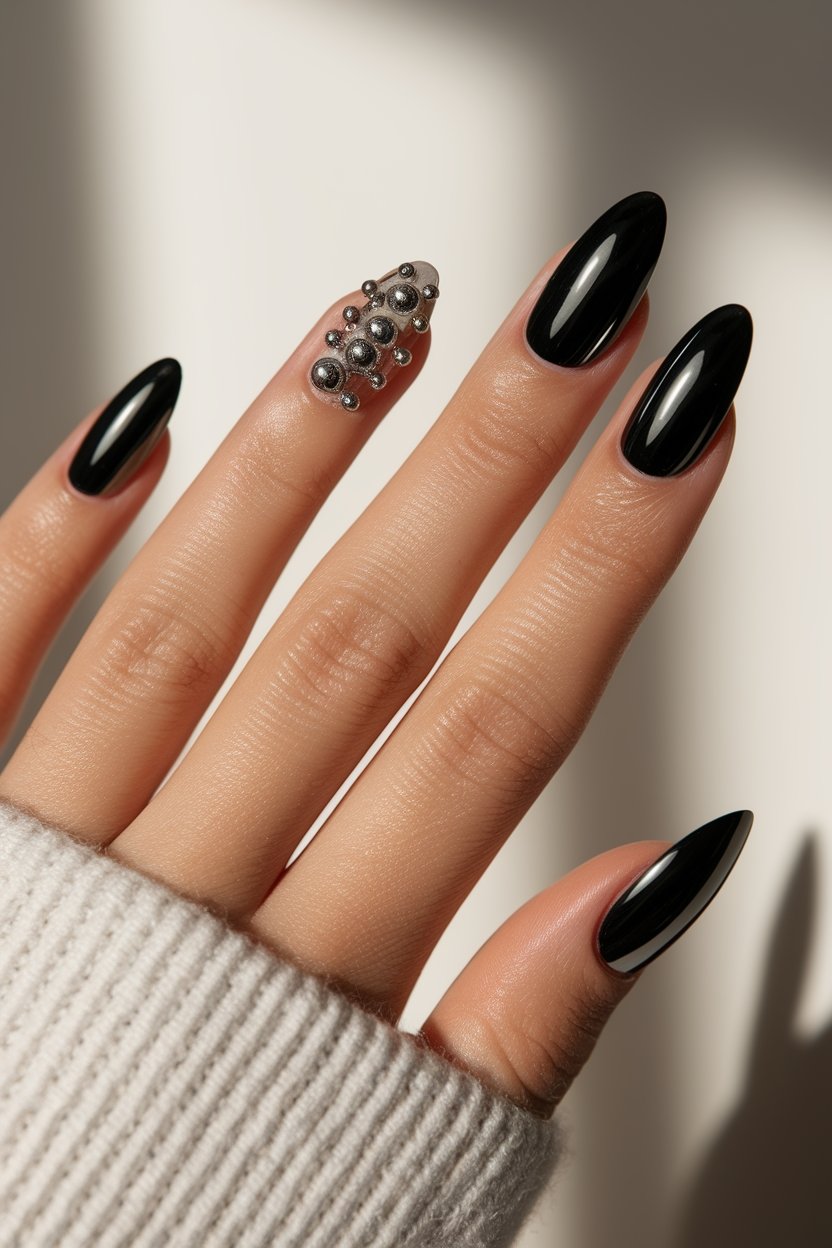
Black Nail Polish | Silver Nail Charms | Rhinestone Nail Glue | Top Coat
How to Create This Look:
- Start with a base coat, then apply two coats of glossy black polish
- Choose one accent nail and place silver bead or gem charms using rhinestone glue
- Let it set completely before sealing with top coat (around the gems, not over)
- Simple everywhere else so that accent nail hits like jewelry
Sparkly black nails featuring ornament-inspired designs
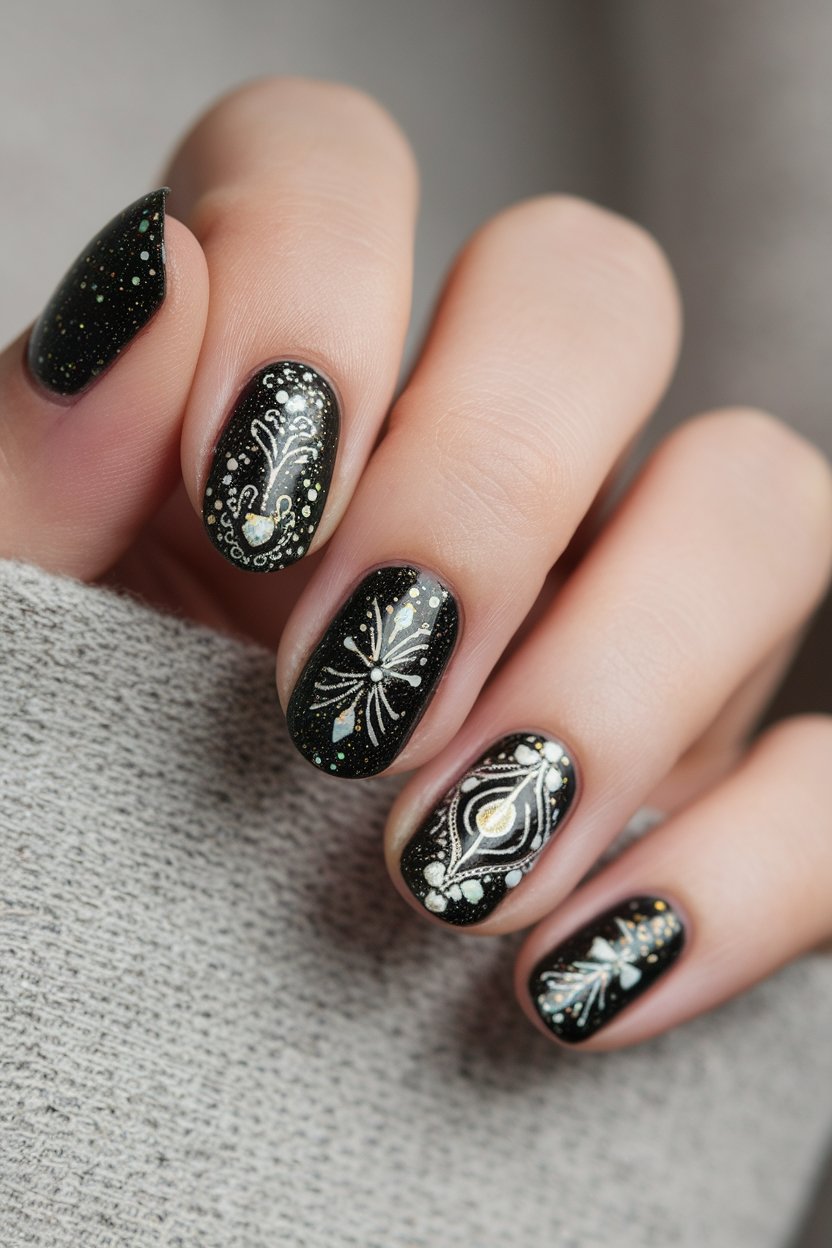
Black Glitter Nail Polish | White Nail Art Pen or Brush | Top Coat
How to Create This Look:
- Apply a glittery black base and let dry
- Use a white detail brush to draw little hanging ornament patterns—think loops, sparkles, curves
- Add tiny rhinestones for dimension and shine
- Finish with top coat to make it party-ready
Chrome black nails with minimalist Christmas tree line art
Black Nail Polish | White Nail Art Stickers – Christmas Trees | Top Coat
How to Create This Look:
- Paint nails with two coats of black polish and let fully dry
- Apply minimalist Christmas tree stickers—keep ’em clean and centered
- Seal with a glossy top coat so it catches the light without overpowering the design
- Subtle but still says “I showed up festive”
Black glitter accent nails paired with matte grey finishes
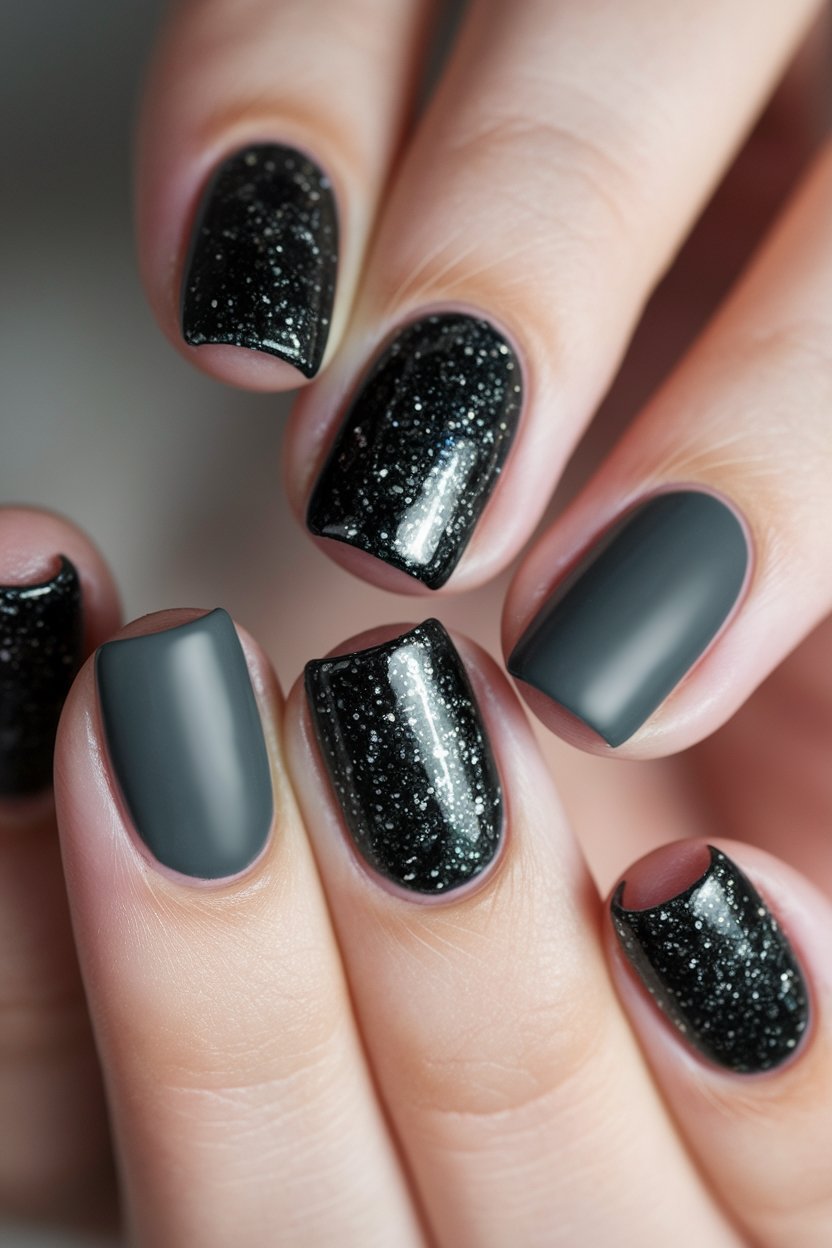
Black Glitter Nail Polish | Matte Grey Nail Polish | Top Coat
How to Create This Look:
- Alternate nails with black glitter polish and matte grey polish
- Keep the glitter coats thin so it doesn’t bulk up
- Leave the matte nails bare or top them with a matte finish for contrast
- Finish only the glitter nails with top coat to keep that dimension pop
Matte Black With Silver Trees

Matte Black Nail Polish | Nail Art Brush or Pen | Top Coat (Matte Finish)
How to Create This Look:
- Start with clean, filed nails for the perfect canvas.
- Apply a base coat to protect your nails and help the polish adhere.
- Paint two coats of matte black polish, allowing each coat to dry completely.
- Using a thin nail art brush or a nail stamping plate, carefully create silver tree designs on each nail.
- Finish with a top coat to seal your design and add shine (if desired), or leave it matte for a chic look.
- Allow your nails to dry completely before flaunting your festive style!
Matte Black With White Reindeer
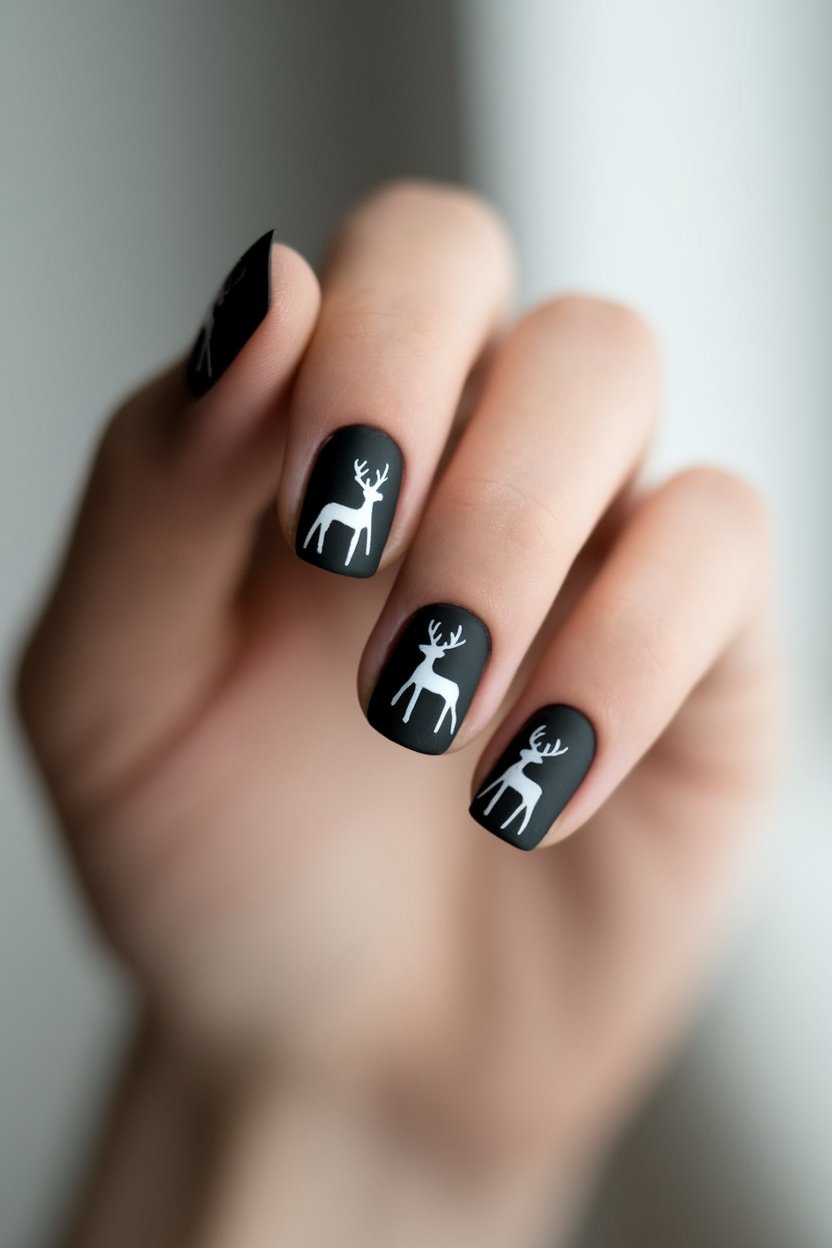
How to Create This Look:
- Start by applying a base coat to protect your nails and ensure a smooth application.
- Once the base coat is dry, paint your nails with matte black polish. Apply 2 coats for an even finish.
- Using a dotting tool or a thin brush, create the outline of reindeer heads on your nails with white polish.
- Add details like antlers and eyes to the reindeer using the same white polish.
- Finish with a top coat to seal your design and enhance durability (optional for a true matte finish).
- Let your nails dry completely, and you’re ready to flaunt your festive manicure!
Black Christmas Nails
So, there you have it! Black Christmas nails are not just a trend, they’re a total vibe! Did you know that over 65% of people say they feel more confident with fun nail art? Imagine rocking those matte black nails with glitzy accents at your holiday party, turning heads left and right. It’s like having a mini celebration on your fingertips! So grab your polish and get creative, because a little festive flair can go a long way!