Have you ever thought about rocking some blue Christmas nails this season?
I mean, frosted blue ombre tips and glittery snowflakes sound like a festive dream, right? It’s like having a mini winter wonderland on your fingertips!
Plus, who doesn’t love a little sparkle? I can’t wait to share some amazing ideas with you that’ll make your nails the star of the holiday party… stay tuned for some fun tips that’ll take your nail game to the next level!
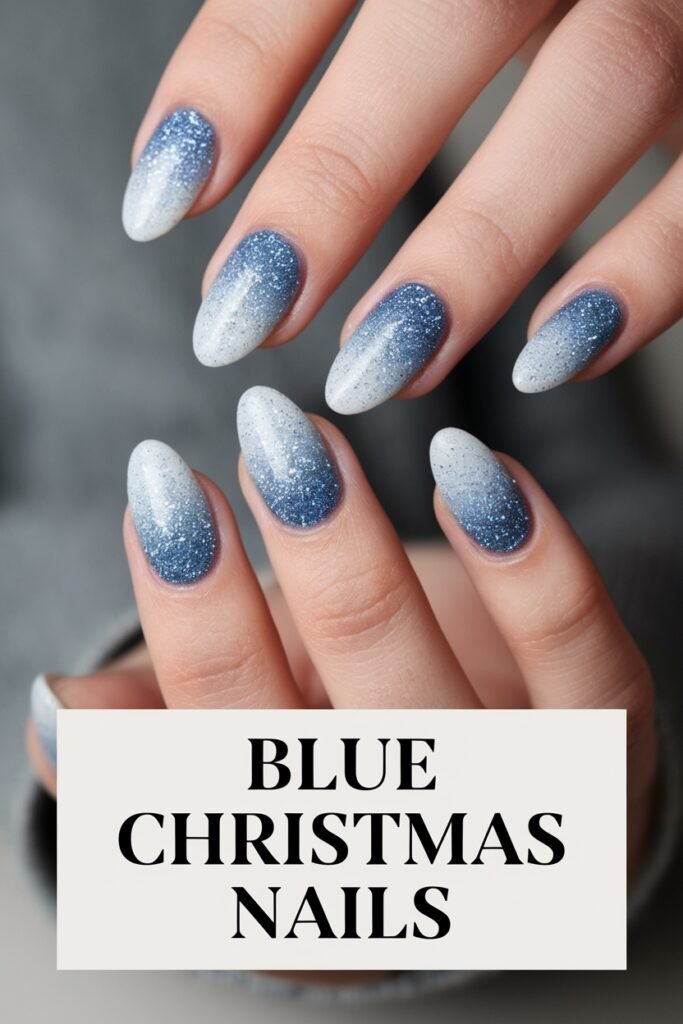
- Frosted Blue Ombre Tips: Create a chic look by blending frosted blue with icy white tips for an elegant ombre effect.
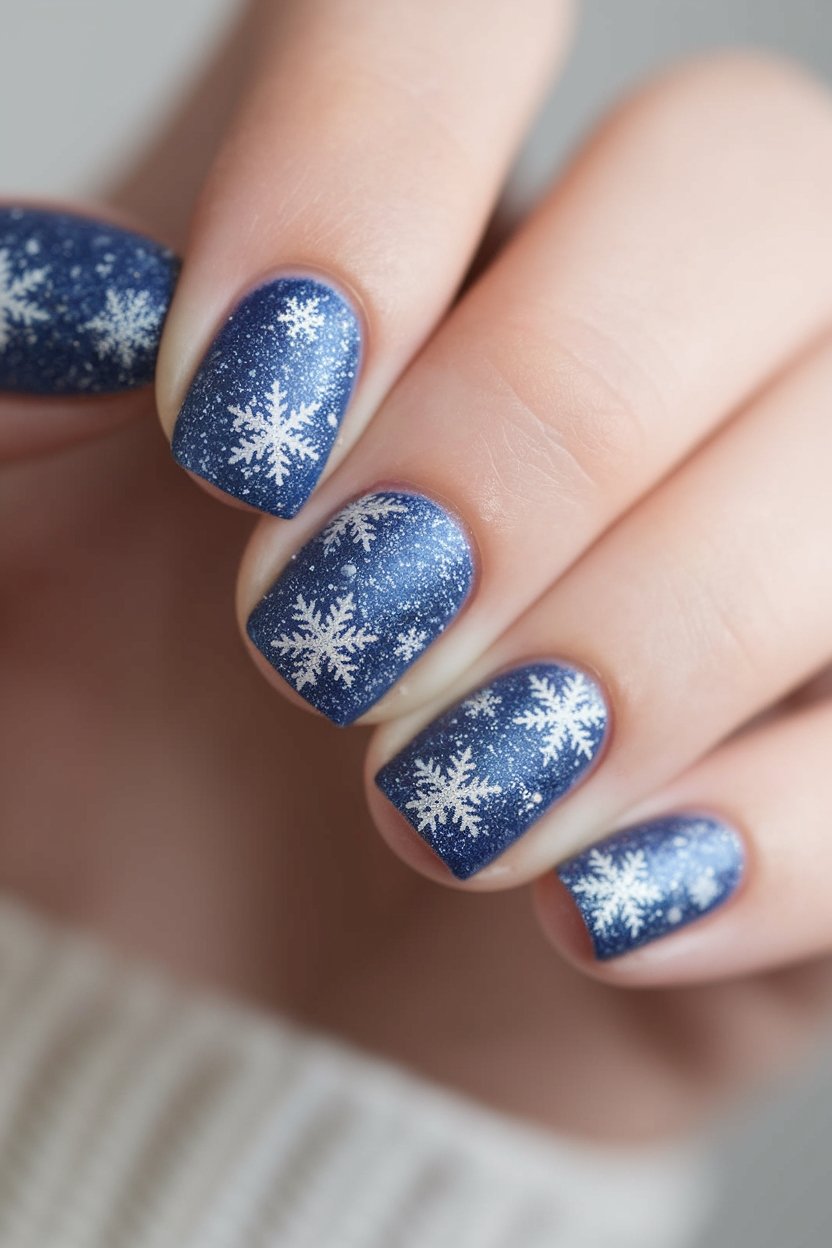
- Glittery Snowflake Accents: Enhance your nails with snowflake designs using white polish and silver glitter for a festive touch.
- Icy Blue Glitter Fade: Apply a light icy blue base and blend silver glitter at the tips for a stunning gradient effect.
- Seasonal Color Trends: Utilize frosted blue and icy white shades, which are popular choices for winter-themed nail designs.
- Nail Care Essentials: Always start with a base coat, allow layers to dry, and finish with a top coat for durability and shine.
My Fave Blue Christmas Nails
I’ve been totally obsessed with Blue Christmas nails lately, and I can’t help but share my excitement. It’s like wearing a little piece of Christmas magic.
And creating these stunning blue Christmas nails is as easy as pie… or should I say, as easy as decorating a tree!
If you’re curious about how to create these festive designs yourself, you’ll definitely want to stick around for some fun ideas!
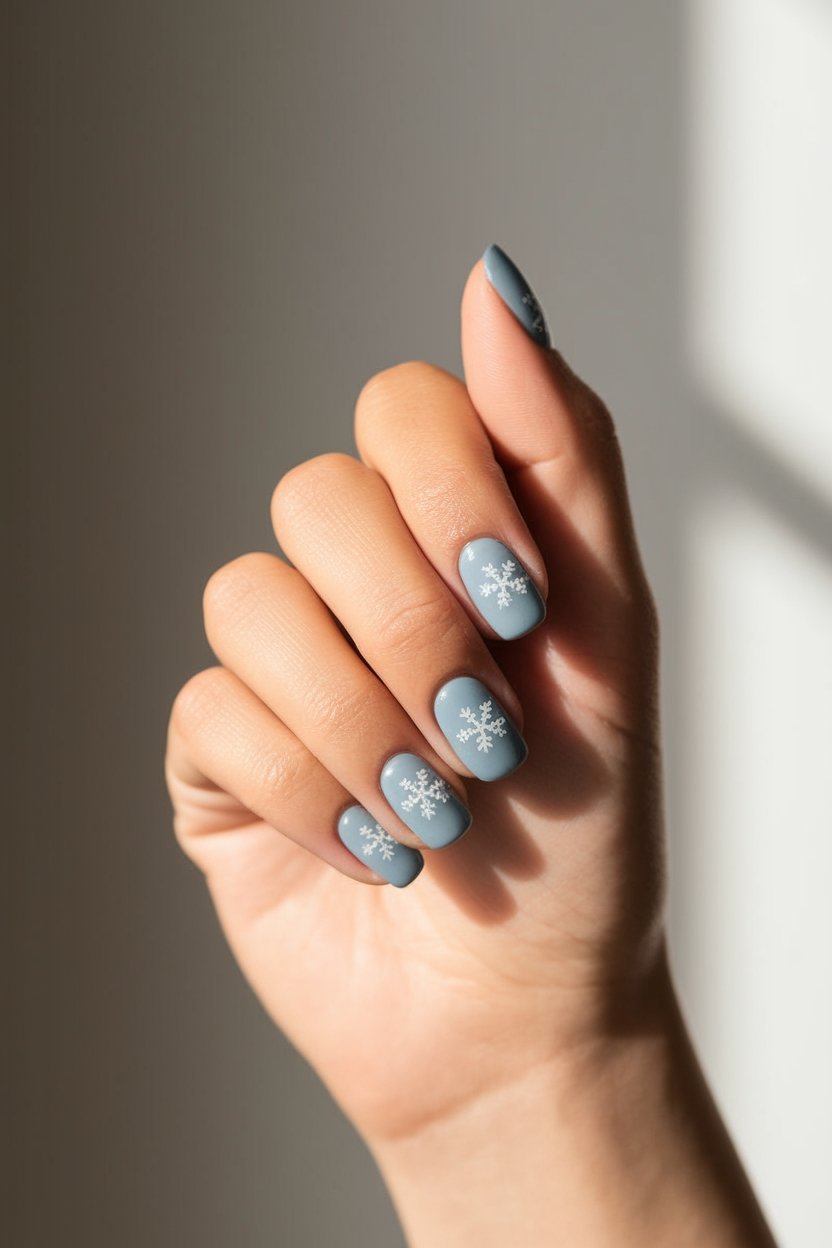
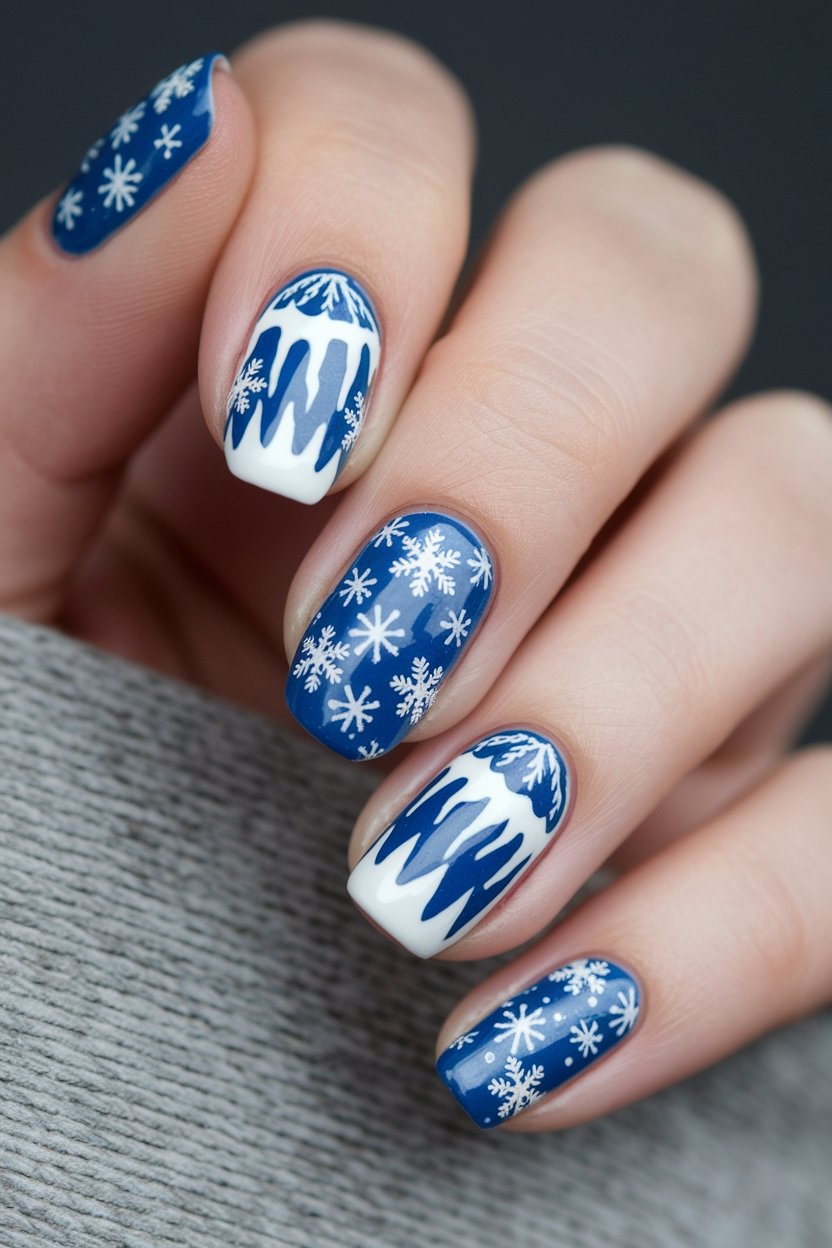
Glittery Snowflake Accents
Glittery Snowflake Accents | Icy Blue Polish | White Polish | Silver Glitter Polish
How to Create This Look:
- Start with a base coat to protect your nails and ensure a smooth application.
- Apply two coats of icy blue polish for a frosty base.
- Once dry, use a thin nail art brush or a dotting tool to create small snowflake designs with white polish on random nails.
- Add a touch of silver glitter polish in the center of each snowflake for some sparkle.
- Finish with a top coat to seal in your design and add shine.
- Allow to dry completely and get ready to show off your festive nails!
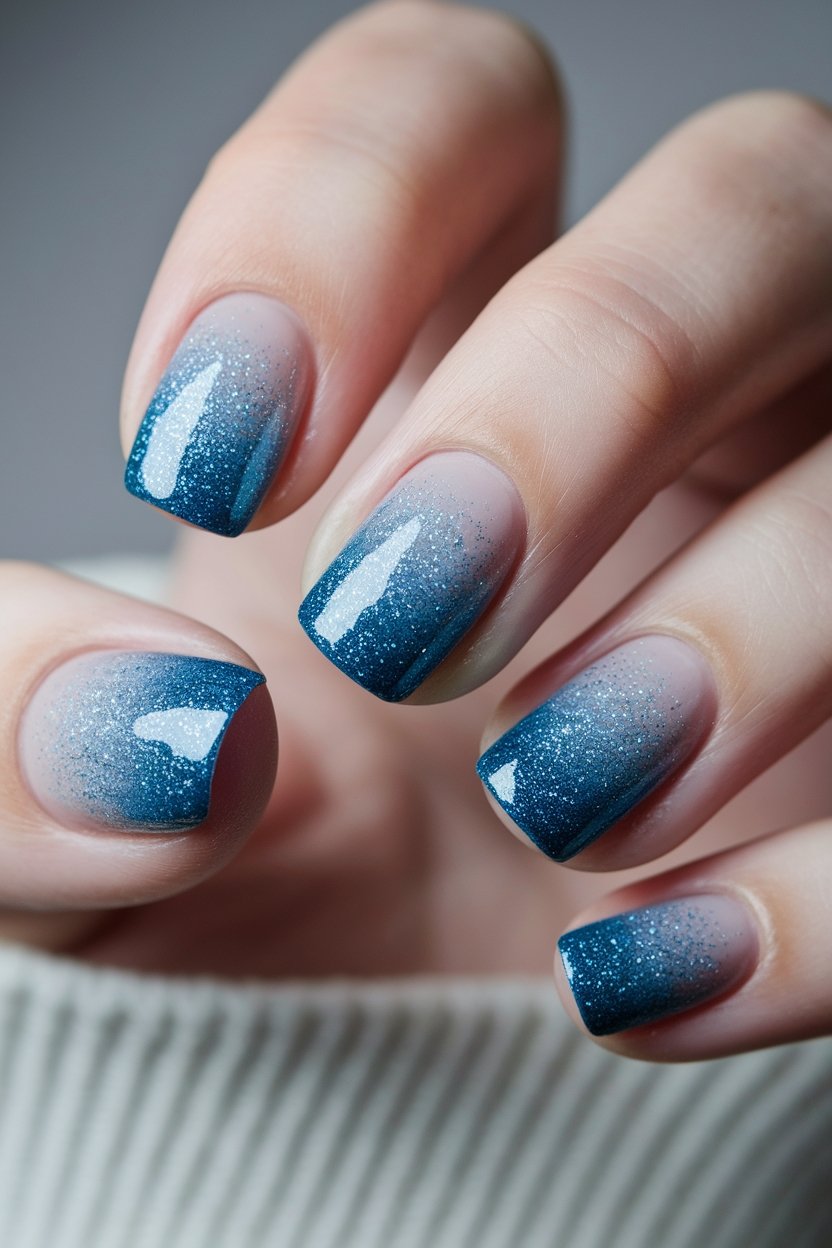
Icy Blue Glitter Fade
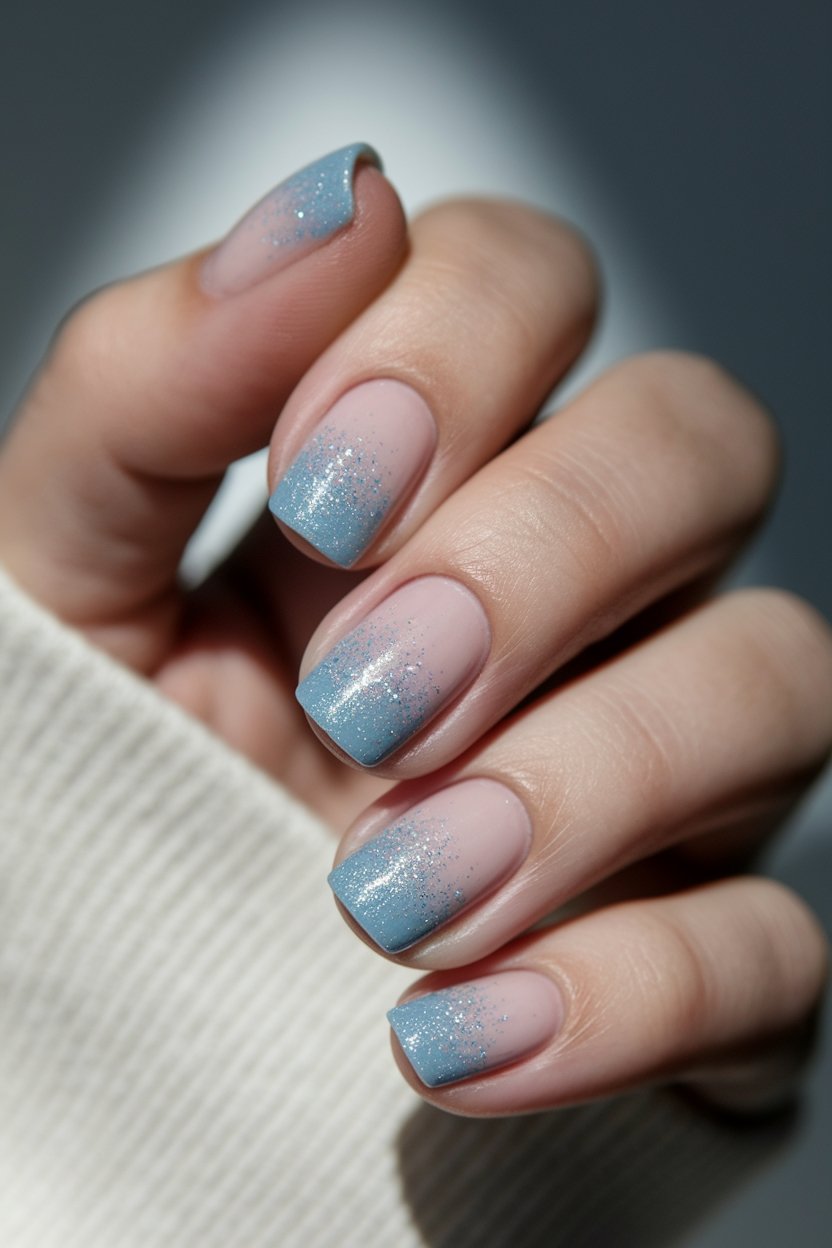
Icy Blue Polish | Silver Glitter Polish
How to Create This Look:
- Start with clean, filed nails and apply a base coat to protect them.
- Choose a light icy blue polish and apply one to two coats, letting each coat dry thoroughly.
- Once the blue polish is dry, take a silver glitter polish and gently dab it on the tips of your nails, blending it downwards for a gradient effect.
- For an extra touch, apply a thin layer of top coat to seal in the glitter and add shine.
- Allow everything to dry completely, and admire your dazzling winter wonderland nails!
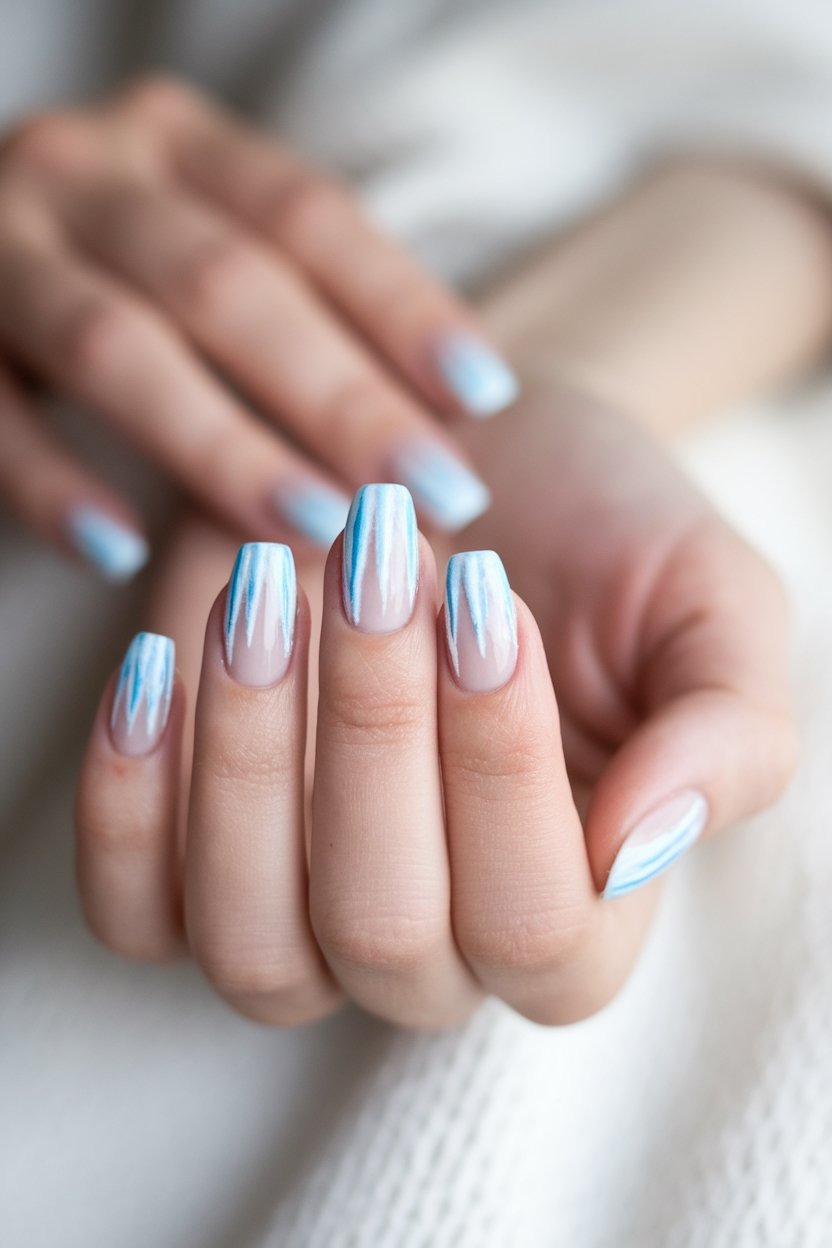
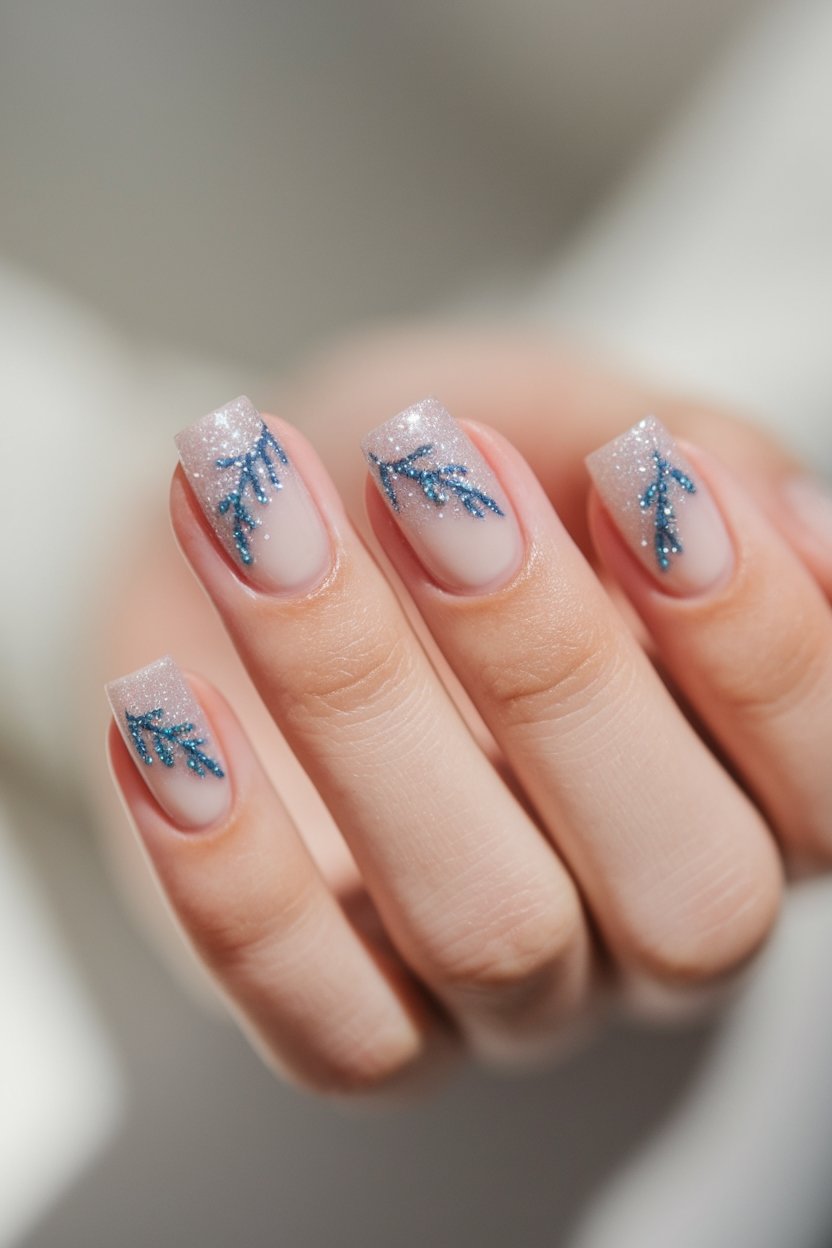
Frosted Blue Ombre Tips
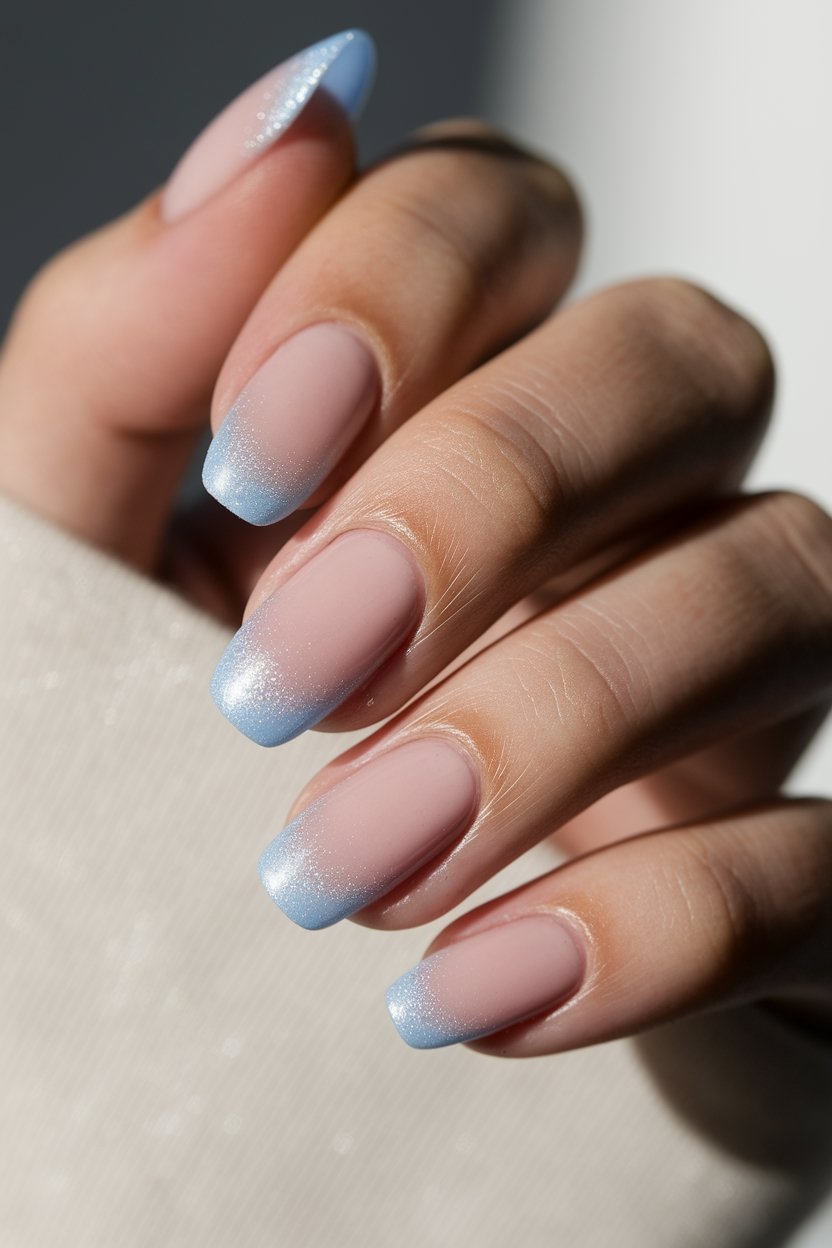
Frosted Blue Polish | Icy White Polish | Glitter Top Coat
How to Create This Look:
- Start with clean, trimmed nails and apply a base coat to protect your nails.
- Paint your nails with the frosted blue polish as the base color and let it dry completely.
- Using a makeup sponge, dab the icy white polish on the tips of your nails, blending it down toward the blue for an ombre effect.
- Once the ombre effect is achieved, apply a glitter top coat for a festive sparkle.
- Finish with a quick-dry top coat to seal in your design and enhance shine. Enjoy your winter wonderland nails!
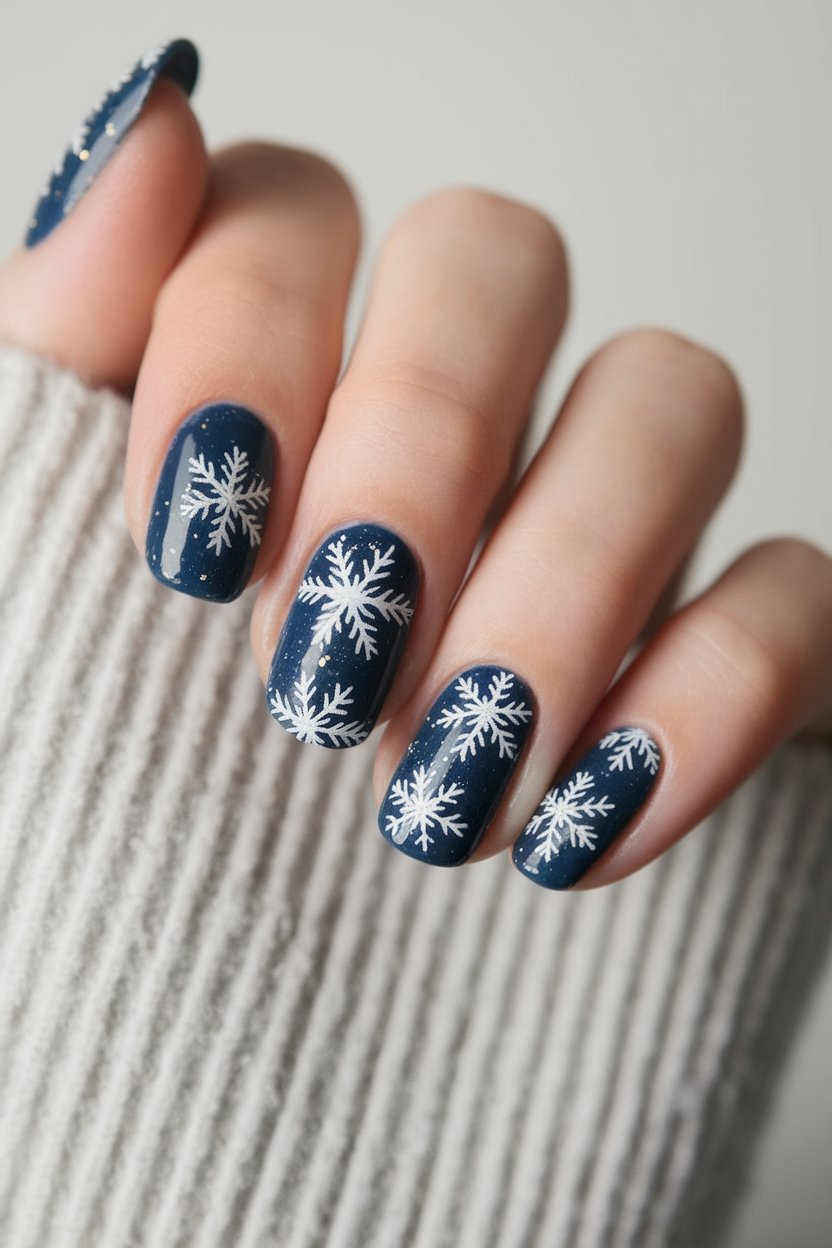
Glittery Blue Starry Night
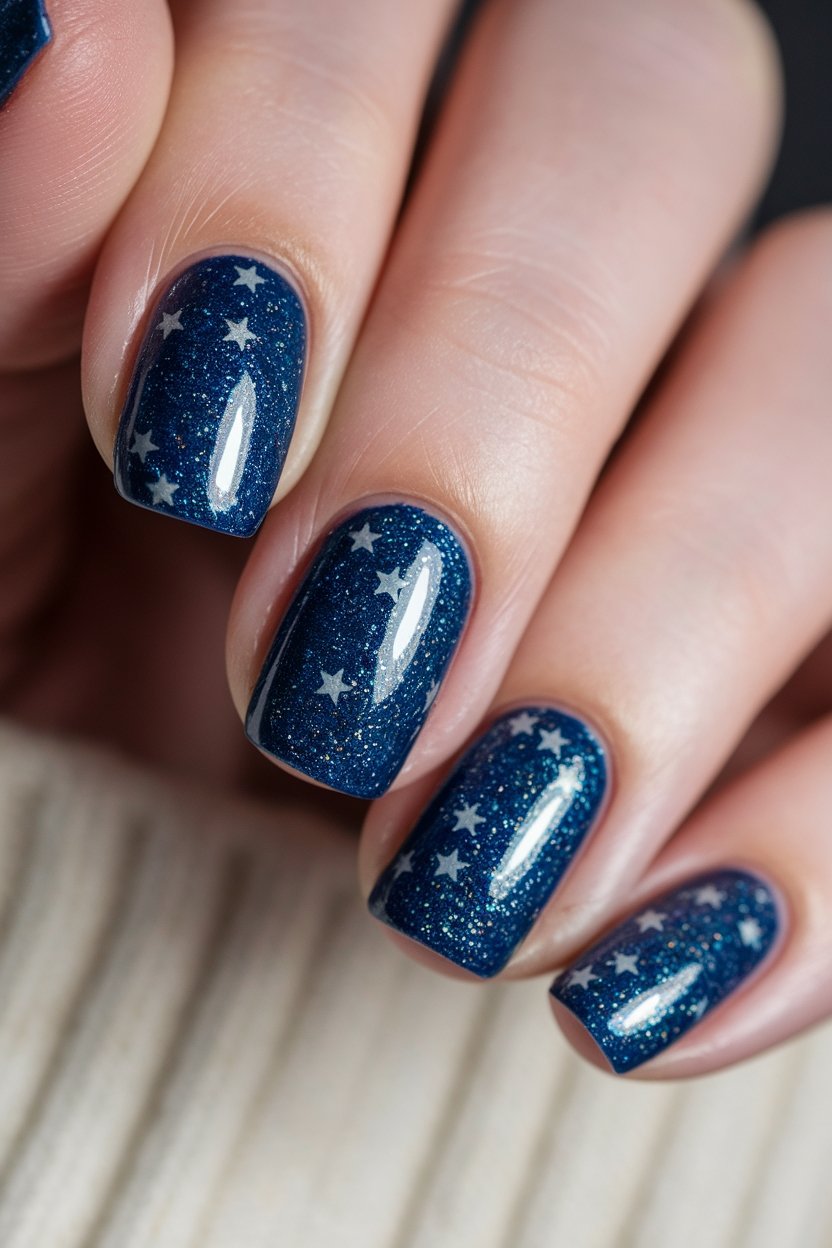
Blue Polish | Glittery Blue Polish | Deep Navy Polish
How to Create This Look:
- Start with a clean and filed set of nails.
- Apply a base coat to protect your nails and ensure even color application.
- Paint your nails with a rich blue polish as your base color. Allow it to dry completely.
- Once dry, use a makeup sponge to apply glittery blue polish at the tips for a gradient effect.
- For added sparkle, gently sprinkle some loose glitter on top while the polish is still wet.
- Seal your design with a top coat to make it shine and last longer.
- Allow everything to dry, and voilà! You have a stunning glittery blue starry night on your nails!
Icy Blue Glitter Fade
Icy Blue | Light Blue | Silver Glitter Polish | Clear Top Coat
How to Create This Look:
- Start with clean, manicured nails and apply a base coat to protect them.
- Paint your nails with two coats of Icy Blue polish, allowing each coat to dry completely.
- Using a makeup sponge, dab Light Blue polish on the tips of your nails to create a gradient effect.
- Apply Silver Glitter Polish over the Light Blue area for a sparkling fade.
- Finish with a layer of Clear Top Coat to seal in the design and add shine.
- Allow your nails to dry completely, and enjoy your winter wonderland look!
Winter Wonderland Nail Art
Soft White Polish | Sparkling Blue Polish | Frosty Silver Polish | Snowflake Nail Art Sticker
How to Create This Look:
- Start with a base coat to protect your nails.
- Apply two coats of soft white polish as your base color and let it dry completely.
- Once dry, add a layer of sparkling blue polish on top of the white, focusing on the tips for an ombre effect.
- Use frosty silver polish to create small dots for a snow-like appearance.
- For added flair, use snowflake nail art stickers on one or two accent nails.
- Finish with a top coat for shine and durability!
Icicle-Inspired Nail Art
Icy Blue Polish | White Polish | Silver Glitter Polish
How to Create This Look:
- Start with a clean set of nails and apply a base coat to protect them.
- Paint your nails with the icy blue polish as the base color. Allow it to dry completely.
- Once dry, use the white polish to create tips at the edges of your nails, mimicking the frosty edges of icicles.
- Add a layer of silver glitter polish on top for that extra sparkle and shimmer.
- Finish with a top coat to seal your design and add shine. Enjoy your winter wonderland nails!
Frosted Blue Glitter Swirls
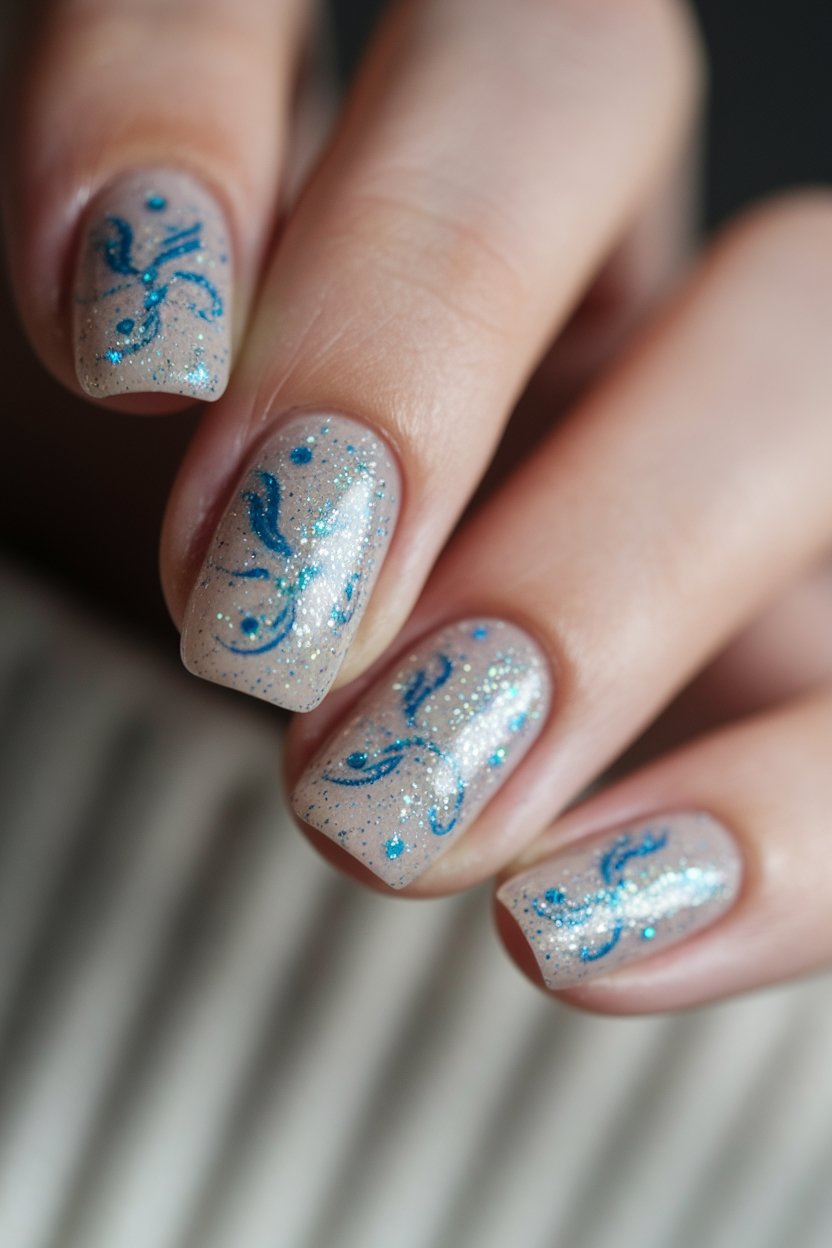
Frosted Blue Polish | Silver Glitter Polish | White Polish
How to Create This Look:
- Start with a base coat to protect your nails.
- Apply two coats of frosted blue polish for a beautiful wintery background.
- Once dry, use a dotting tool or a small brush to create swirls with the white polish.
- Add silver glitter polish on top of the swirls for that extra sparkle.
- Finish with a top coat to seal in your design and add shine.
- Let your nails dry completely and enjoy your winter wonderland look!
Frosted Blue Glitter Snowdrifts
Frosted Blue | Silver Glitter | White Polish
How to Create This Look:
- Start with a clean nail and apply a base coat to protect your nails.
- Choose a soft blue nail polish and apply one or two coats for a smooth base, allowing it to dry completely.
- Take fine blue glitter and gently sprinkle it over your nails while the polish is still slightly tacky, focusing on the tips for a gradient effect.
- Once the glitter is in place, seal it with a clear top coat to add shine and create that frosty finish.
- Allow everything to dry, and admire your winter wonderland nails!
Blue Glittery Snowman Designs
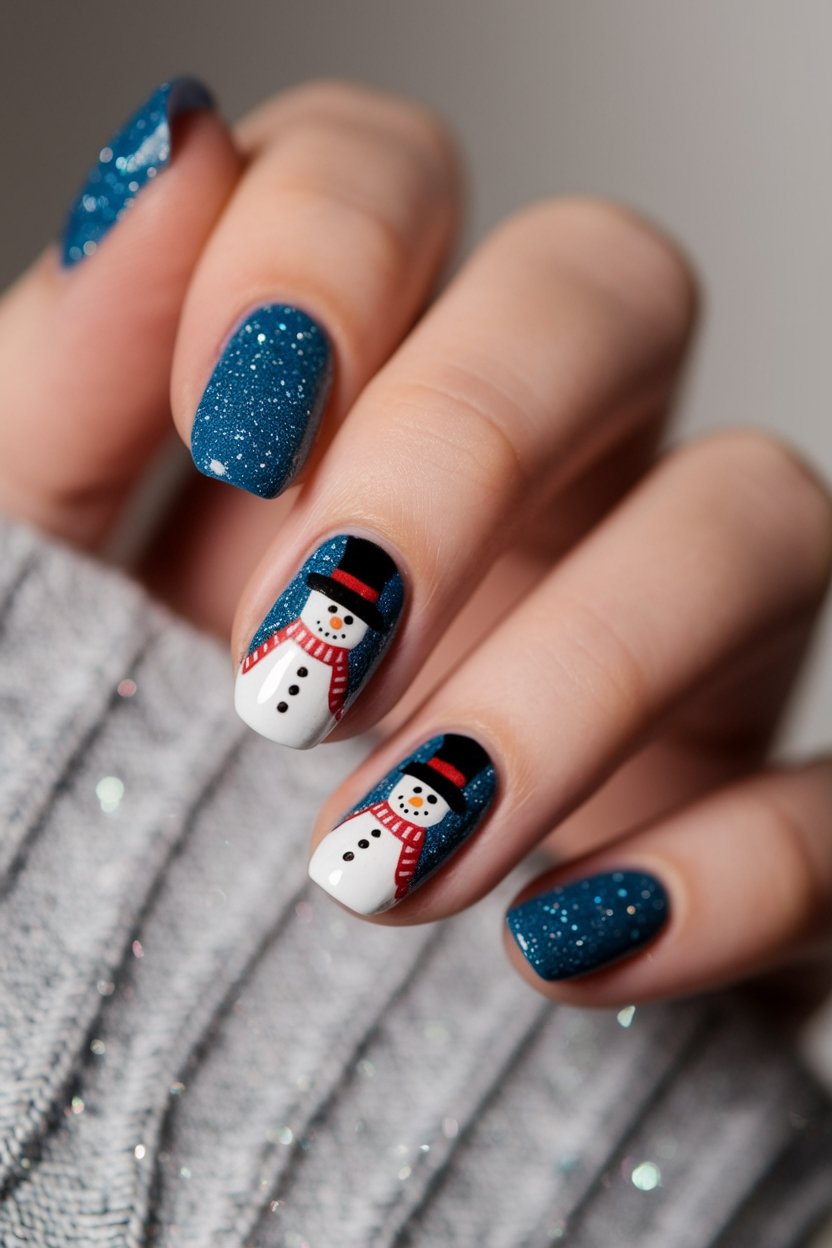
Light Blue Polish | White Polish | Silver Glitter Polish
How to Create This Look:
- Start with a base coat of light blue polish.
- Using a dotting tool or a small brush, add white dots to represent snow.
- Create tiny snowman shapes using the white polish and let them dry.
- Finish off your design with a sprinkle of silver glitter for that magical sparkle.
- Seal your design with a top coat for extra shine and longevity.
Get ready to spread some holiday cheer with these adorable glittery snowmen!
Blue Candy Cane Stripes
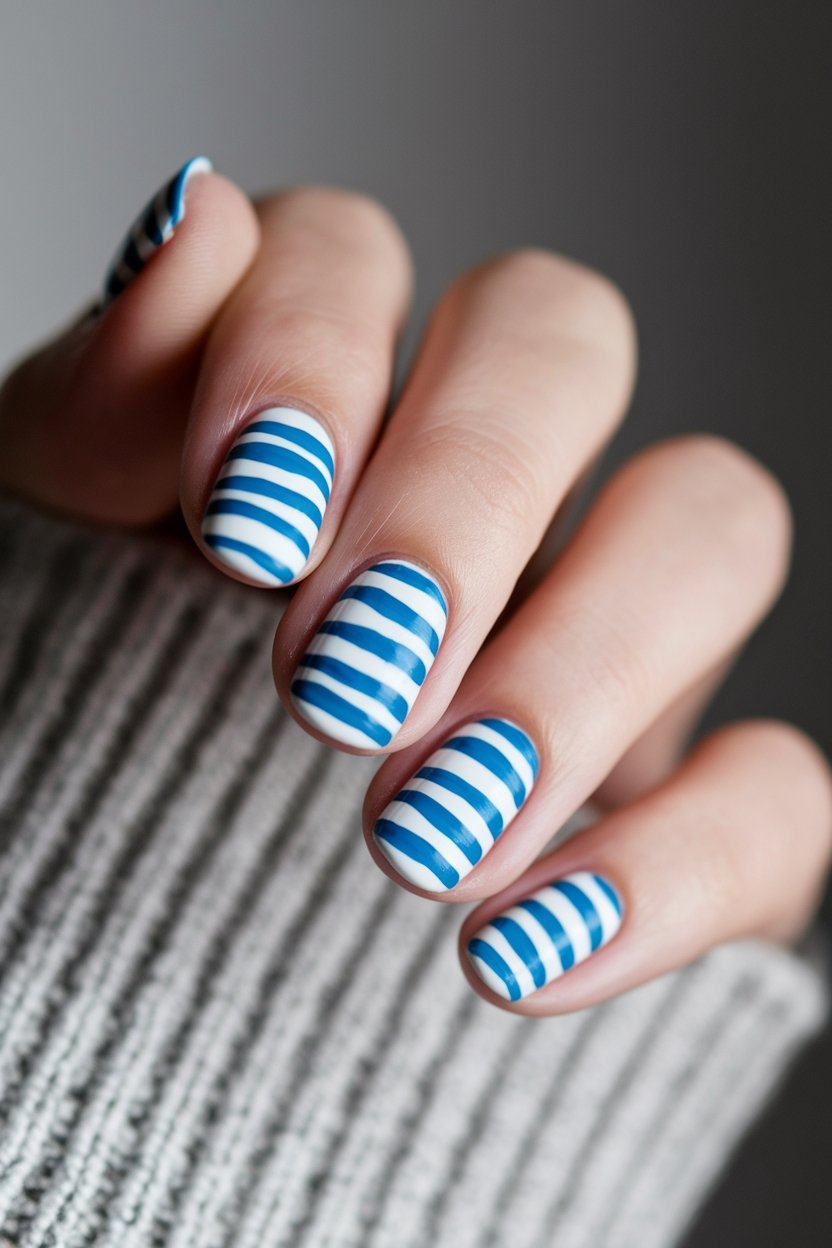
Blue Polish | White Polish | Silver Glitter Polish
How to Create This Look:
- Start with a base coat to protect your nails and enhance the polish’s longevity.
- Apply a coat of your favorite blue polish and let it dry completely.
- Using a thin brush, dip it into the white polish and carefully paint diagonal stripes across your nails.
- For an extra festive touch, add silver glitter polish along the edges of the stripes.
- Finish with a top coat to seal the design and add shine. Enjoy your sweet candy cane striped nails!
Glittery Blue Frosted Leaves
Glittery Blue Frosted Leaves | Deep Blue Polish | Silver Glitter Polish | Frosted Top Coat
How to Create This Look:
- Start with a base coat to protect your nails.
- Apply a profound blue polish as your base color.
- Once dry, add a layer of silver glitter polish for that extra sparkle.
- Finish off with a frosted top coat to give your nails that enchanting, icy look.
- Allow to dry completely and admire your winter wonderland nails!
Blue Frosted Pine Cones
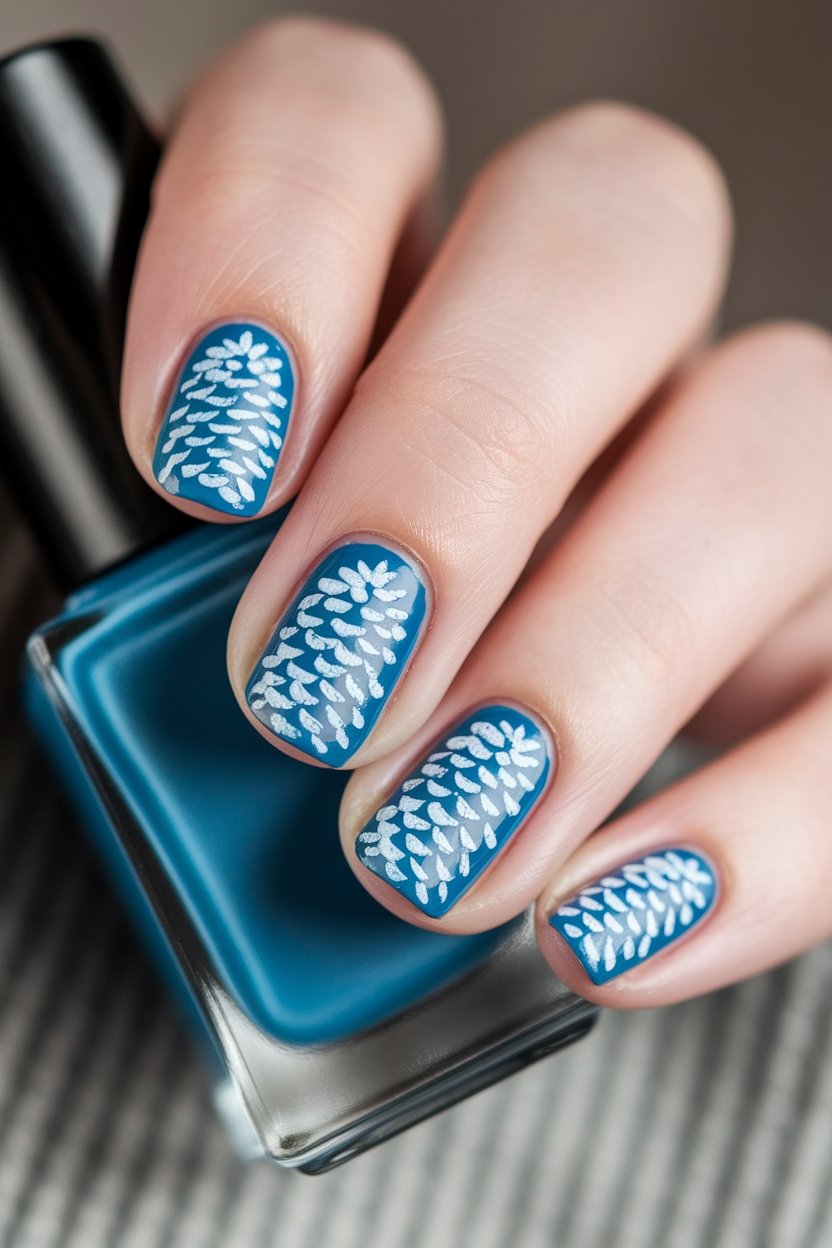
Icy Blue Polish | Frosted White Polish | Silver Glitter Polish
How to Create This Look:
- Start with a base coat to protect your nails.
- Apply two coats of icy blue polish for a vibrant base.
- Once dry, use a thin brush or a nail art dotting tool to create frosted white tips.
- Add a touch of silver glitter polish on top of the white tips for a sparkling effect.
- Finish with a top coat to seal your design and add shine.
- Allow your nails to dry completely, and enjoy your whimsical winter look!
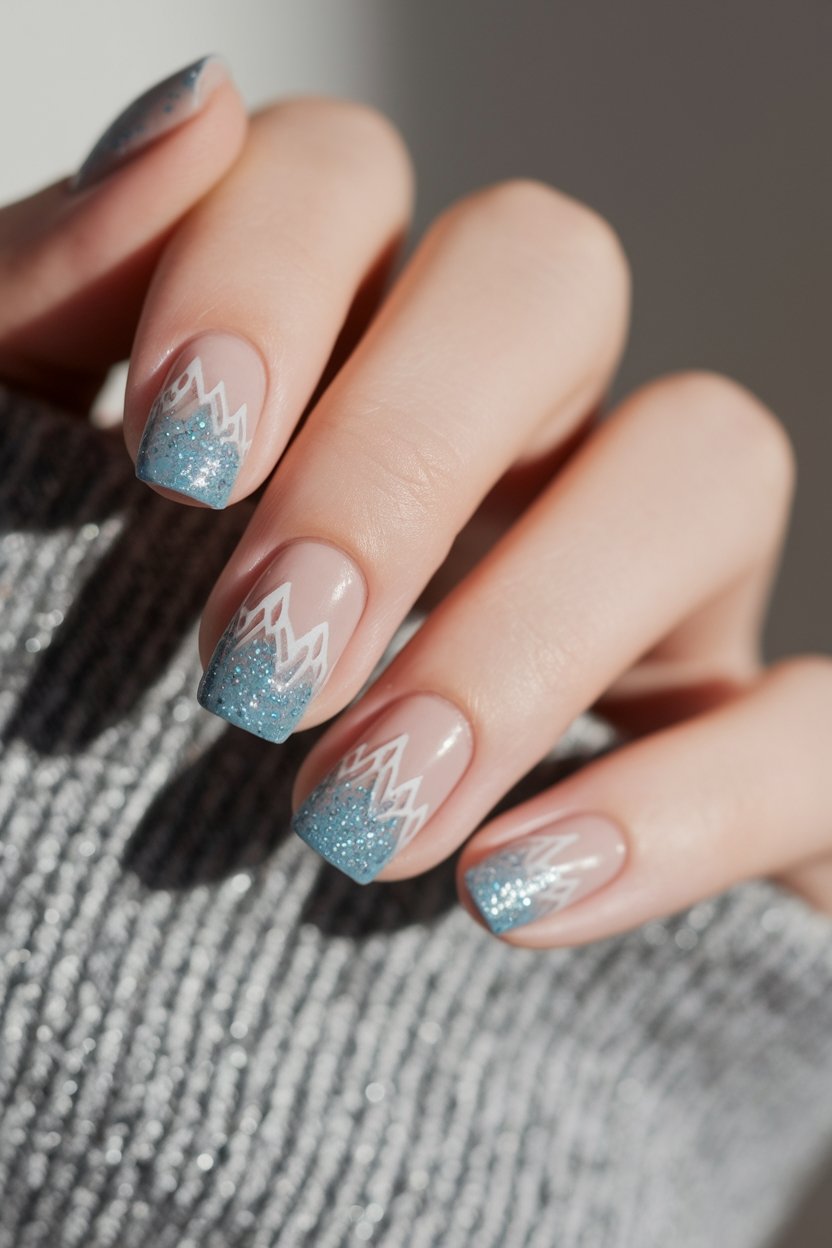
Blue Frosted Snowy Mountains
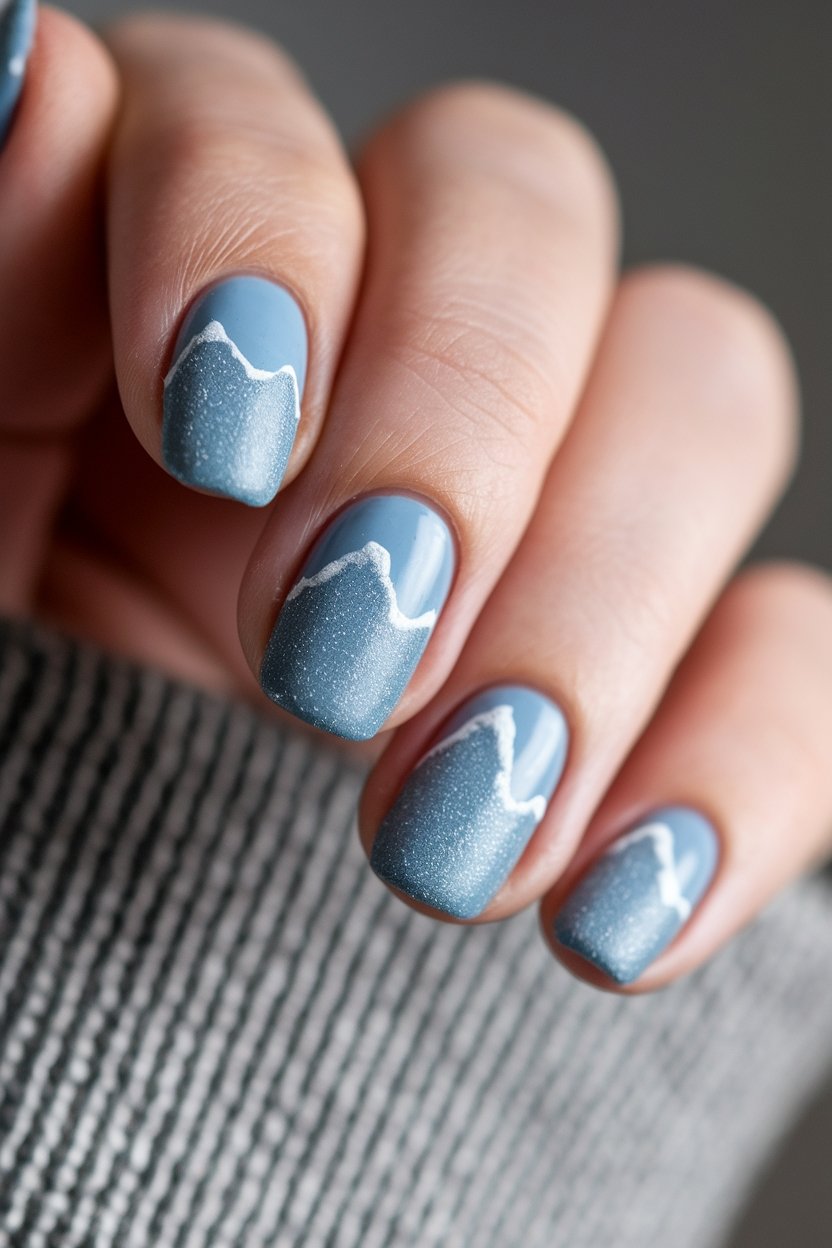
Blue Frosted Snowy Mountains
Sky Blue Polish | Frosty White Polish | Shimmering Silver Polish
How to Create This Look:
- Start with a base coat to protect your nails.
- Apply two coats of sky blue polish as your base color.
- Once dry, use a sponge to dab on frosty white polish at the tips for a gradient effect.
- Add a touch of shimmering silver polish to accentuate the peaks of the gradient.
- Finish with a top coat for added shine and protection.
- Allow to dry completely, and enjoy your winter wonderland nails!
Blue Christmas Trees
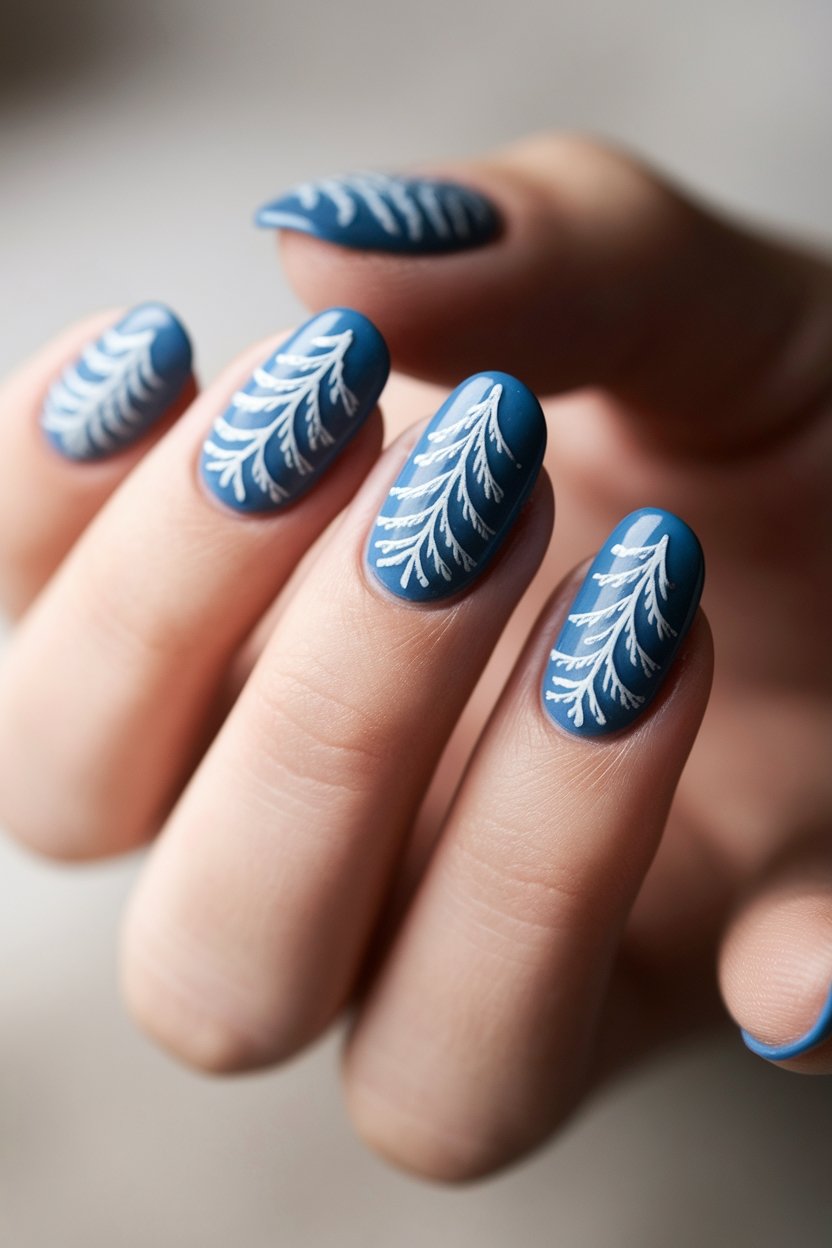
Blue Frosted Polish | Icy Blue Glitter Polish | Frosty White Polish
How to Create This Look:
- Start with a clean and dry nail surface.
- Apply a base coat to protect your nails and enhance polish longevity.
- Choose a light blue nail polish as your base color and apply two coats for an opaque finish.
- Once dry, use a frosty white polish to add tips or designs to mimic frosted tree tips.
- Finish with an icy blue glitter polish to add sparkle, applying it strategically for a magical effect.
- Seal your design with a top coat for a glossy finish and extra durability.
- Let your nails dry completely, and enjoy your stunning blue frosted look!
Blue Ornament Designs
Blue Frosted Polish | Silver Glitter Polish | White Polish | Top Coat
How to Create This Look:
- Start by applying a base coat to protect your nails.
- Paint your nails with the blue frosted polish for a beautiful base.
- Once dry, use a thin brush to paint delicate snowflakes with the white polish.
- Add tiny silver beads to the center of the snowflakes for a shiny touch.
- Finish with a glittery top coat to mimic frost and enhance the sparkle.
- Allow to dry completely and enjoy your dazzling holiday nails!
Minimal Blue Christmas Nails

Festive Blue Christmas Nails
So, there you have it, my festive friends! Blue Christmas nails are the perfect blend of holiday cheer and winter magic.
If you’re rocking frosted ombre tips or glittery snowflakes, your nails are sure to be the talk of the town.
Just remember, if your nails start to look like a snowstorm exploded, it might be time to tone it down a notch… unless you’re going for the “I just got lost in a blizzard” look. Happy decorating!