Have you ever tried festive short Christmas nails? They’re such a fun way to get into the holiday spirit. Picture candy cane stripes or adorable snowflakes dancing on your fingertips… it’s like a mini celebration! I love using vibrant colors like red and green, plus a little glitter never hurts. If you’re curious about all the cute designs you can create, stick around, because I’ve got some awesome ideas that’ll make your nails the talk of the party!
Trending This Season
- Start with a protective base coat to ensure nail health before applying festive designs.
- Choose vibrant colors like red, green, and white for a classic Christmas look.
- Incorporate fun designs such as candy cane stripes or snowflakes for added flair.
- Use a dotting tool for precise details like tiny Christmas lights or reindeer faces.
- Finish with a glossy top coat to seal the design and enhance shine.
Candy Cane Stripes Design
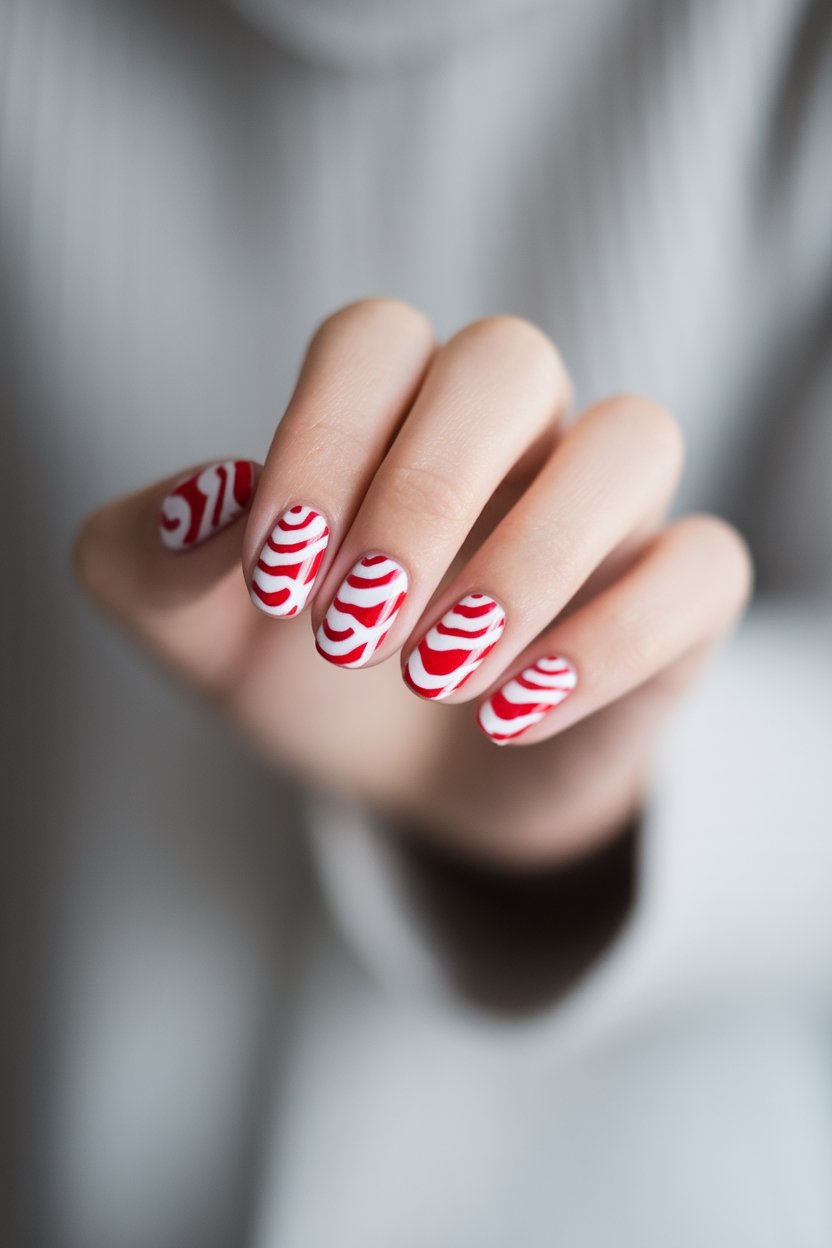
Red Polish | White Polish | Green Polish
How to Create This Look:
- Start with a base coat to protect your nails.
- Paint all your nails with a coat of white polish and let it dry completely.
- Using the red polish, create diagonal stripes across your nails. You can use striping tape for precision or just freehand it for a playful look!
- For an extra festive touch, add a green stripe or two on some nails.
- Finish with a top coat to seal in your design and add shine.
- Let everything dry, and enjoy your sweet candy cane nails!
Snowflake Accents on Red
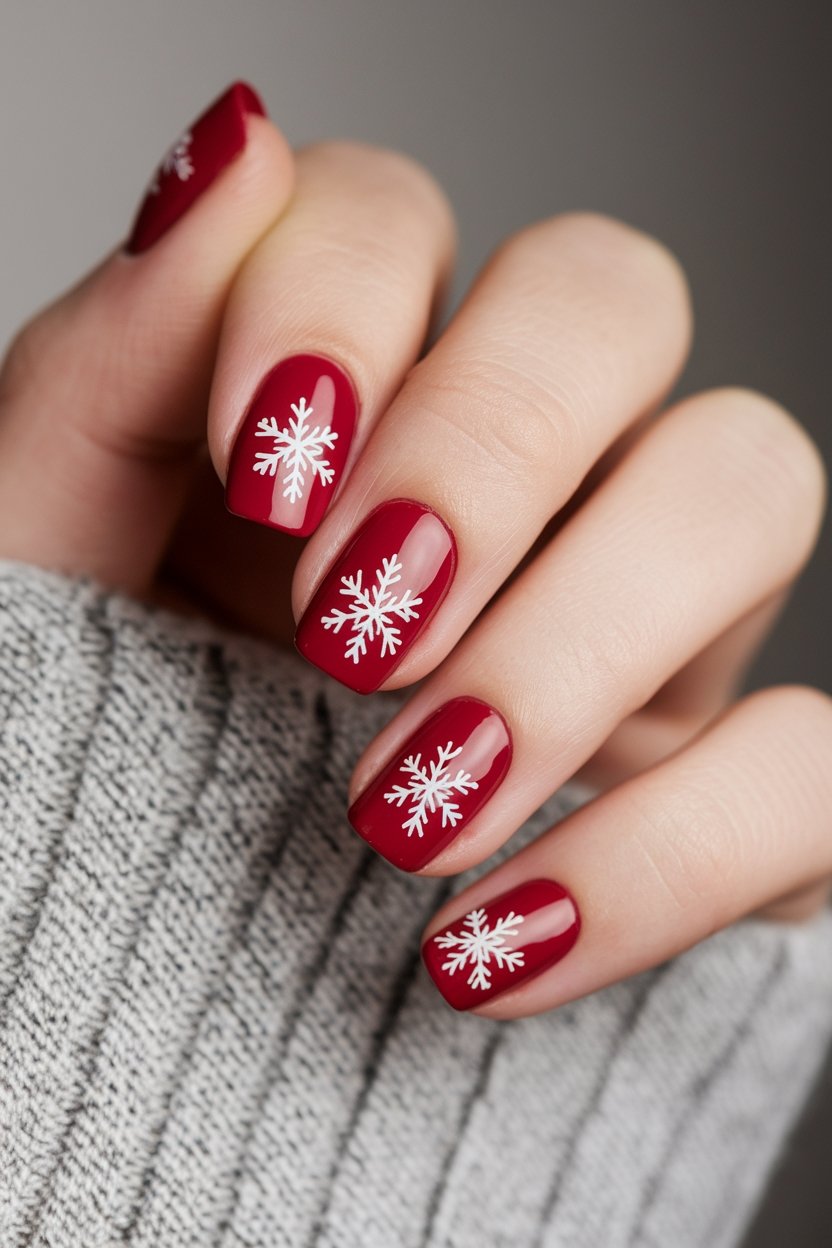
Red Polish | White Polish
How to Create This Look:
- Start with a clean nail surface and apply a base coat to protect your natural nails.
- Paint your nails with a bright red polish as your base color. Allow it to dry completely.
- Using a fine nail art brush or a dotting tool, dip into the white polish and create delicate snowflake designs on each nail.
- Add extra details like tiny dots or lines to enhance the snowflake effect.
- Finish with a top coat to seal in your design and add shine.
- Allow everything to dry and enjoy your festive winter wonderland nails!
Glittery Gold Star Accents
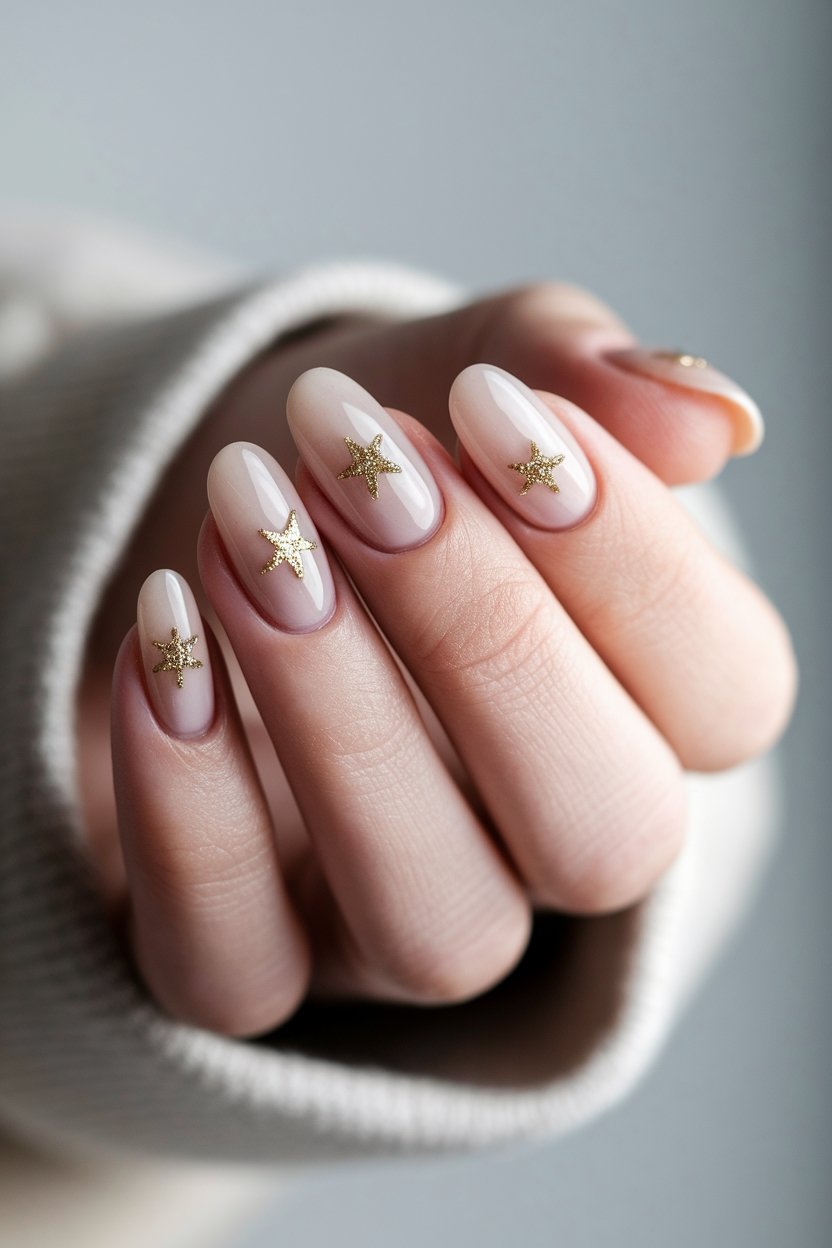
Gold Polish | Glitter Top Coat | Clear Polish
How to Create This Look:
- Start with a clean base: Apply a layer of clear polish to protect your nails.
- Choose your base color: Paint your nails with a gold polish and let it dry completely.
- Add some sparkle: Use a glitter top coat to give your nails that dazzling effect.
- For extra flair: Dot some gold glitter or place star-shaped stickers on your nails before the top coat dries.
- Finish it off: Seal everything with another layer of clear polish to lock in the sparkle!
Frosted Berry Nail Art
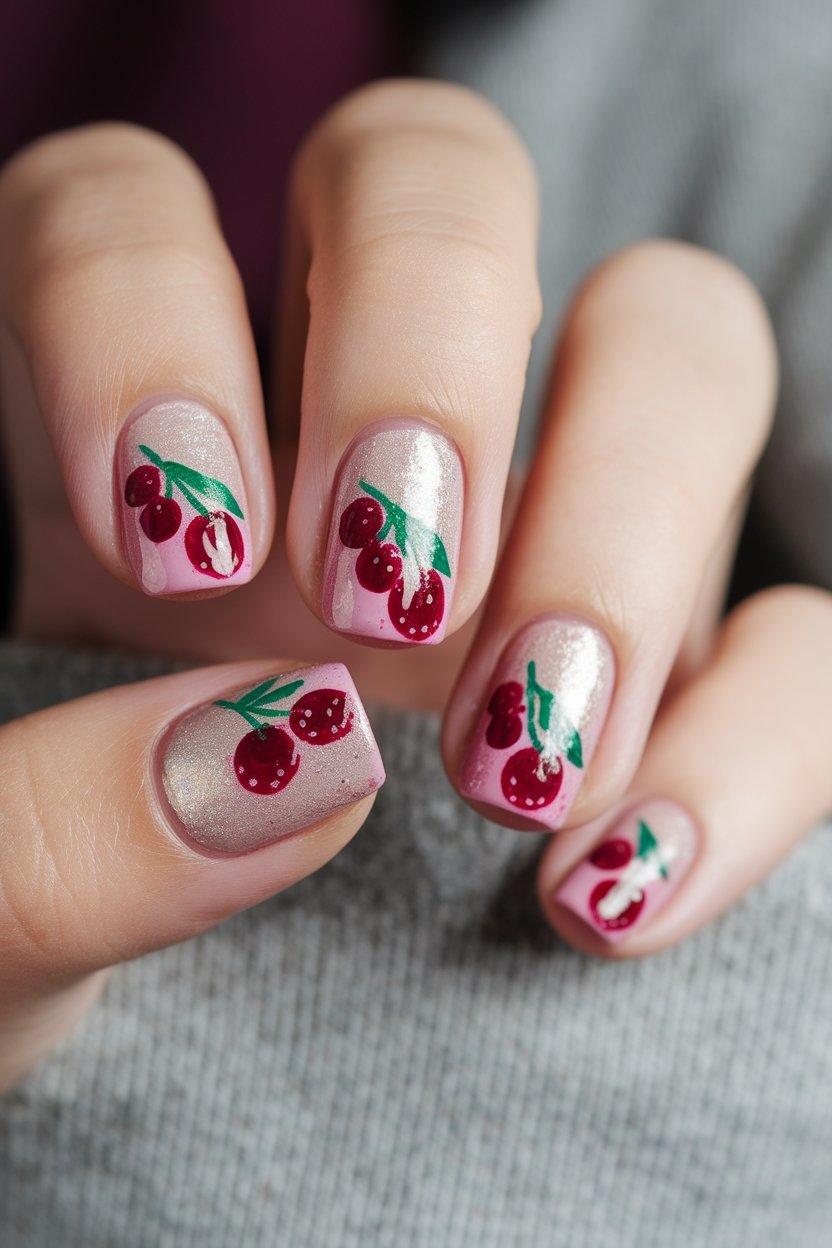
Berry Red Polish | Frosty White Polish | Deep Green Polish | Sparkling Silver Polish
How to Create This Look:
- Start with a base coat to protect your nails.
- Apply two coats of berry red polish on all nails for a vibrant base.
- Once dry, use a thin brush to create small dots of frosty white polish on top to mimic frost on berries.
- Add tiny accents of deep green polish to represent leaves at the base of the berries.
- For a touch of sparkle, dab some sparkling silver polish on a few dots to create a festive shine.
- Finish with a top coat to seal in your design and add extra gloss.
Enjoy your whimsical frosted berry holiday nails!
Reindeer Faces With Red Noses
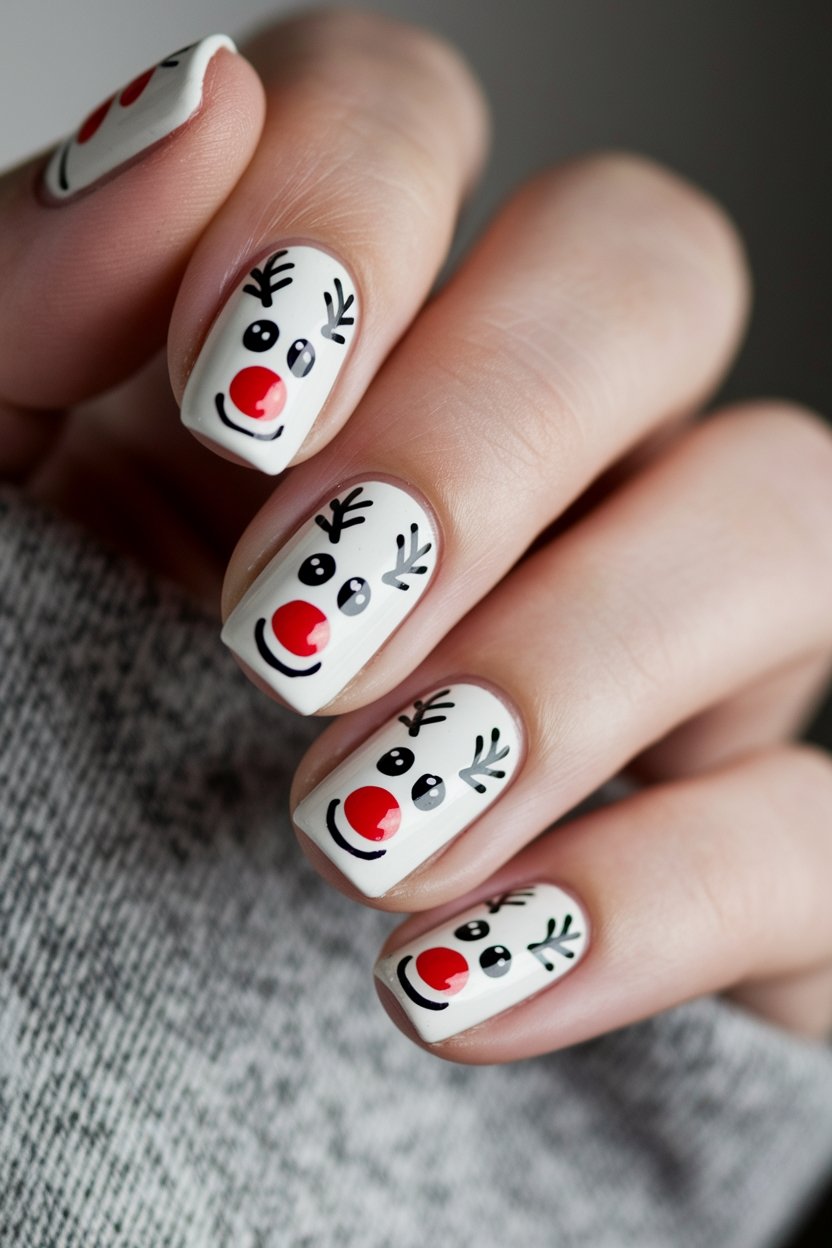
Brown Polish | White Polish | Black Polish | Red Polish
How to Create This Look:
- Start with a base coat of brown polish for the reindeer face.
- Use white polish to dot on the eyes.
- With a fine brush, paint on the antlers using black polish.
- Add a bright red dot for the iconic nose to finish off your festive look!
It’s simple and sure to spread holiday cheer!
Jingle Bell Accent Tips
Gold Glitter Polish | Red Polish | White Polish
How to Create This Look:
- Start with a base coat to protect your nails and help the polish adhere better.
- Apply two coats of your chosen red polish to create a vibrant base.
- Once the red polish is dry, take a fine brush or dotting tool and apply white polish to create adorable reindeer faces on each nail.
- For the festive twist, dip a brush into the gold glitter polish and gently swirl it around the tips of your nails, mimicking the jingle bell effect.
- Finish with a top coat to seal in your design and add extra shine.
- Let your nails dry completely and enjoy your holiday-themed manicure!
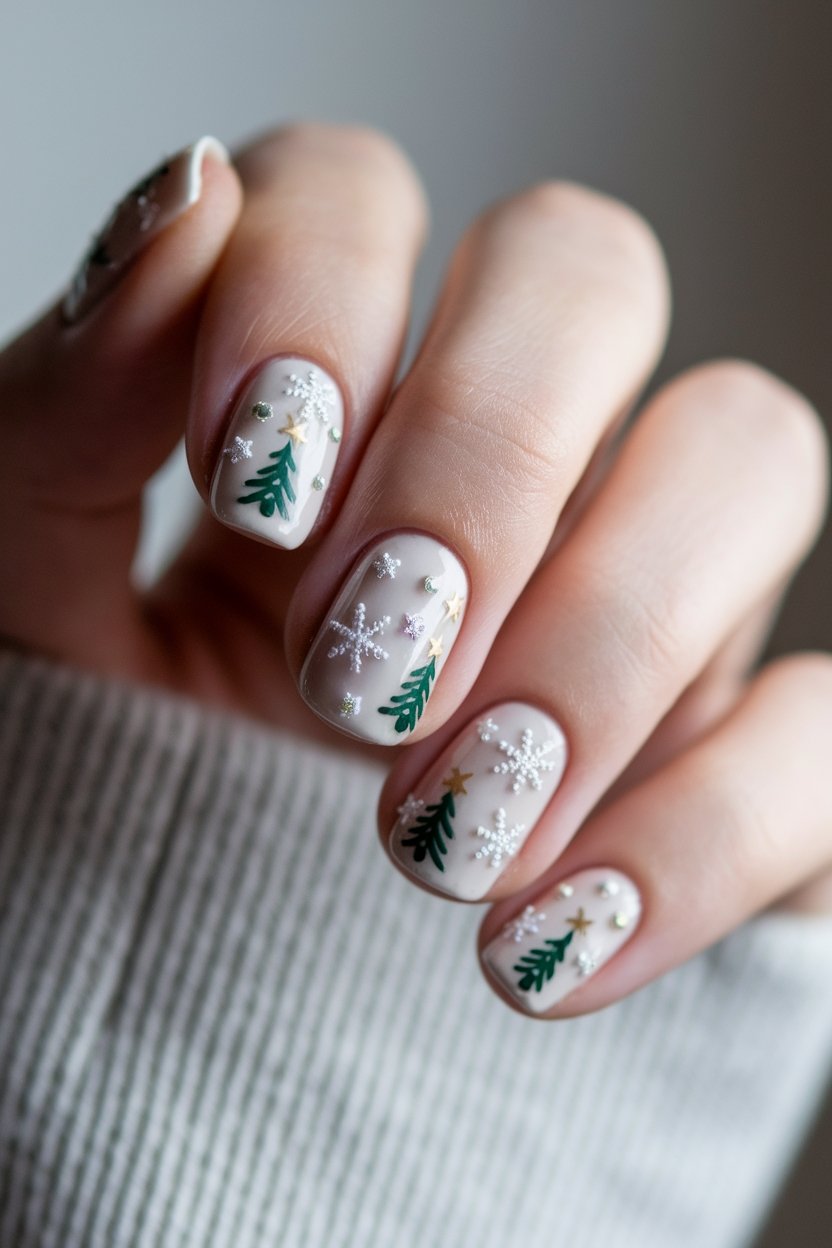
Holly Leaf and Berry Design
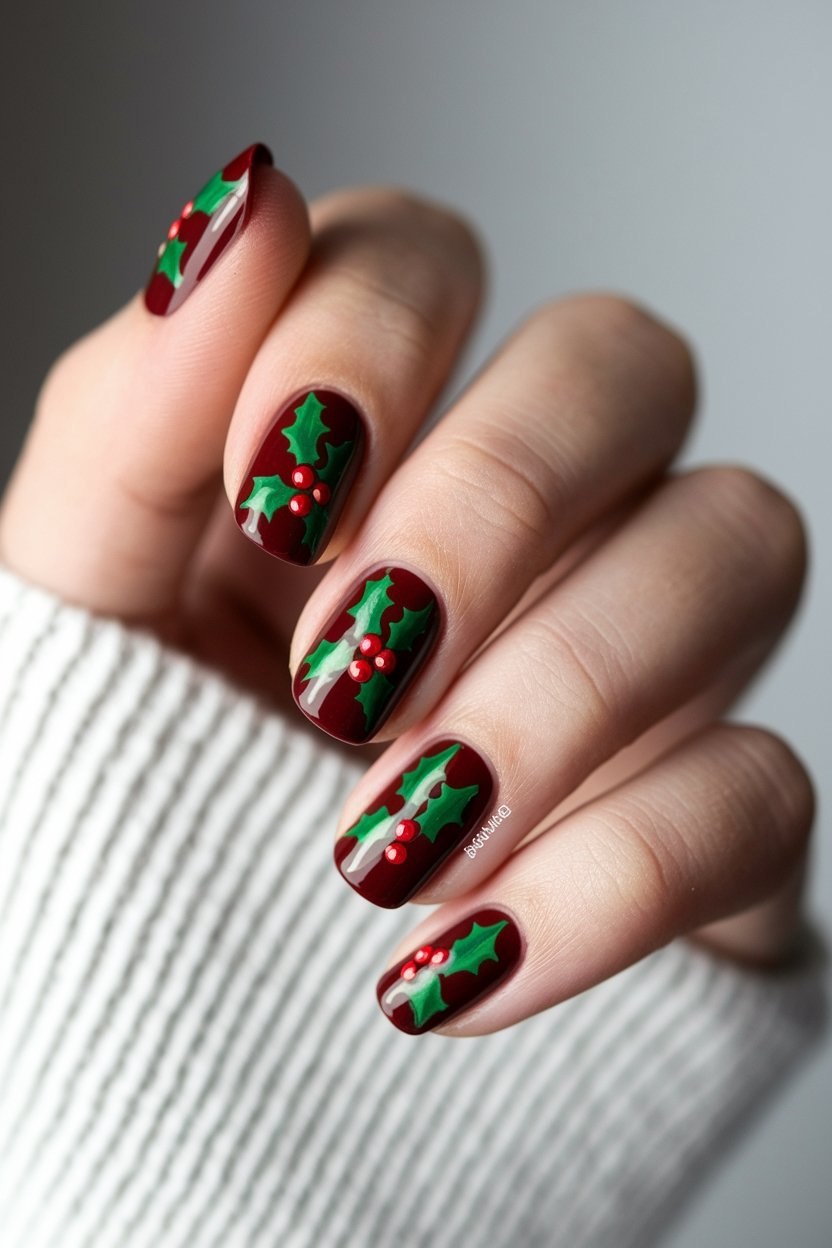
Green Nail Polish | Red Nail Polish | Top Coat | White Nail Polish
How to Create This Look:
- Start with a base coat for nail protection.
- Apply two coats of green nail polish to create a base for the leaves.
- Using a tiny brush, paint small leaf shapes with the green polish.
- Add red dots with the red nail polish to represent the berries, placing them near the leaves.
- For extra detail, you can use a white nail polish to add highlights on the leaves.
- Finish with a top coat for a glossy shine and to seal your design.
Enjoy your festive nail art!
Sparkling Snowman Faces
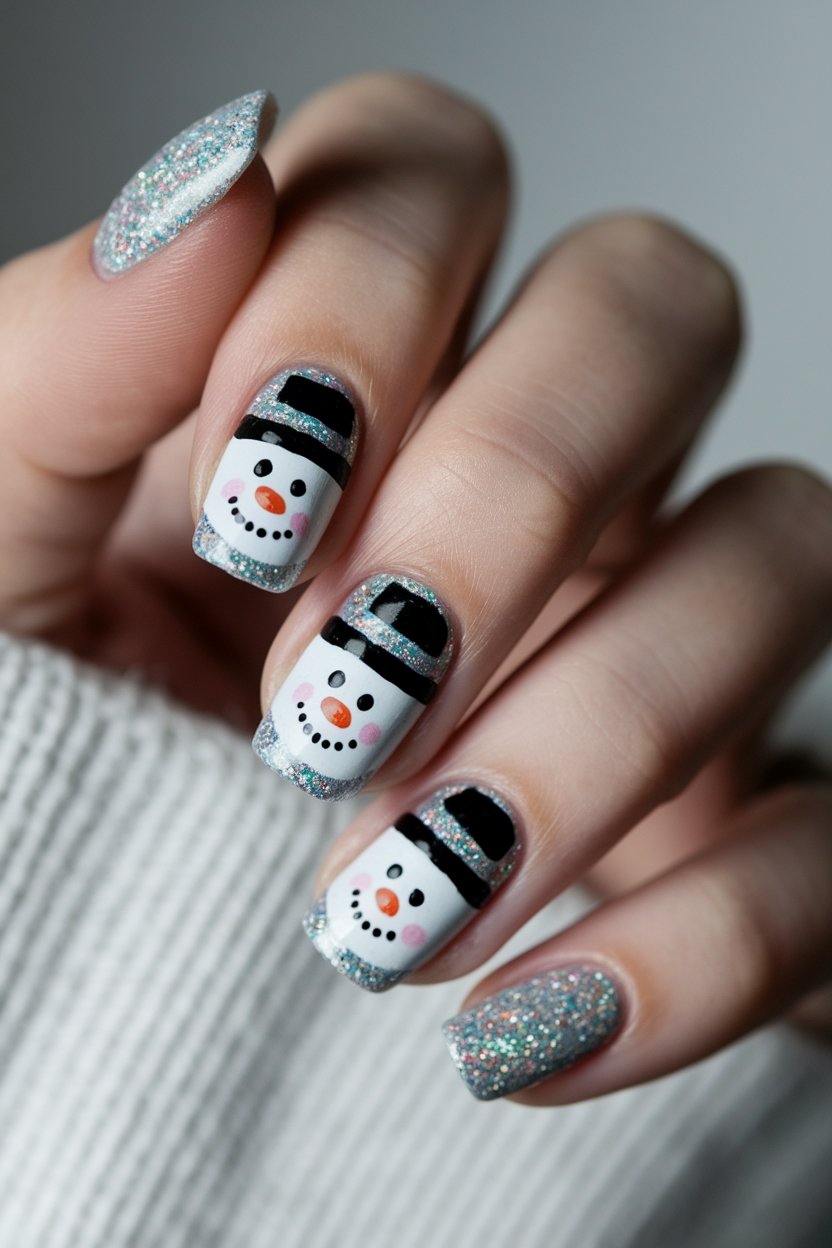
White Polish | Black Polish | Orange Polish | Silver Glitter Polish
How to Create This Look:
- Start with a base coat of white polish for the snowman base.
- Once dry, use a dotting tool or a small brush to create black eyes and a mouth.
- For the carrot nose, use the orange polish to paint a small triangle shape.
- Finish off the design with a touch of silver glitter polish for a frosty effect.
- Seal your art with a top coat to keep those cheerful snowman faces shining bright!
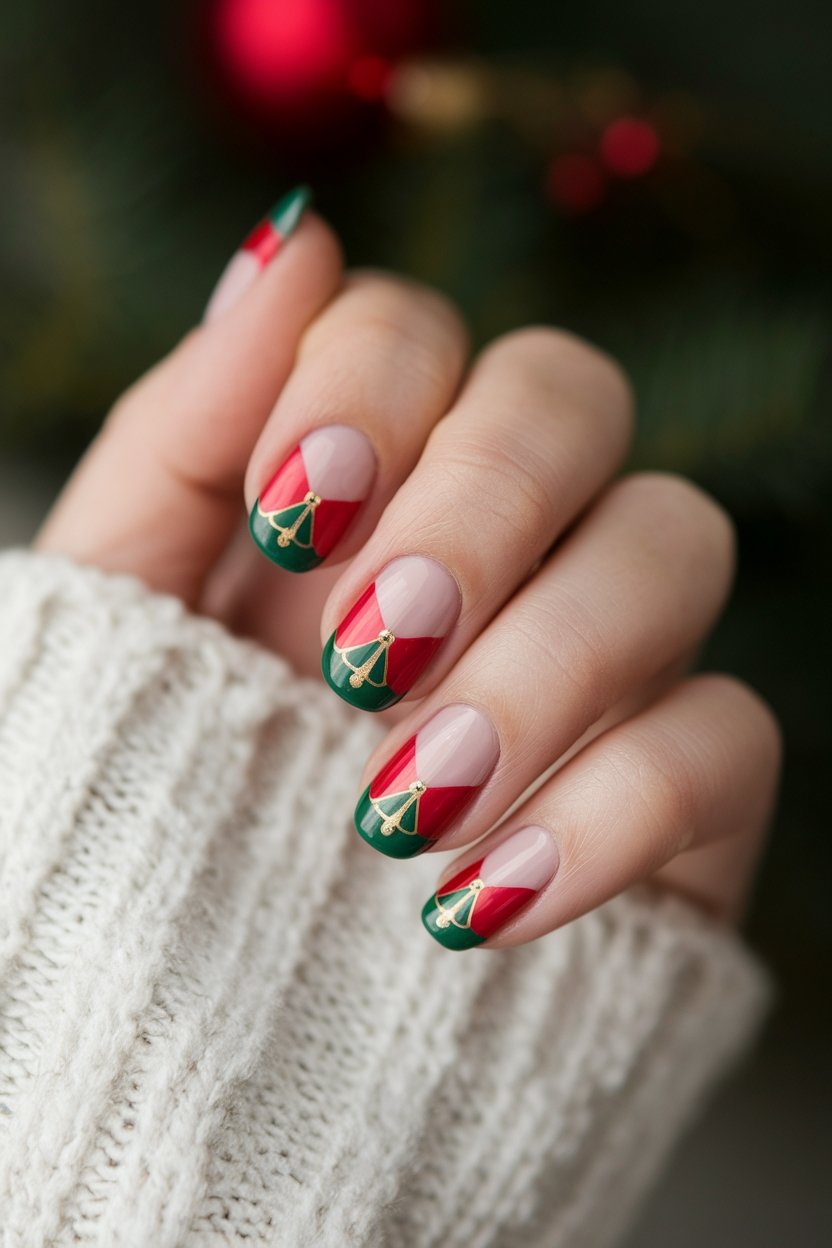
Festive Nail Art
Red Polish | Gold Glitter Polish | Green Polish | Silver Polish
How to Create This Look:
- Start with a clean and filed set of nails.
- Apply a base coat to protect your nails.
- Paint your nails with a red polish as the base color and let it dry completely.
- Using a fine brush or a dotting tool, create tiny ornaments with gold glitter polish by making small circles.
- Add some green polish for accent baubles, placing them strategically among the gold.
- For an extra touch, use a silver polish to draw tiny strings or hooks on the ornaments.
- Finish with a top coat to seal in your design and add shine.
- Allow your nails to dry thoroughly before showing them off!
Icicle Nail Tips

Shimmering Silver Polish | Frosty White Polish | Icy Blue Polish | Sparkling Rhinestones
How to Create This Look:
- Start with a base coat to protect your nails.
- Apply two coats of shimmering silver polish as your base.
- Using a thin brush, add delicate white accents like snowflakes or swirls.
- Create a frosty gradient effect by blending icy blue polish from the tips towards the cuticle.
- Finish with tiny rhinestones placed strategically for an added sparkle.
- Seal your design with a top coat to lock in the look and shine!
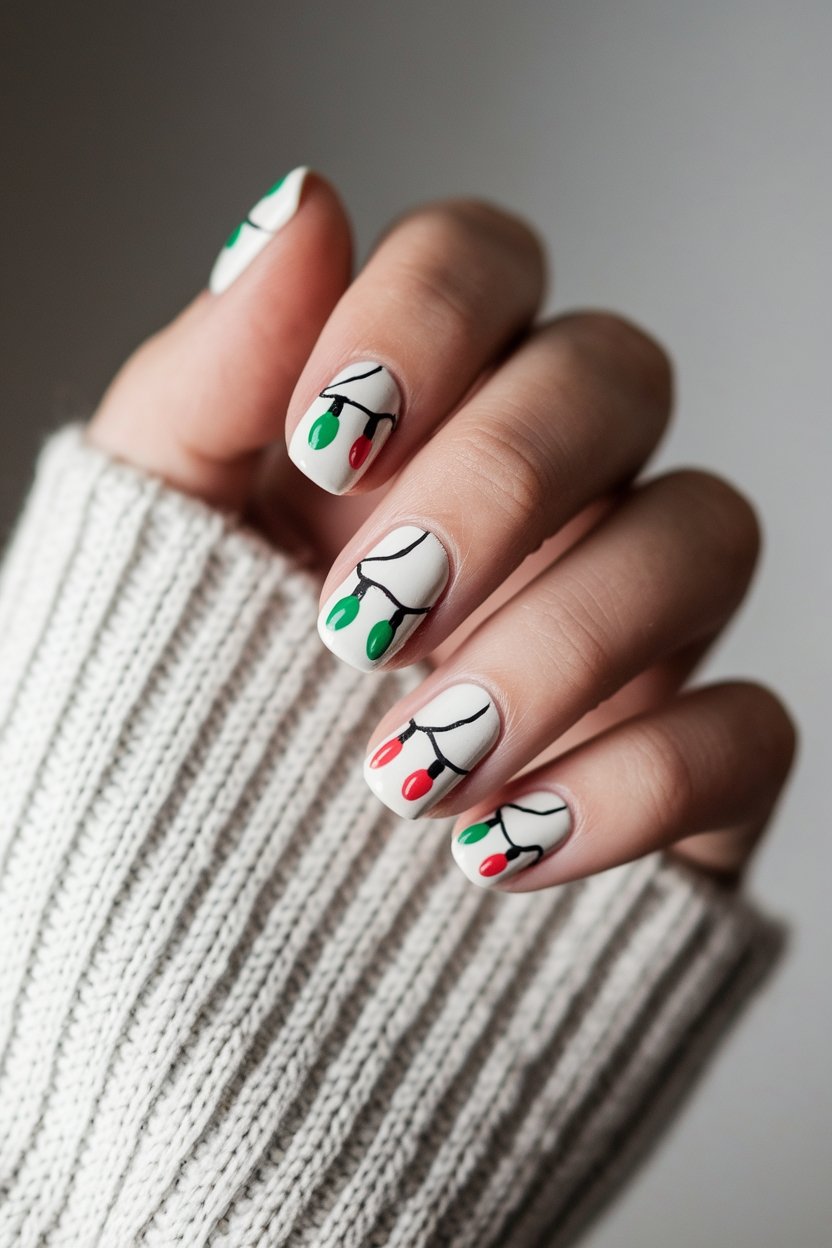
Twinkling Christmas Light Tips
Red Polish | Green Polish | Yellow Polish | White Polish
How to Create This Look:
- Start with a base coat for a smooth application.
- Paint your nails with a solid color of your choice as the base (white works great!).
- Using a dotting tool or a toothpick, dip it into the red polish and create tiny dots in clusters on your nails.
- Repeat the dotting process with green and yellow polish to mimic Christmas lights.
- Allow the dots to dry completely.
- Finish with a top coat to seal the design and add shine.
- Enjoy your festive nail art that sparkles like Christmas lights!
Santa Hat Nail Art
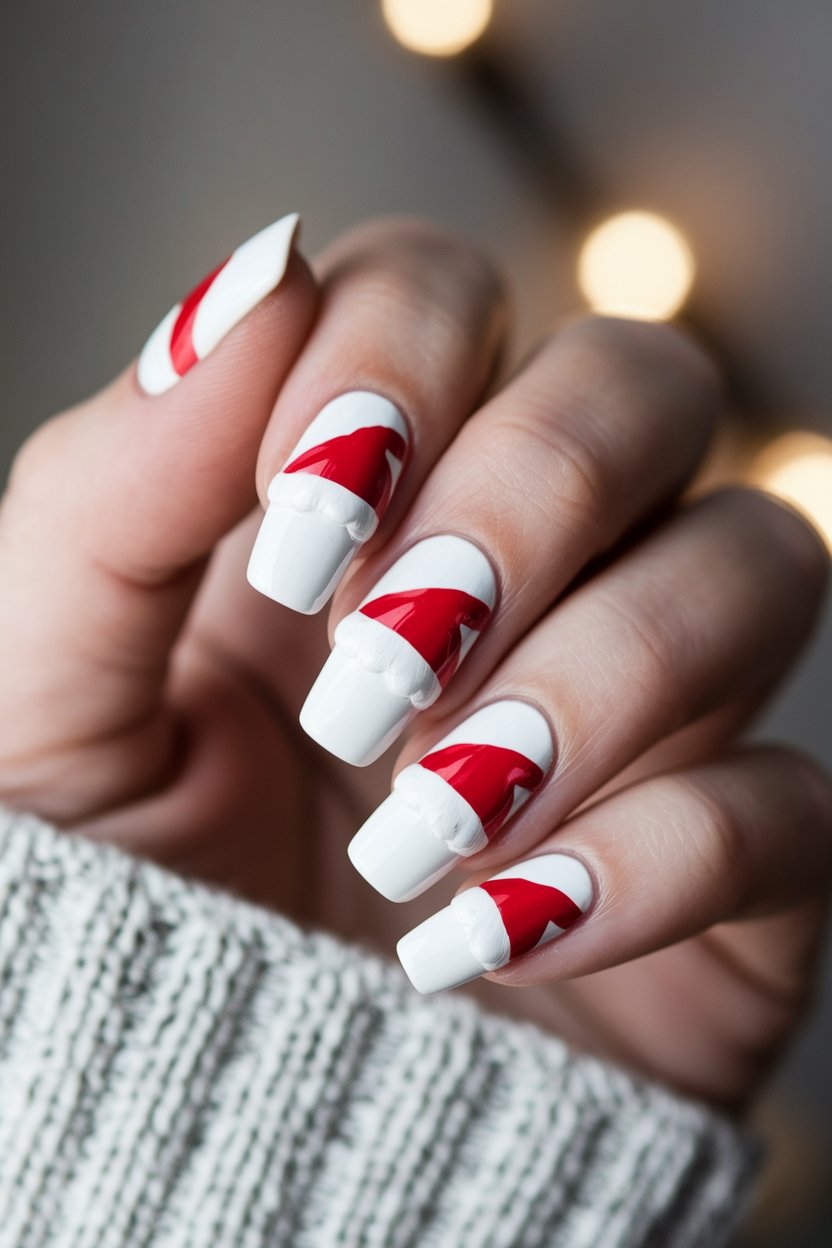
Red Polish | White Polish | Green Polish | Gold Glitter Polish
How to Create This Look:
- Start with a base coat to protect your nails.
- Apply two coats of red polish on all your nails for a festive base.
- Once dry, use a fine brush or dotting tool to create a Santa hat shape at the tip of your nails with white polish.
- Add a little white pom-pom at the peak of the Santa hat with the dotting tool.
- Optional: Use green polish to add some holly leaves beside the hat for extra flair.
- Finish off with a top coat for shine and protection.
Now you’re ready to show off your adorable Santa hat nails at the holiday party!
Festive Christmas Gel nail Ideas
So, there you have it—your guide to festive short Christmas nails that’ll make you feel like a holiday superstar! With designs as sparkly as a thousand twinkling lights, you can show off your creative side while spreading cheer. Regardless of if you go for candy cane stripes or a cute Santa hat, your nails will be the talk of the party! So grab those polish bottles… let your imagination run wild, and get ready to dazzle everyone this season!