Gold Christmas nails really add that extra sparkle to the holiday season. I mean, who wouldn’t want their nails to shine brighter than the Christmas lights?
With so many designs to choose from – glittery ombres to cute snowflakes – it can be hard to pick just one!
Trending This Season
- Start with a base coat for nail protection before applying any polish to ensure durability.
- Consider designs like glittering gold ombre or matte gold with sparkling tips for festive flair.
- Use gold glitter to create holiday-themed designs, such as Christmas trees or gift boxes.
- Incorporate decorative elements like gold snowflakes or angel designs for a unique touch.
- Finish with a clear top coat for added shine and longevity to your gold Christmas nails.
Gold Christmas Nail Designs
These styles can turn your nails into festive works of art! So, ready to explore some gold nail ideas?
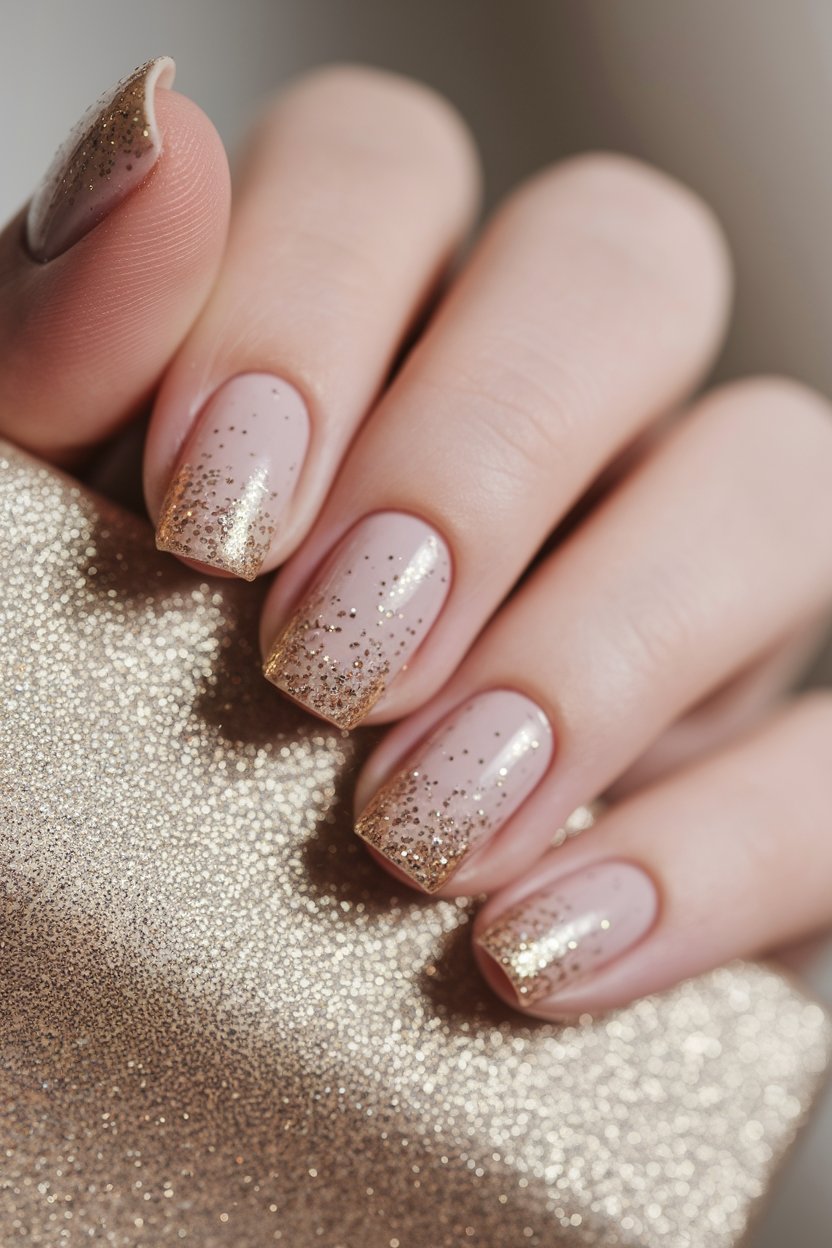
Glittering Gold Ombre Effect

Gold Base Polish | Dark Gold Polish | Glitter Top Coat
How to Create This Look:
- Start with clean, dry nails and apply a base coat for protection.
- Paint the tips of your nails with a lighter gold base polish.
- Using a makeup sponge, dab on a darker gold polish, blending upwards from the tips.
- Add a touch of glitter top coat for that extra sparkle.
- Finish with a clear top coat to seal in the look and add shine. Enjoy your beautiful ombre nails!
Matte Gold With Sparkling Tips
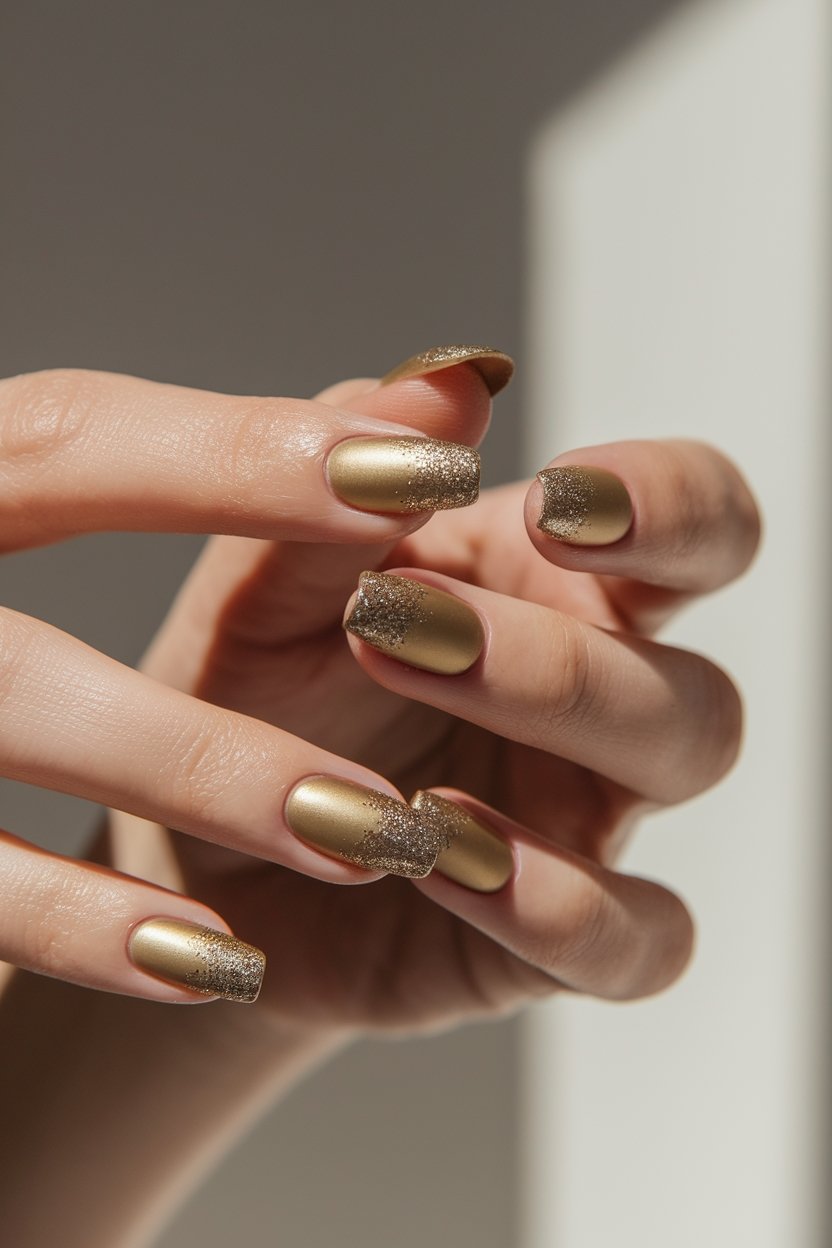
Matte Gold Polish | Gold Sparkle Top Coat
How to Create This Look:
- Start with clean, dry nails and apply a base coat for protection.
- Once the base coat is dry, paint your nails with the matte gold polish and let it dry completely.
- After the matte gold is set, take the gold sparkle top coat and gently apply it to the tips of your nails, creating a gradient effect.
- For added precision, use a small brush or a nail art tool to blend the glitter into the matte base.
- Finish with a top coat to seal the design and enhance durability. Enjoy your festive, elegant nails!
Gold Snowflake Accents
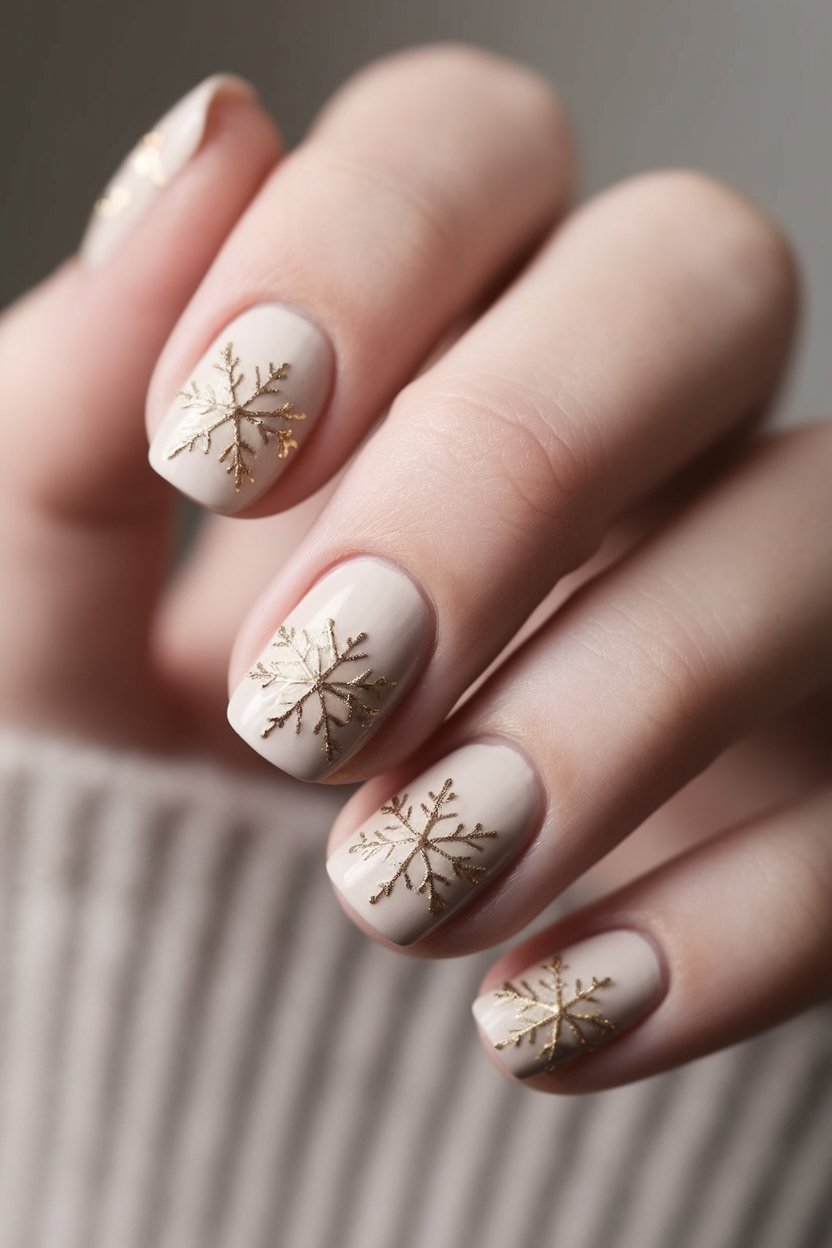
Gold Polish | White Polish | Clear Top Coat | Gold Glitter Polish
How to Create This Look:
- Start with clean, dry nails and apply a base coat for protection.
- Paint your nails with a shimmering white polish for a snowy base.
- Once dry, use a fine brush or nail art tool to create delicate gold snowflake designs on your nails.
- Add a touch of gold glitter polish to enhance the sparkle of the snowflakes.
- Finish with a clear top coat to seal your design and add extra shine.
- Allow your nails to dry completely and enjoy your festive winter manicure!
Gold Foil Flakes Design
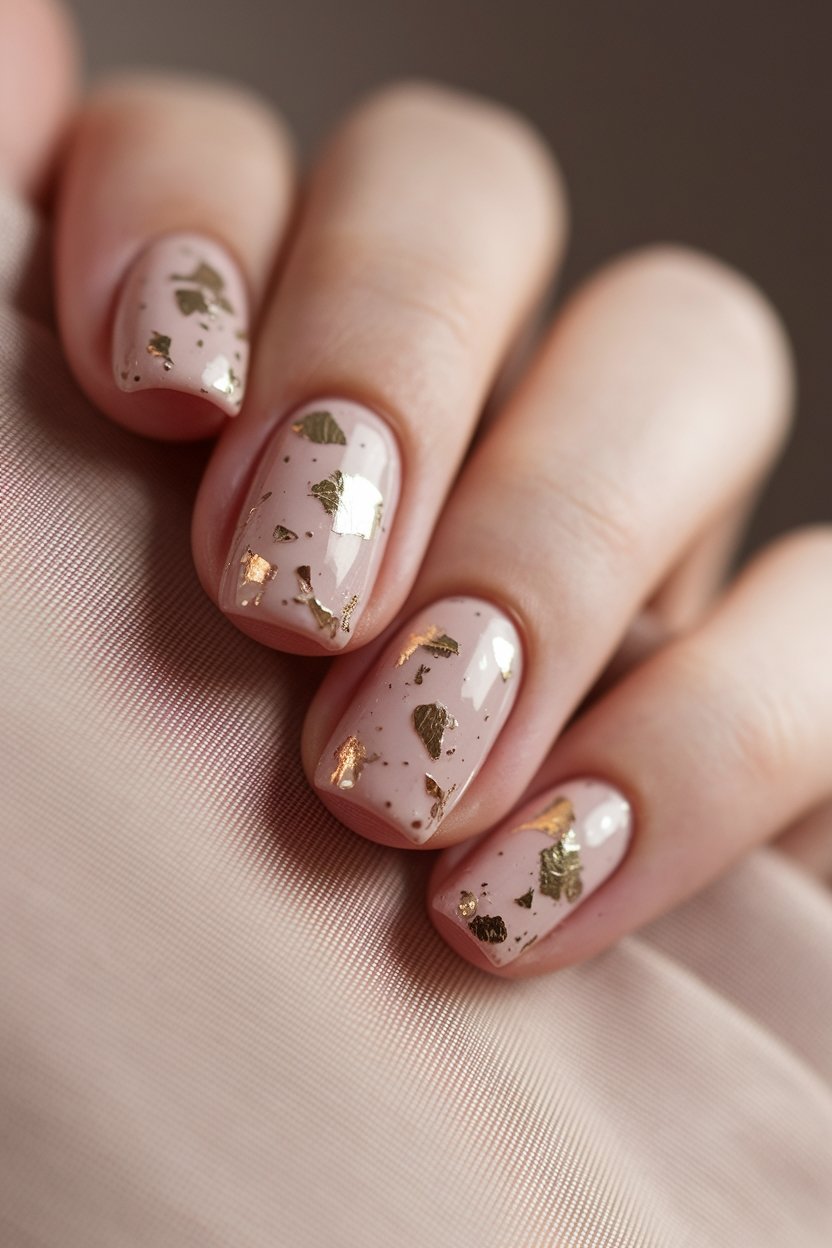
Gold Polish | White Polish | Silver Glitter Polish
How to Create This Look:
- Start by applying a base coat to protect your nails and allow it to dry completely.
- Choose a nail polish color as your base (like a classic gold or shimmering white) and apply one or two coats, letting each coat dry.
- Once your base is dry, grab a topcoat and apply it to your nails.
- Carefully take the gold foil flakes and gently dab them onto your nails—think of it as adding little golden leaves!
- Finish off with another layer of topcoat to seal the design and add extra shine.
- Enjoy your dazzling winter wonderland nails!
Gold Glitter French Tips

Gold Polish | Glitter Top Coat | Clear Coat
How to Create This Look:
- Start with clean, filed nails and apply a base coat to protect your nails.
- Choose a classic nude or soft pink polish for the base color and apply one or two coats, allowing it to dry completely.
- Once dry, take your gold polish and carefully paint the tips of your nails, creating a classic French tip shape.
- For added sparkle, apply a layer of glitter top coat over the gold tips.
- Seal your design with a clear coat for a glossy finish and to enhance the longevity of your manicure.
- Let it dry, and you’re all set to shine at your holiday gathering!
Gold Glittery Christmas Tree
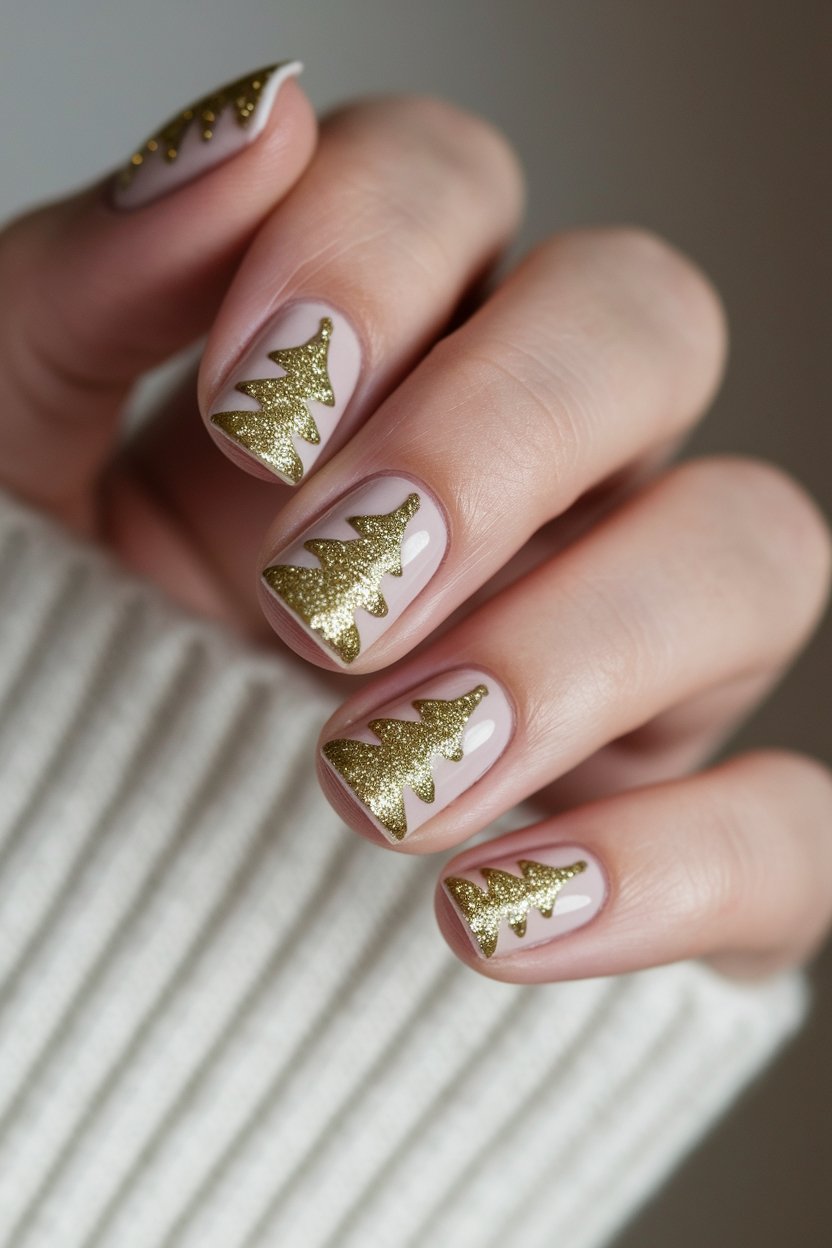
Gold Polish | Green Polish | Red Polish | Top Coat
How to Create This Look:
- Start with clean, manicured nails and apply a base coat to protect your nails.
- Paint your nails with a gold polish as the base color and let it dry completely.
- Using a thin nail brush or a dotting tool, create a Christmas tree shape in the center of your nail with green polish.
- Add small dots of red polish for ornaments on the tree.
- Once everything is dry, apply a layer of top coat to seal your design and add extra shine.
- Enjoy your festive, glittery nails and spread the holiday cheer!
Gold Glittery Candy Cane Stripes
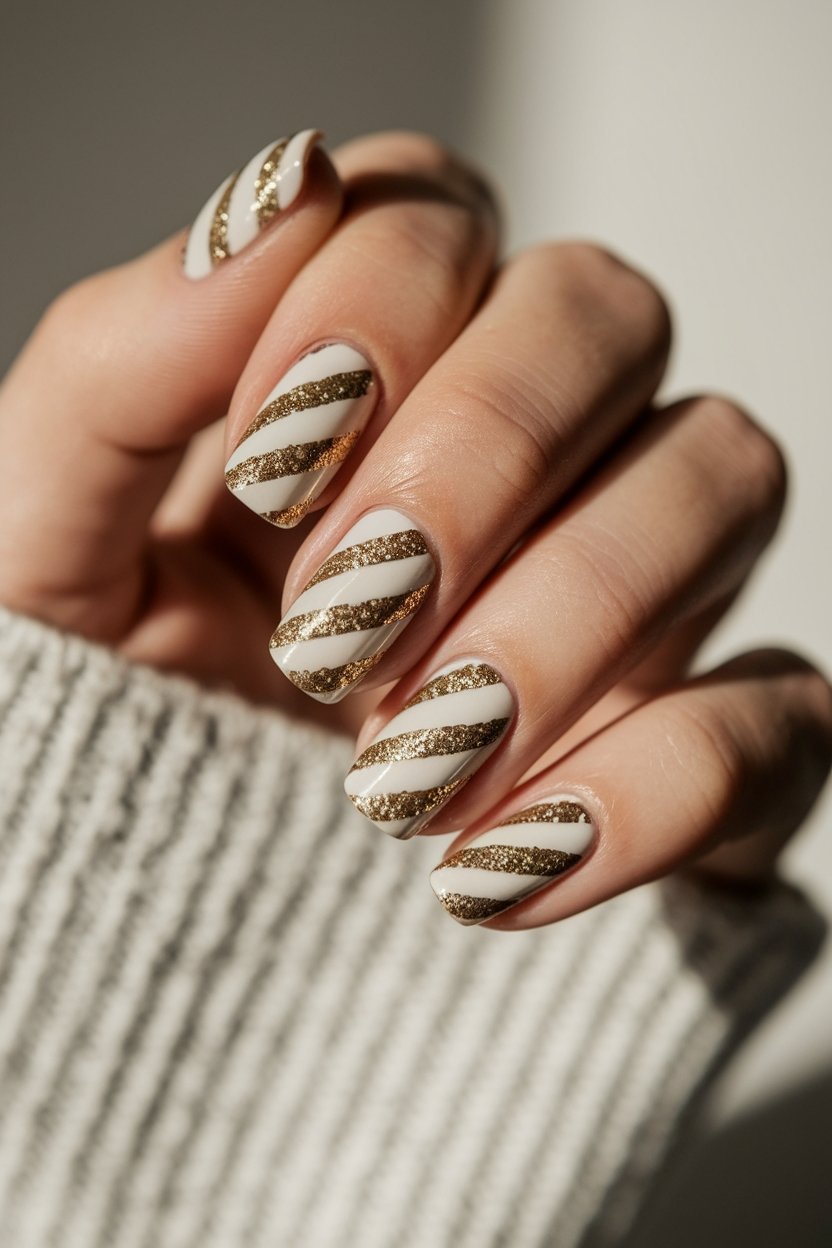
Gold Glittery Polish | Festive Red Polish | White Polish
How to Create This Look:
- Start with a base coat of your favorite festive red polish.
- Once dry, apply striping tape in diagonal lines to create the candy cane effect.
- Paint the exposed areas with white polish for a classic candy cane look.
- Carefully remove the striping tape before the polish dries.
- Finish with a layer of gold glitter polish over the white stripes for an eye-catching sparkle!
You’ll be twinkling like a holiday star!
Gold Glittery Star Accents

Gold Polish | Clear Top Coat | Gold Glitter Polish
How to Create This Look:
- Start with a clean set of nails and apply a base coat to protect them.
- Apply a layer of gold polish for a festive base.
- Once the gold polish is dry, use a dotting tool or a small brush to dab on gold glitter polish in star shapes.
- Seal the design with a clear top coat to add shine and longevity.
- Allow everything to dry completely, and voila! You have sparkling starry nails perfect for the holiday season!
Gold Glittery Reindeer Silhouettes
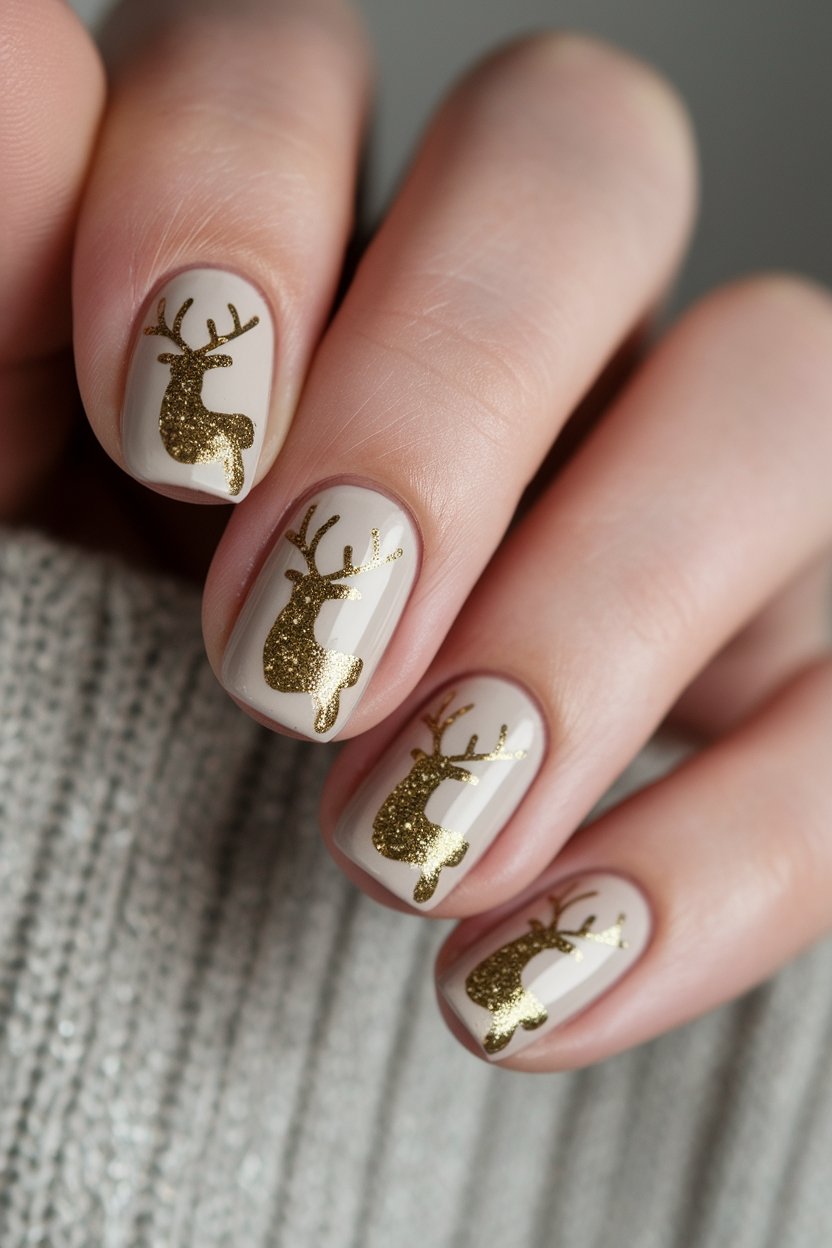
Gold Glitter Polish | Brown Polish | White Polish
How to Create This Look:
- Start with a base coat to protect your nails.
- Apply two coats of gold glitter polish for a dazzling base.
- Once dry, use a reindeer stencil and a brown polish to create adorable silhouettes.
- Add white polish details for a festive touch, like snowflakes or dots.
- Finish with a top coat to seal your design and add shine.
Get ready to flaunt your twinkling reindeer nails at every holiday event!
Gold Glittery Ornament Designs
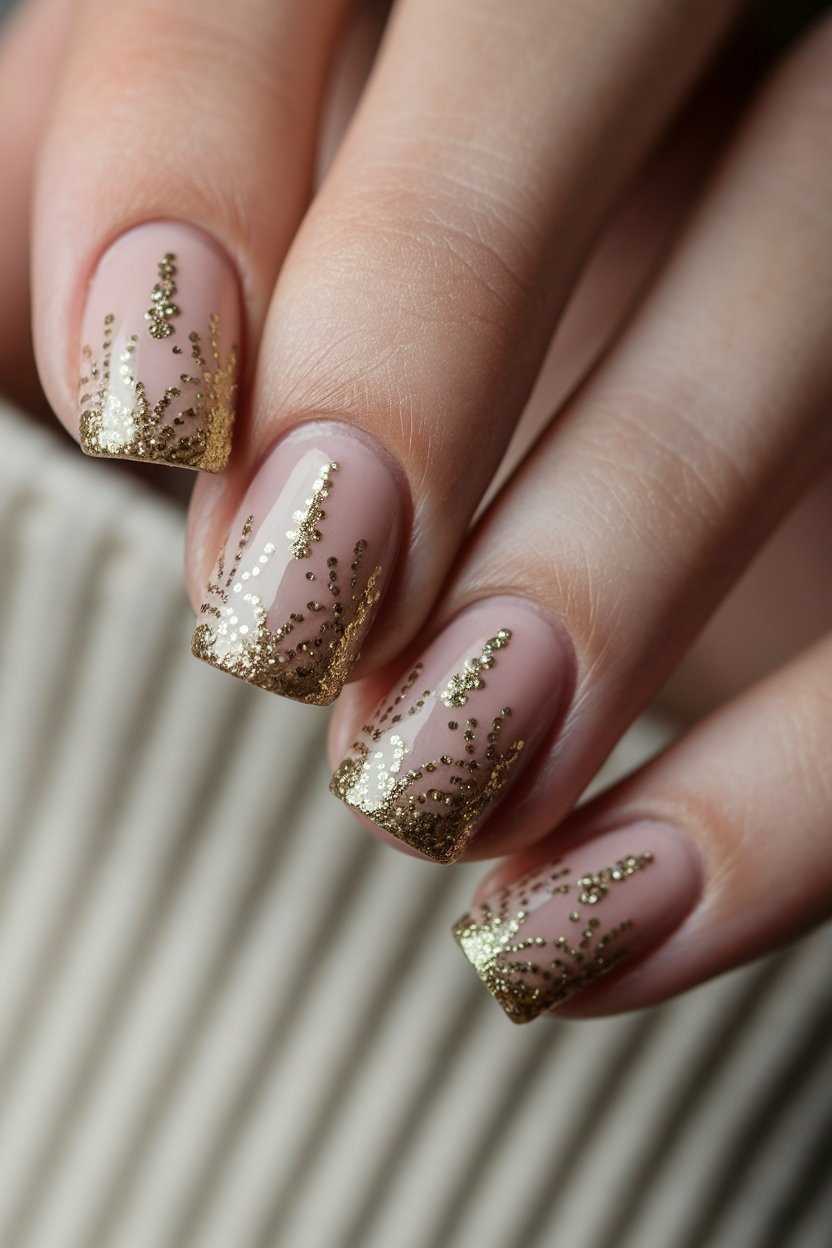
Gold Polish | Gold Glitter Polish | Clear Top Coat
How to Create This Look:
- Start with clean, manicured nails and apply a base coat to protect your natural nails.
- Choose a gold polish and apply a thin layer to each nail, ensuring even coverage.
- Once the gold polish is dry, take your gold glitter polish and dab it onto the tips of your nails for a gradient effect.
- For added sparkle, sprinkle a bit more glitter onto each nail while the polish is still wet.
- Finish off with a clear top coat to seal in the design and add shine.
- Allow your nails to dry completely, and get ready to show off your festive flair!
Gold Glittery Snowman Designs
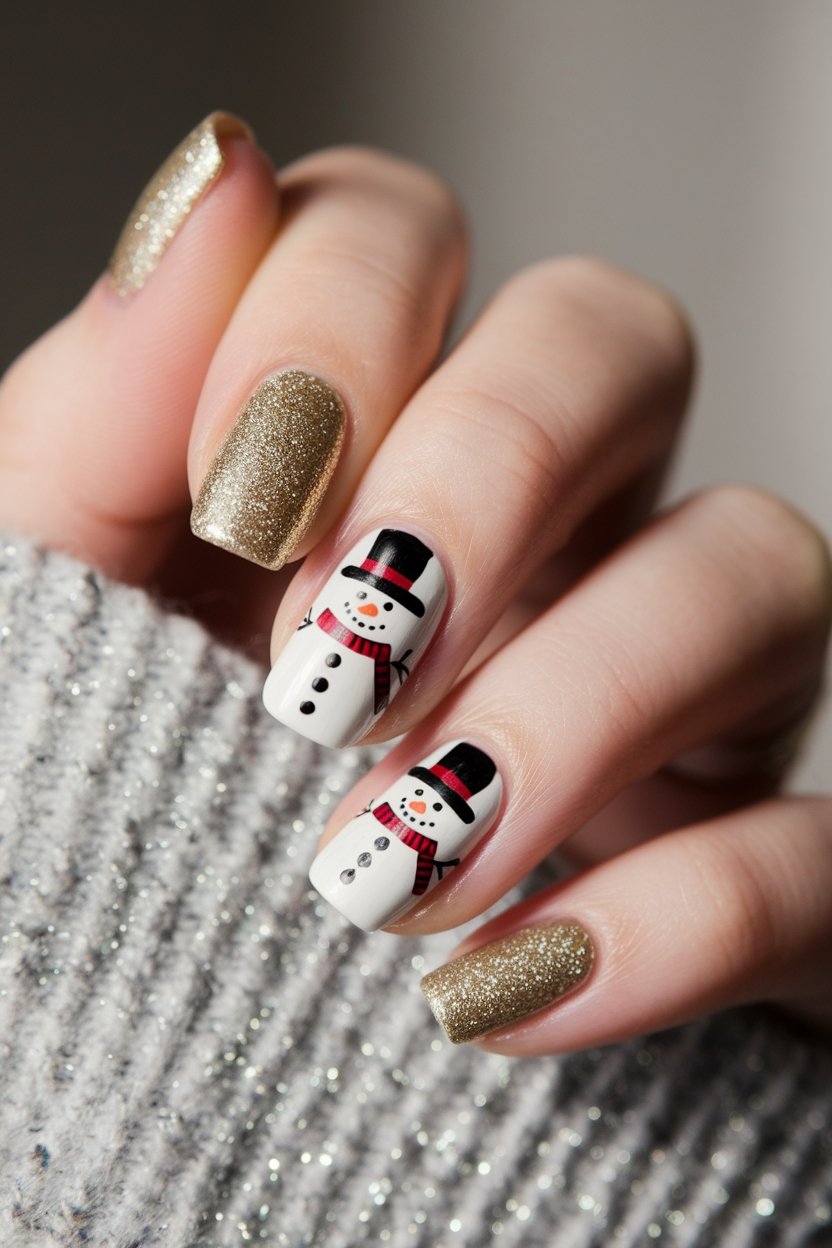
White Base Coat | Gold Glitter Polish | Orange Polish | Black Polish
How to Create This Look:
- Begin with a clean set of nails and apply a white base coat for a snowy backdrop.
- Once the base is dry, use a dotting tool or a small brush to create the shape of a snowman with gold glitter polish.
- Add tiny details like an orange polish carrot nose and a black polish for the eyes and buttons.
- Optionally, use a thin brush to paint a colorful scarf around the snowman’s neck.
- Finish with a top coat for shine and to seal your festive design!
Enjoy your sparkling holiday nails!
Gold Glittery Wreath Accents

Gold Polish | Green Glitter Polish | White Polish
How to Create This Look:
- Start with a clean set of nails and apply a base coat to protect your nails.
- Paint your nails with a gold polish as the base color for a festive vibe.
- Using a fine nail brush or a dotting tool, create tiny wreath shapes with green glitter polish on each nail.
- Add small dots of white polish to represent the decorations on the wreaths.
- Finish off with a top coat to seal the design and add extra shine.
- Allow your nails to dry completely and enjoy your sparkling holiday look!
Gold Glittery Ombre
Gold Glitter Polish | Black Polish | Glossy Topcoat
How to Create This Look:
- Start with a base coat to protect your nails.
- Apply one or two coats of gold glitter polish for that dazzling effect.
- Use a thin nail art brush or a dotting tool to add small black dots to mimic ribbons on your gift boxes.
- Finish with a glossy topcoat to seal your design and add extra shine.
Now your nails can sparkle as much as the glittery gift boxes!
Gold Twinkle Starry Night Effect

Navy Blue Polish | Gold Glitter Polish | Top Coat
How to Create This Look:
- Start with clean, dry nails and apply a base coat for protection.
- Paint your nails with a deep navy blue polish and let it dry completely.
- Once dry, take your gold glitter polish and gently dab it onto your nails, focusing on the tips and center to mimic a starry effect.
- Apply a second layer of gold glitter for a more intense sparkle.
- Finish with a top coat to seal in the design and add shine.
- Allow your nails to dry fully and admire your magical starry night!
Gold Glittery Angel Designs
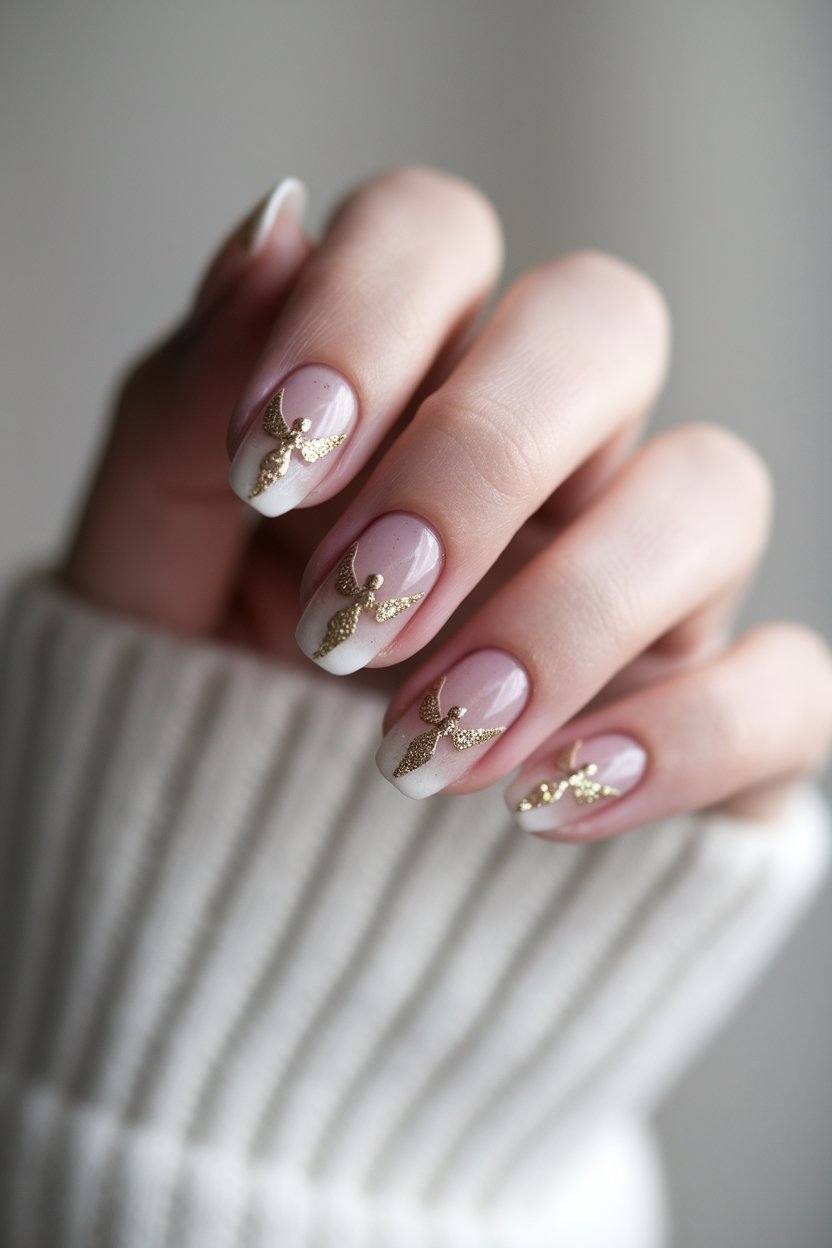
Gold Base Coat | Glittery Gold Polish | White Polish | Clear Top Coat
How to Create This Look:
- Start with a base coat to ensure a smooth and even foundation.
- Apply a layer of glittery gold polish to create that angelic shimmer.
- For the wings, either use tiny angel wing stickers or carefully paint them on with white polish.
- Finish with a clear top coat for added shine and protection.
Now you have a heavenly nail design that sparkles!
Conclusion
So there you have it, my festive friends! Gold Christmas nails are like tiny holiday treasures that sparkle on your fingertips, bringing joy with every gesture. If you go for that dazzling ombre or cute snowflake accents, you’ll be shining brighter than a star on top of the tree. Remember, it’s all about having fun and showing off your holiday spirit. So grab your polish and let your creativity flow… your nails are ready to spread some cheer!