While some folks are dreaming of a white Christmas, I’m all about those vibrant green nails that scream holiday cheer!
These shades of emerald colors get me in the festive spirit. Imagine adding glittery accents or cute holly designs… it’s like wearing a Christmas tree on your fingertips!
If you’re curious about how to jazz up your nails this season, let’s explore some fabulous ideas together!
Trending This Season
- Start with a base coat on clean, trimmed nails for protection before applying green polish.
- Try emerald green with gold flakes for a festive, shimmering effect.
- Create holly leaf designs using emerald green polish and add red dots for berries.
- Use snowflake stencils on a green base for a wintery nail art design.
- Finish with a top coat to enhance shine and durability of your Christmas nails.
Emerald Green Glitter Tips
Emerald Green Polish | Gold Glitter Polish | Clear Top Coat
How to Create This Look:
- Start with clean, dry nails and apply a base coat for protection.
- Paint your nails with a solid coat of emerald green polish and let it dry completely.
- Using a small brush or a sponge, apply the gold glitter polish to the tips of your nails for that sparkling effect.
- Allow the glitter to set for a few minutes before applying a clear top coat to seal in the design and add shine.
- Finish with a quick-dry spray if desired, and enjoy your festive, glittery nails!
Holly Leaf Designs

Emerald Green Polish | Bright Red Polish | Snow White Polish
How to Create This Look:
- Start with a clean base coat to protect your nails.
- Apply two coats of emerald green polish as your base color.
- Using a fine nail brush or a dotting tool, paint small holly leaves in varying sizes.
- Add bright red dots for the berries at the tips of the leaves.
- For a festive touch, add a few white dots around the design to represent snow.
- Finish with a top coat for shine and durability!
- Let your nails dry completely to enjoy your mini Christmas tree look!
Glittery Pinecone Accents
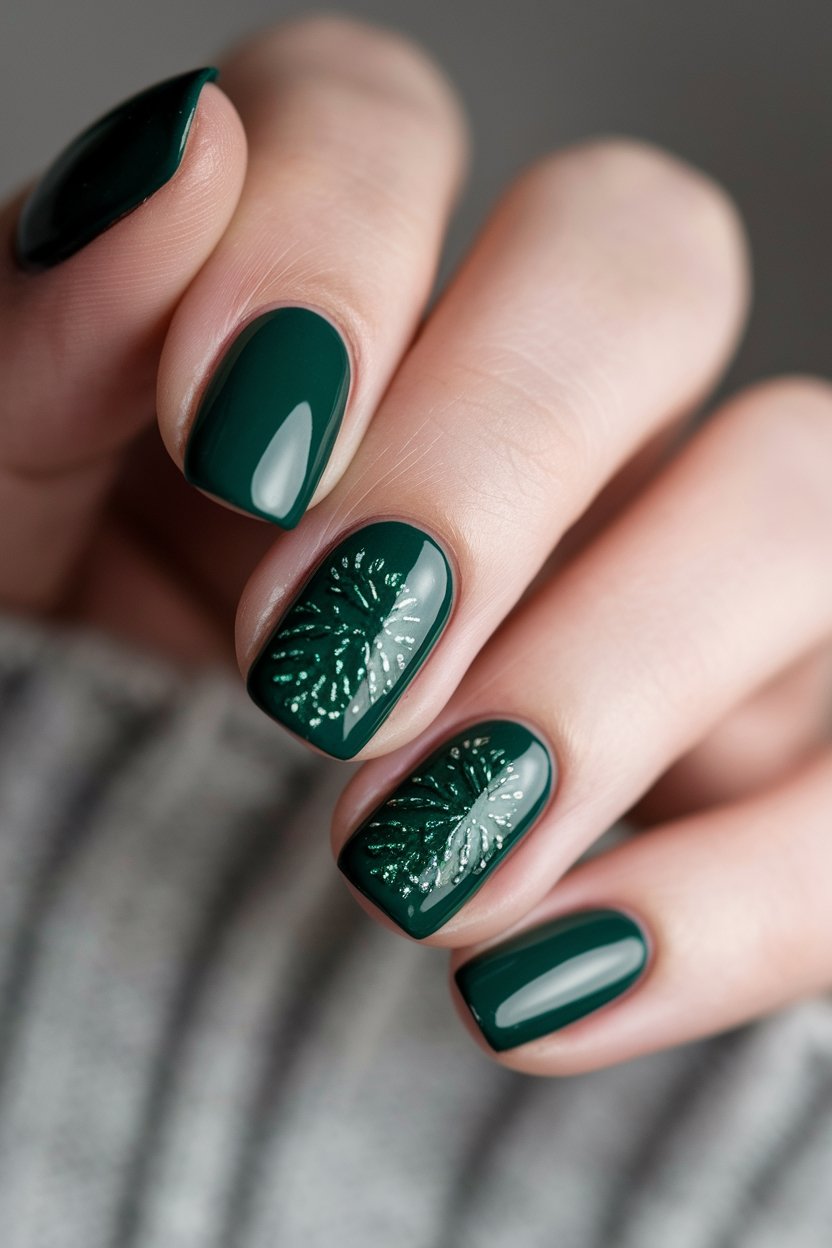
Gold Polish | Bronze Glitter Polish | Dark Green Polish
How to Create This Look:
- Start with a clean set of nails and apply a base coat to protect them.
- Paint your nails with a coat of gold polish for a warm, shimmering base.
- Once the gold polish is dry, use a small brush or a dotting tool to apply bronze glitter polish in a random pattern to mimic the texture of pinecones.
- For added depth, use a dark green polish to create small accents or stripes on some nails, representing pine needles.
- Finish with a clear top coat to seal in the glitter and give your nails a glossy shine.
- Allow your nails to dry completely, and get ready to show off your festive manicure!
Snowflake Stencils on Green
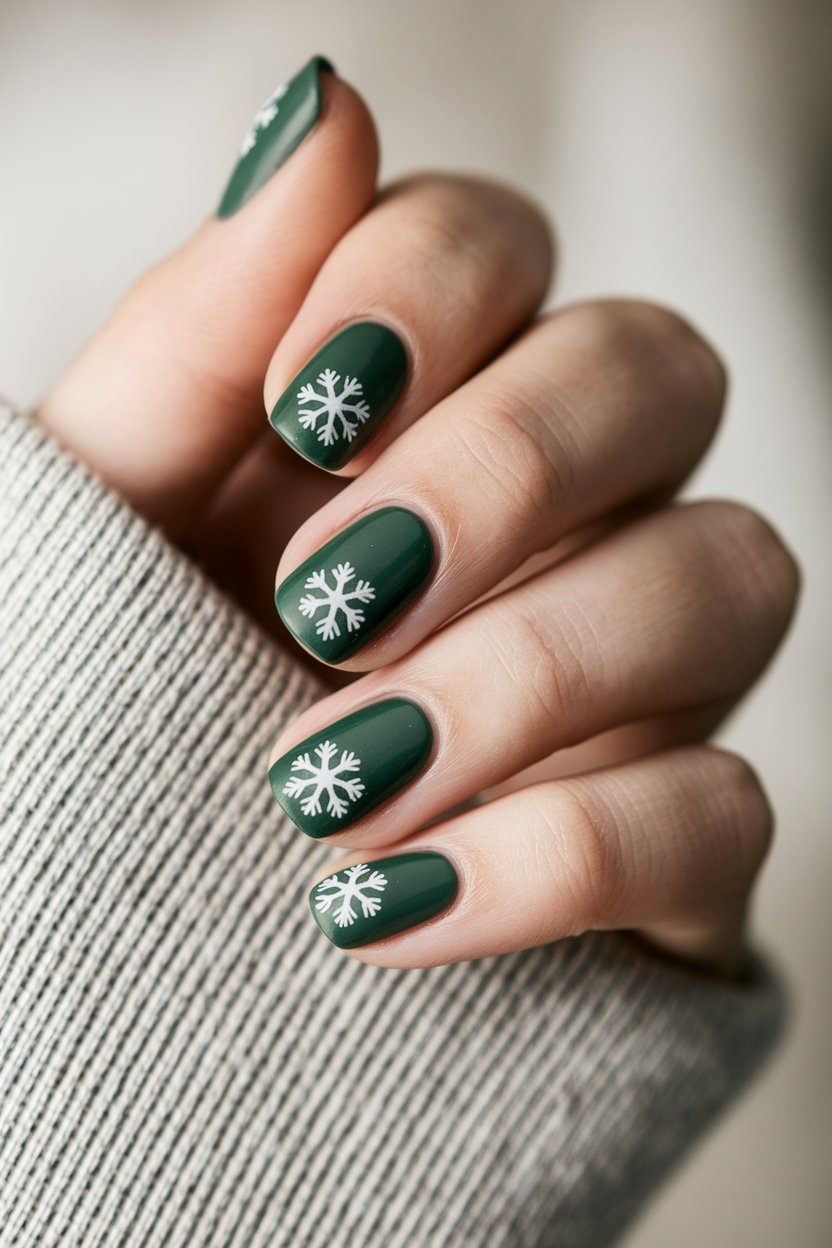
Emerald Green Polish | White Polish | Silver Glitter Polish
How to Create This Look:
- Start with a base coat to protect your nails.
- Apply two coats of emerald green polish for a rich background.
- Allow the green polish to dry completely.
- Using snowflake stencils, place them on your nails where you want the designs.
- Use white polish to fill in the stencils, creating beautiful snowflake patterns.
- Carefully peel off the stencils while the polish is still wet for clean edges.
- Once the white polish is dry, add a touch of silver glitter polish for some sparkle.
- Finish with a top coat to seal in your design and add shine. Enjoy your festive nail art!
Frosted Green Ombre Effect
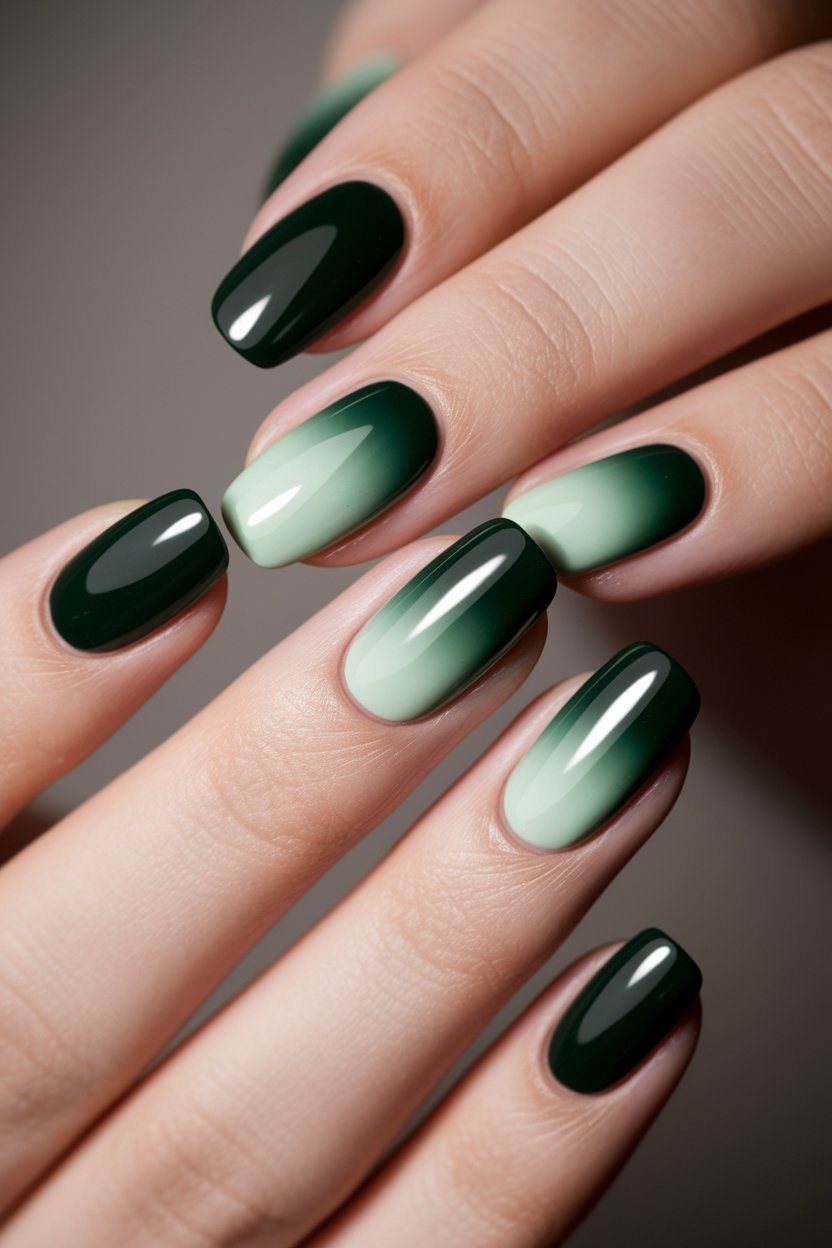
Frosted Green | Forest Green | Mint Green | White Glitter
How to Create This Look:
- Start with a base coat to protect your nails.
- Apply two coats of the forest green polish as your base color.
- Using a makeup sponge, dab on the mint green polish at the tips of your nails to create the ombre effect.
- Blend the mint green down towards the center of the nail for a soft gradient.
- Add a touch of white glitter polish at the tips for a frosted finish.
- Seal your design with a top coat for shine and longevity. Enjoy your winter wonderland nails!
Glittery Christmas Tree Motifs

Green Polish | Gold Glitter Polish | White Polish
How to Create This Look:
- Start with a base coat to protect your nails.
- Apply two coats of green polish for a festive background.
- Use a small brush or a dotting tool to create tiny Christmas tree shapes with white polish.
- Add gold glitter polish on top of the trees for that sparkling effect.
- Finish with a top coat to seal in your design and add shine.
Now your nails will dazzle at every holiday gathering!
Glittery Reindeer Silhouettes
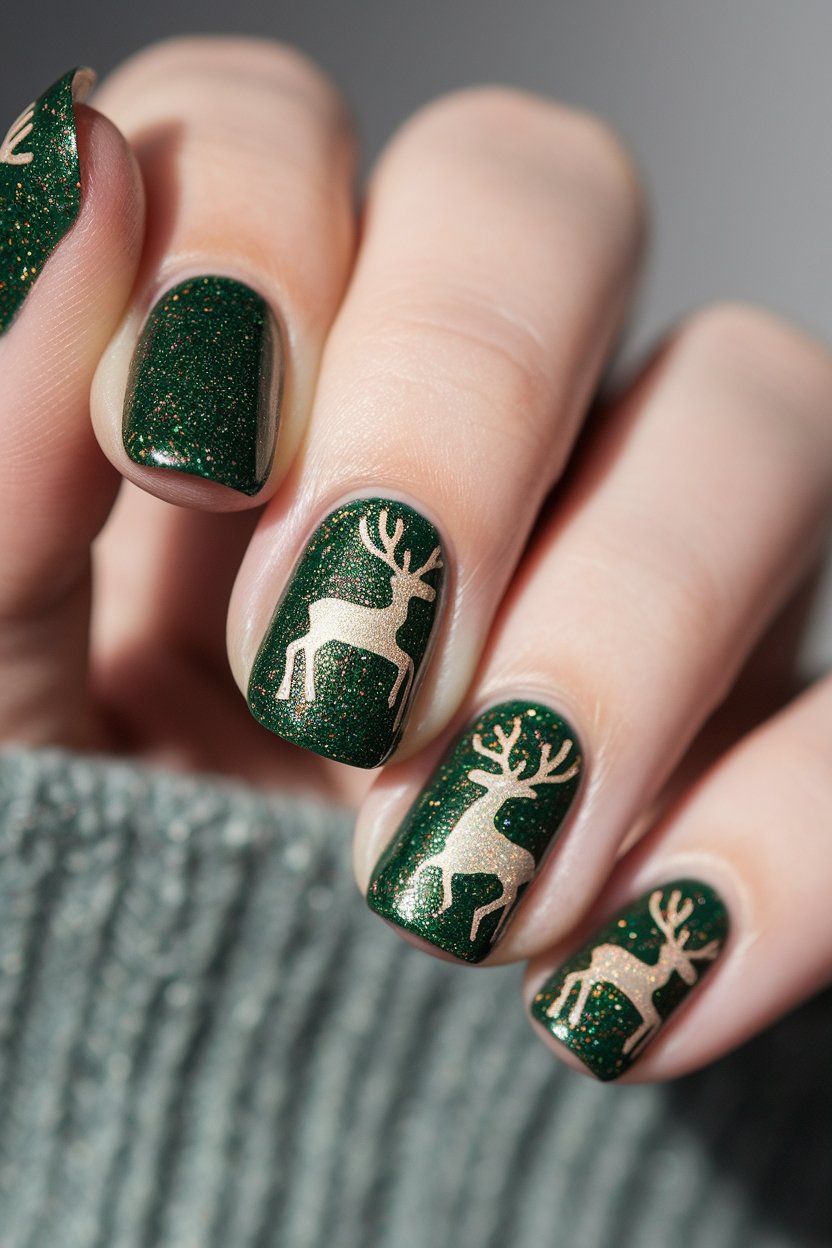
Nail Polish Colors: Deep Red Polish | Sparkly Gold Polish | Forest Green Polish
How to Create This Look:
- Start with a base coat to protect your nails.
- Apply your chosen nail polish color as the base (deep red, sparkly gold, or forest green).
- Let the base color dry completely.
- Use a small nail art brush or a dotting tool to create reindeer silhouettes with the gold polish.
- Add details like antlers and a cute little nose using the same or a contrasting color.
- Finish with a top coat for extra shine and to seal in your design.
- Show off your festive nails and spread the holiday cheer!
Glittery Christmas Ornament Designs
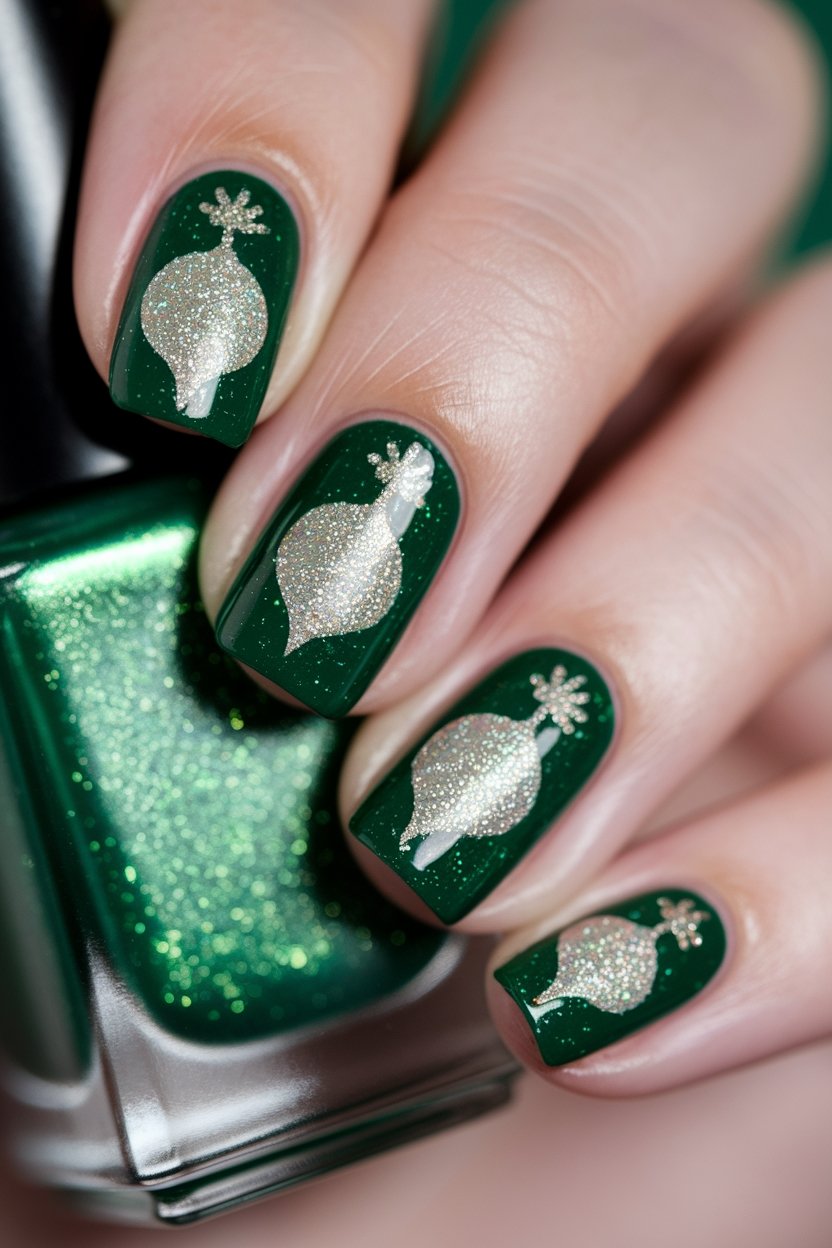
Bright Red Polish | Sparkling Gold Glitter Polish | Emerald Green Polish | Silver Polish
How to Create This Look:
- Start with a clean, dry nail surface and apply a base coat to protect your nails.
- Choose your base color (e.g., bright red) and apply one or two coats, allowing to dry completely.
- Using a thin brush or a dotting tool, create small circles with your glitter polish (e.g., sparkling gold) to represent ornaments on your nails.
- For added flair, layer different colors of glitter (like emerald green and silver) to create a festive, multi-colored ornament effect.
- Finish with a top coat to seal your design and add shine.
- Let dry and show off your dazzling holiday nails!
Emerald Green Marble Swirls
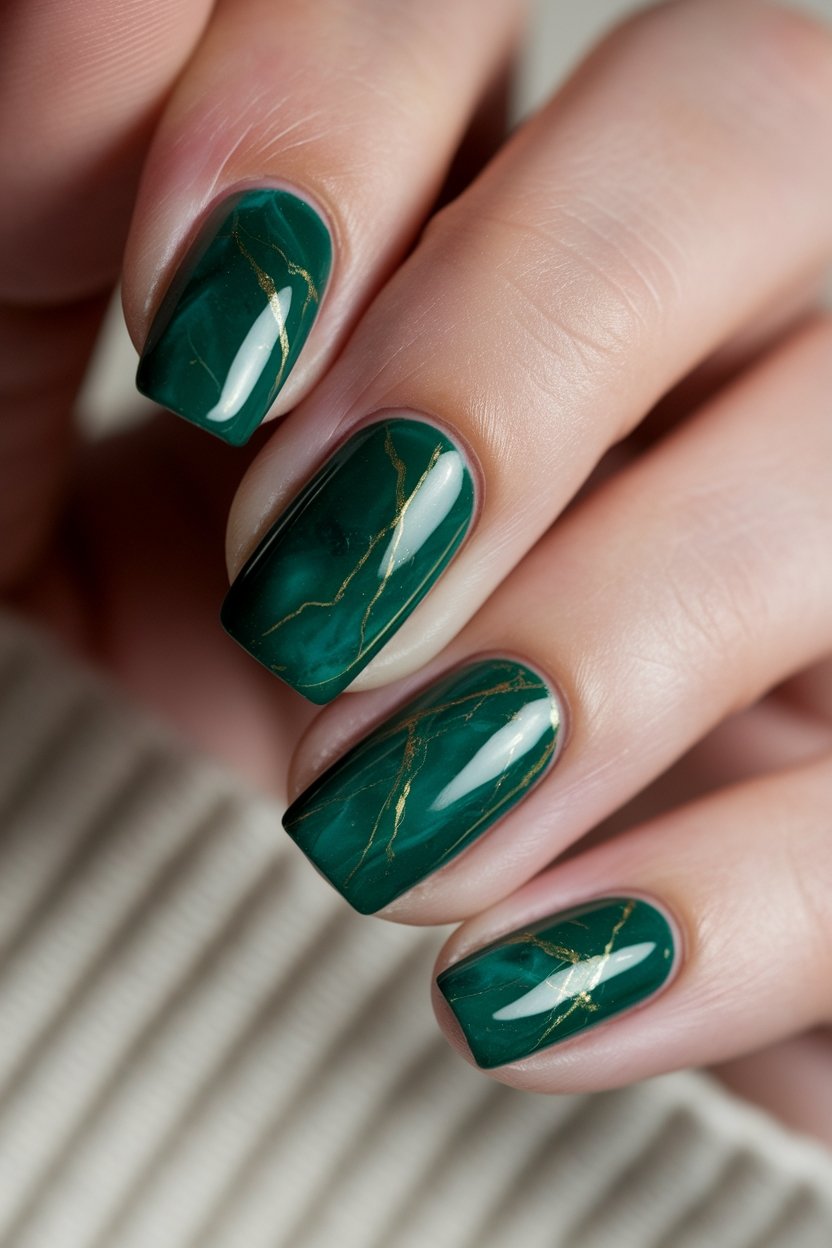
Emerald Green Polish | Light Green Polish | White Polish
How to Create This Look:
- Start with a base coat to protect your nails.
- Apply a coat of emerald green polish as your base color.
- Once dry, take a small amount of light green polish and place a few dots on the emerald base.
- Use a toothpick or a nail art brush to swirl the light green into the emerald polish, creating a marbled effect.
- Add small dots of white polish for added contrast and dimension.
- Finish with a top coat to seal in your design and add shine.
- Allow your nails to dry completely, and enjoy your chic holiday nails!
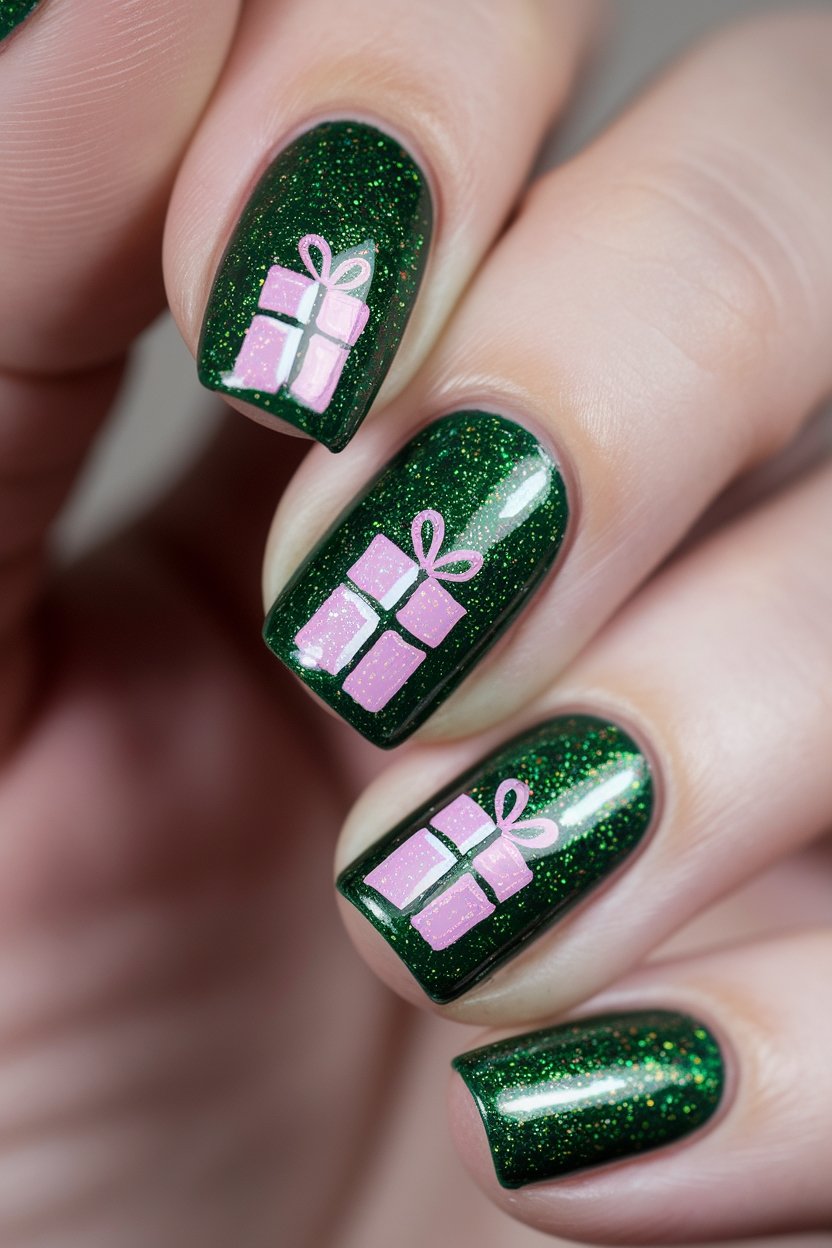
Glittery Green Gift Boxes
Bright Green Polish | Shimmering Gold Polish | Sparkly Top Coat
How to Create This Look:
- Start with a clean nail surface and apply a base coat to protect your nails.
- Paint your nails with a bright green polish, making sure to apply two coats for an even finish.
- Once the green polish is dry, use a thin brush or a nail art pen to add shimmering gold accents, like stripes or dots.
- Create tiny bow designs on a couple of your nails using the gold polish for a festive touch.
- Finish off with a sparkly top coat to add extra shine and seal in your design.
- Allow your nails to dry completely and enjoy your glittery green gift box nails!
Green Christmas Nails
If you’re rocking emerald green glitter tips or sporting a chic matte base, there’s a design for everyone to flaunt this holiday season.
Let’s get those nails ready for parties, family gatherings or just cozy nights in.
Remember, your nails can be just as sparkly as your holiday spirit, so let’s make ‘em shine! Now grab your polish and get creative—because who doesn’t want to be the nail art star at Christmas?