I love the idea of creating White Christmas nails, they can be so much fun to play with.
Delicate snowflakes or sparkly icicles on your fingertips… it’s like wearing a winter wonderland! Stick around, because I’m about to share some cool designs that’ll make your nails the star of the holiday season.
Trending This Season
- Start with a clean base coat on nails for protection before applying any nail art.
- Use crisp white polish as a base for a classic snowy effect on nails.
- Incorporate silver glitter polish to add a festive sparkle to your white Christmas nails.
- Create snowflake designs with light blue polish for a winter wonderland vibe.
- Finish with a clear top coat to seal your design and add extra shine.
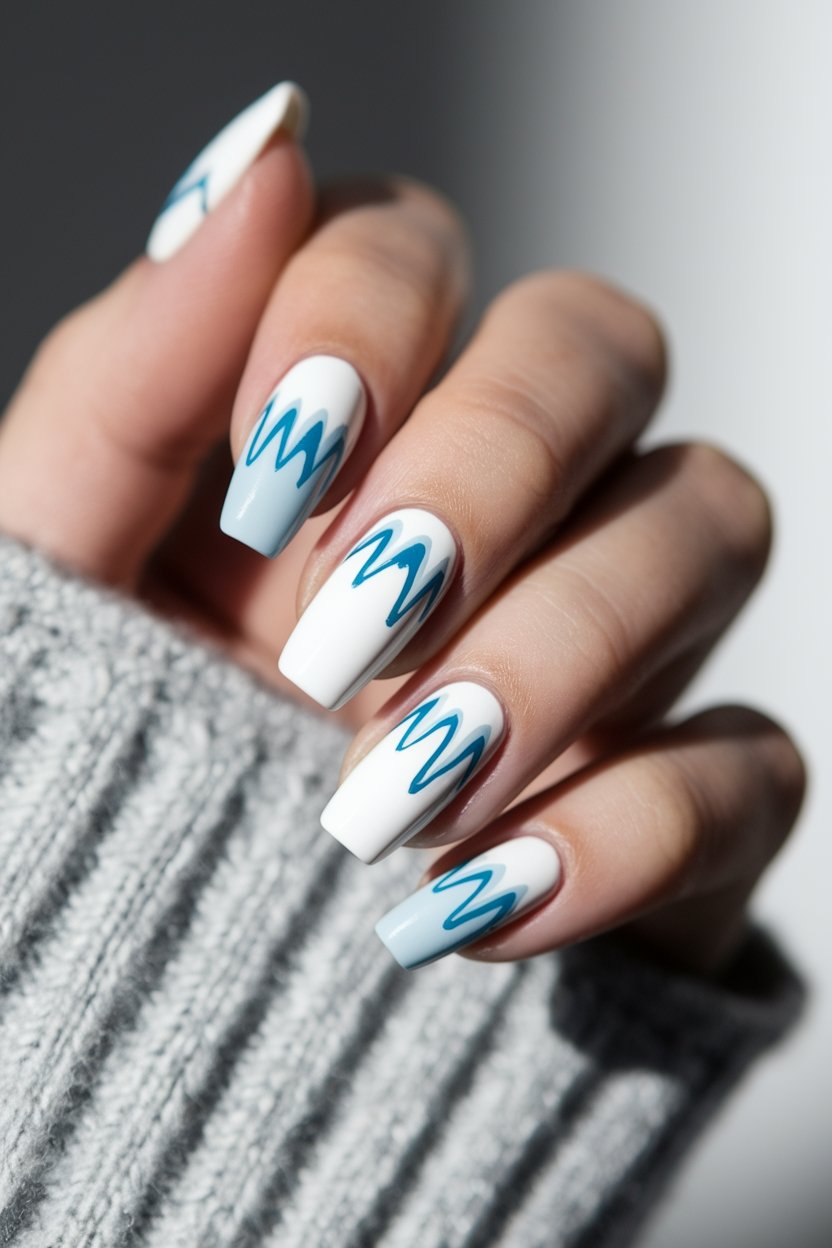
Snowflake Accents on White Nails
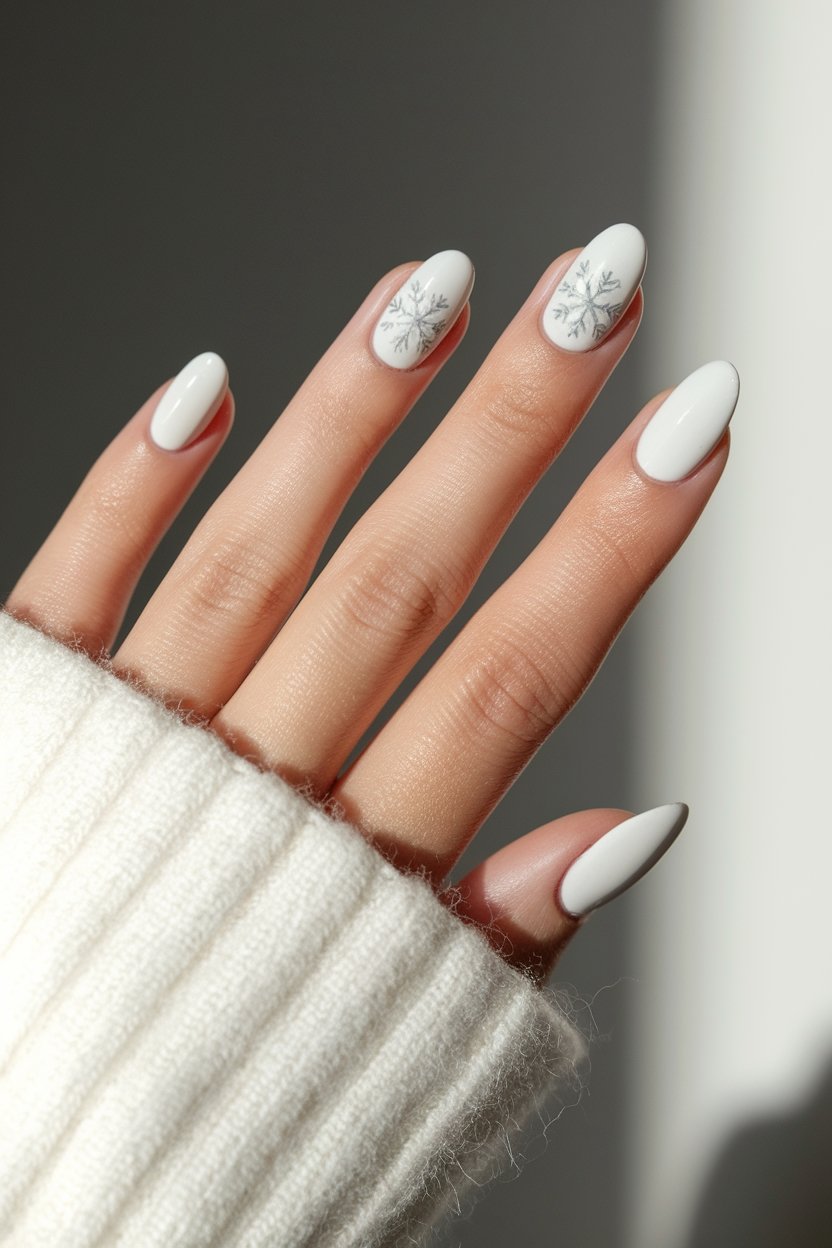
White Polish | Light Blue Polish | Silver Glitter Polish
How to Create This Look:
- Start with a clean set of nails and apply a base coat to protect your nails.
- Paint your nails with a crisp white polish and let it dry completely.
- Using a fine brush and light blue polish, create small snowflake designs on each nail.
- Add accents with silver glitter polish to enhance the winter wonderland effect.
- Finish with a top coat for a glossy shine and to seal your designs.
- Show off your festive nails and enjoy the compliments at your holiday party!
Glittery Frosted Tips
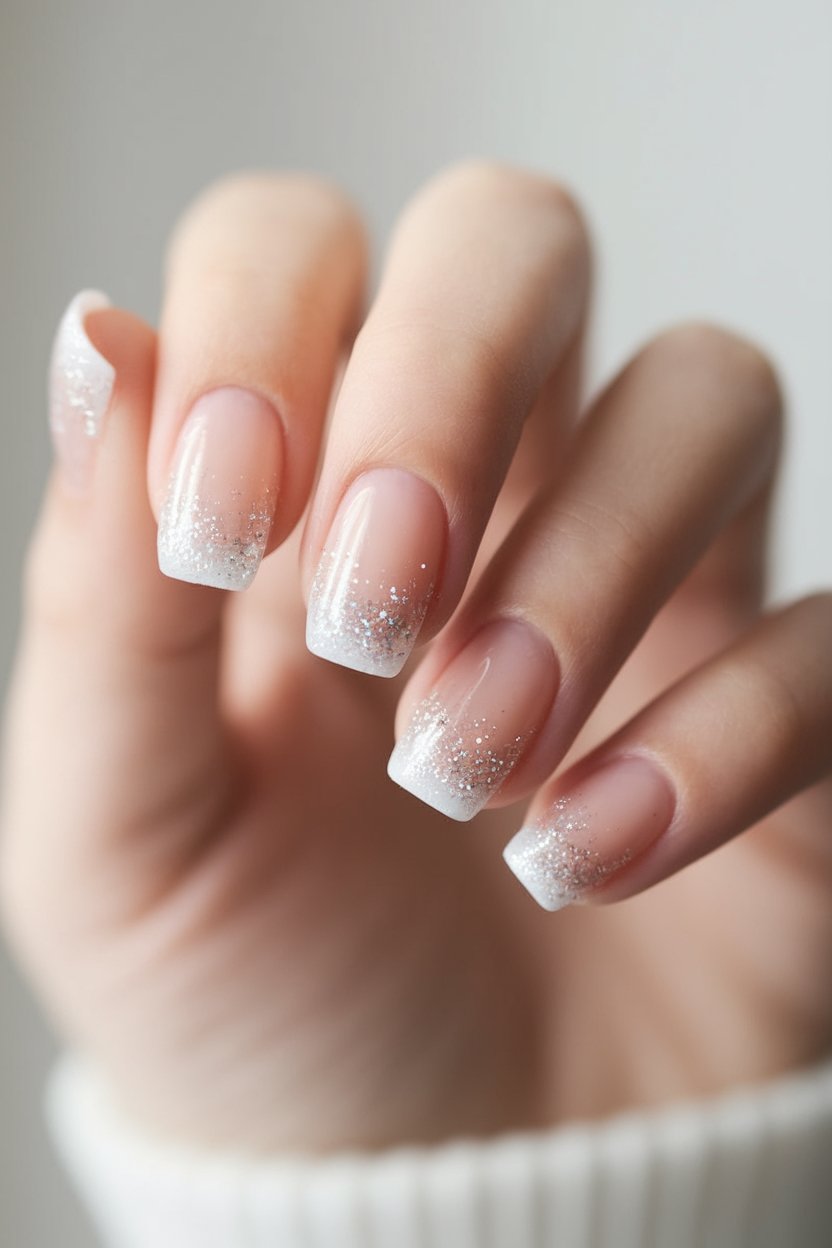
Glittery Frosted Tips | Icy Blue Polish | Silver Glitter Polish | White Polish
How to Create This Look:
- Start with clean, trimmed nails and apply a base coat to protect your nails.
- Paint your nails with two coats of icy blue polish for a frosty base.
- Allow the blue polish to dry completely.
- Using a small brush or a sponge, apply silver glitter polish to the tips of your nails, creating a gradient effect.
- For added sparkle, lightly dab some white polish at the very tips and blend it with the glitter.
- Finish with a top coat to seal in your design and add shine.
- Let everything dry, and you’re ready to show off your winter wonderland nails!
Icy Blue Ombre Effect

Icy Blue Polish | Frosty Blue Polish | Deep Ocean Blue Polish
How to Create This Look:
- Start with a clean nail surface and apply a base coat for protection.
- Paint the tips of your nails with a light blue polish, creating a smooth gradient.
- Using a makeup sponge, dab the profound blue polish at the base of your nails, blending it into the light blue.
- Repeat the sponging technique until you achieve your desired ombre effect.
- Finish off with a top coat for shine and to seal your look.
- Allow your nails to dry completely and admire your winter sky-inspired nails!
Frosted White Glitter Swirls
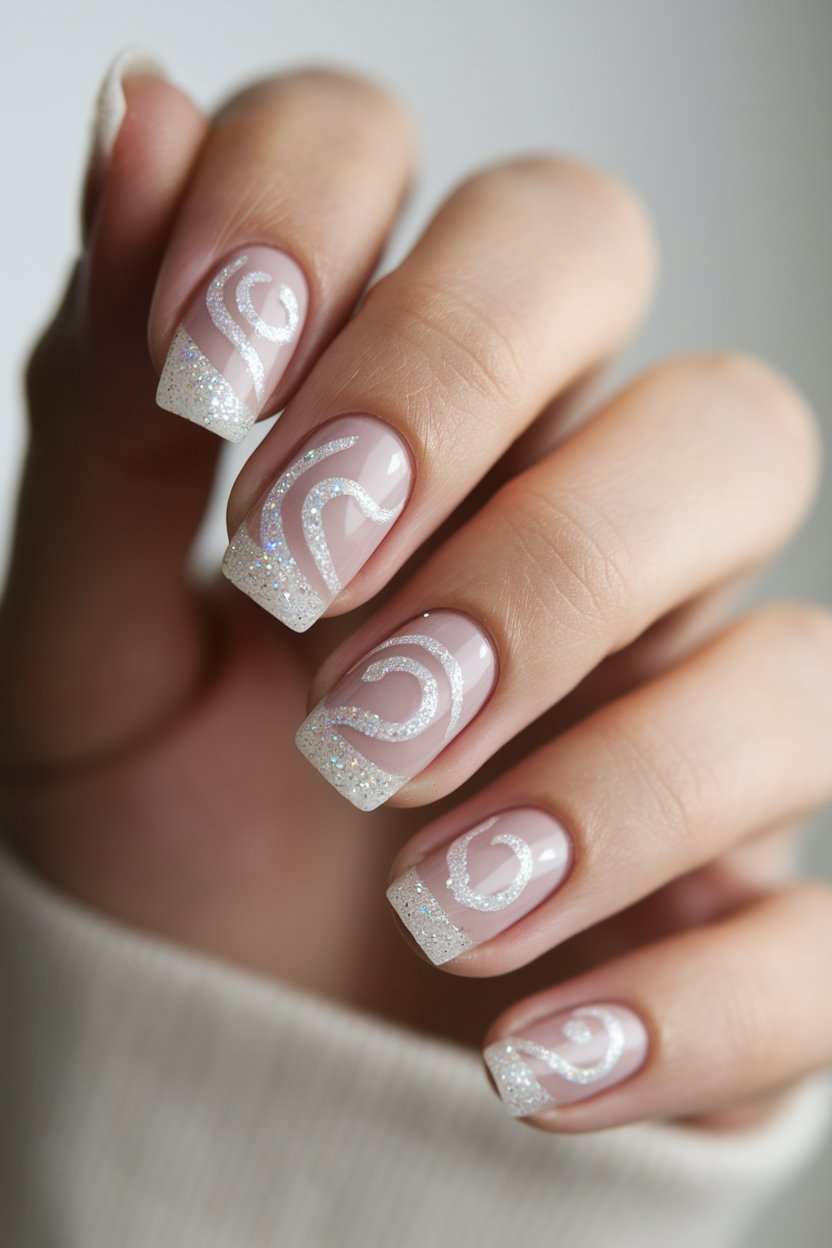
Frosted White Polish | Silver Glitter Polish | Clear Top Coat
How to Create This Look:
- Start with clean, dry nails and apply a base coat for protection.
- Apply one or two coats of frosted white polish, allowing each layer to dry completely.
- Take a silver glitter polish and gently swirl it onto the tips of your nails for a frosted effect.
- Finish with a clear top coat to seal in the glitter and add extra shine.
- Let it dry completely, and admire your magical winter wonderland nails!
Snowy Pine Tree Designs
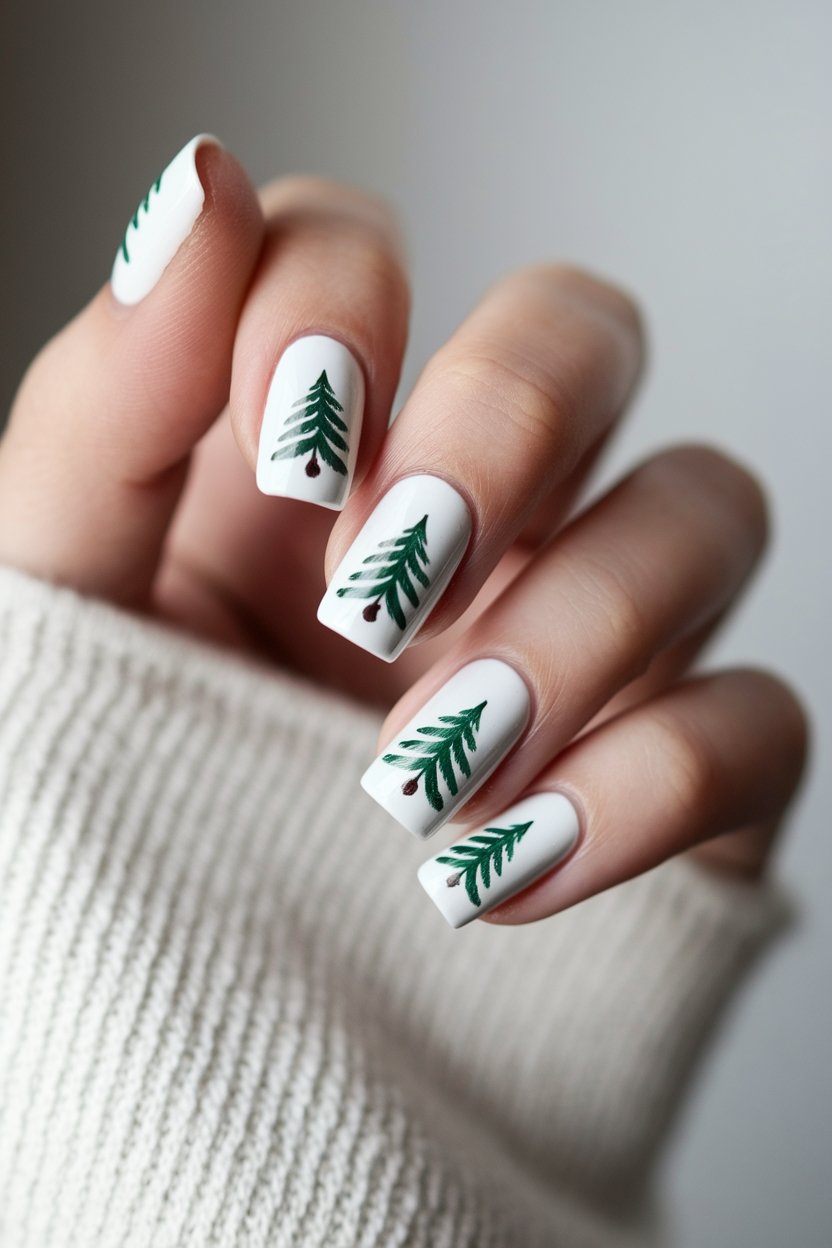
Green Polish | White Polish | Clear Top Coat
How to Create This Look:
- Start with a base coat to protect your nails and apply a coat of green polish as the base for your trees.
- Once dry, use a thin brush or a dotting tool to paint tiny pine tree shapes with the green polish.
- Add white dots or small snowflake designs using the white polish for that cozy winter vibe.
- Finish with a clear top coat to seal in your festive design and add shine.
- Don’t fret about achieving perfection; embrace the natural imperfections of your snowy trees!
Silver Starry Night Design
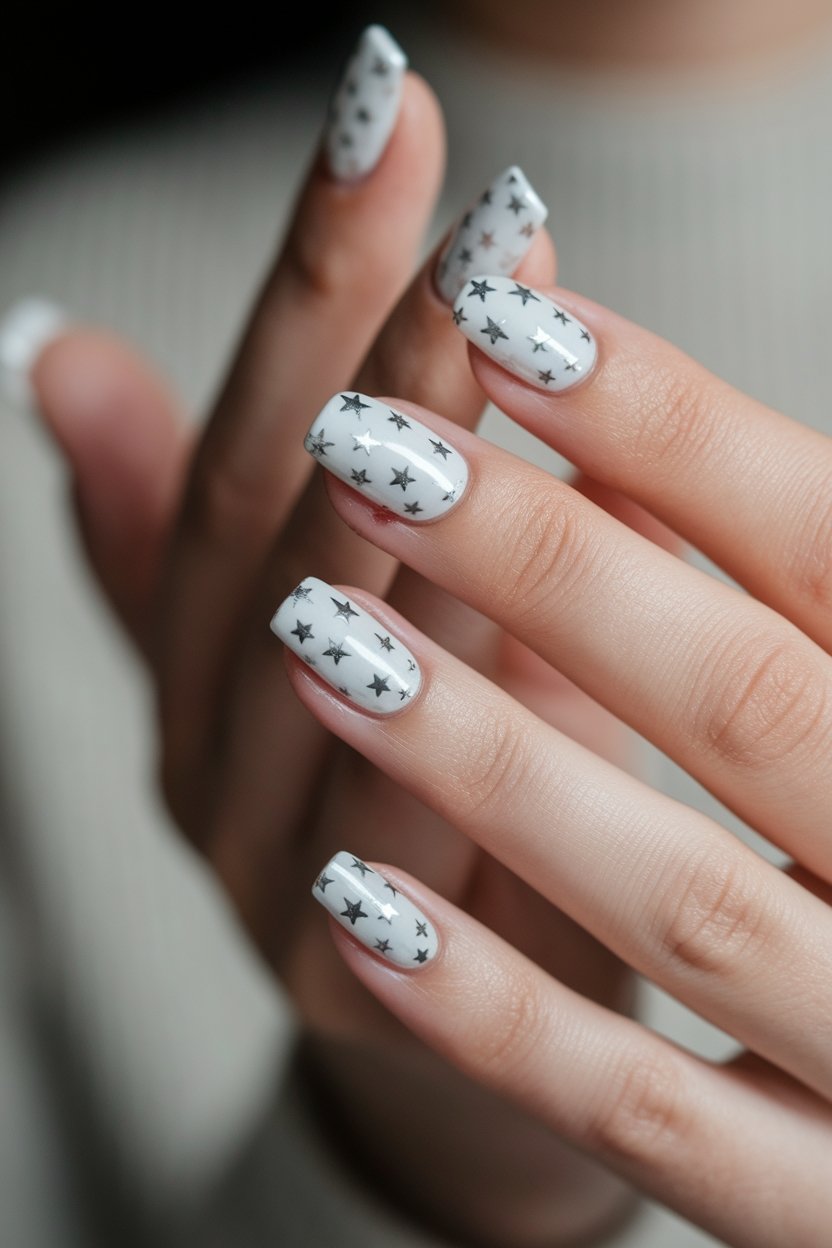
Silver Starry Night Design
Navy Blue Polish | Silver Glitter Polish | Clear Top Coat
How to Create This Look:
- Start with clean, dry nails and apply a base coat to protect your natural nails.
- Paint all your nails with the navy blue polish, ensuring even coverage. Let it dry completely.
- Using a dotting tool or a fine brush, create small silver stars on your nails with the silver glitter polish. You can make them different sizes for a more dynamic look.
- For added sparkle, you can also add tiny silver dots around the stars.
- Once the design is dry, seal it with a clear top coat to give it a glossy finish and prolong the wear.
- Enjoy your beautiful Silver Starry Night nails and get ready to shine through the winter!
Candy Cane Stripes
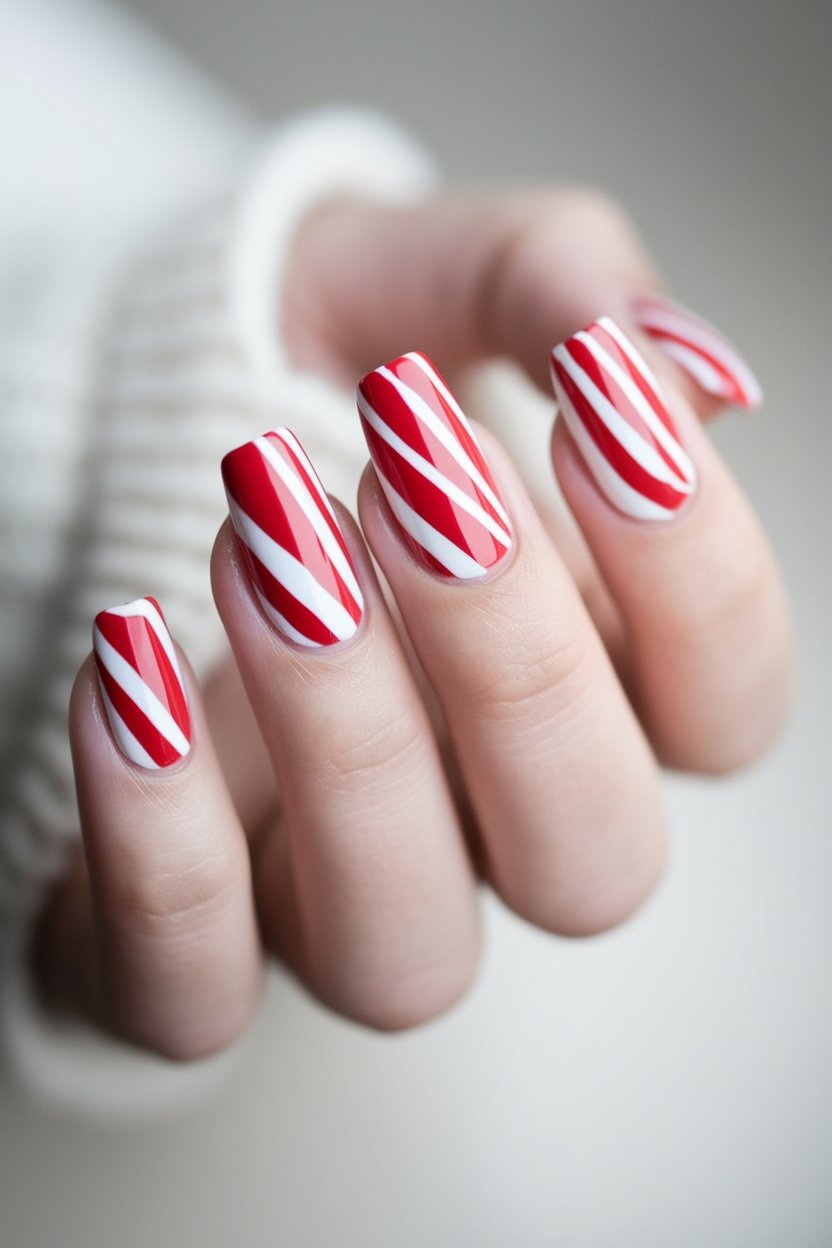
Red Polish | White Polish
How to Create This Look:
- Start with a base coat to protect your nails and help the polish adhere.
- Once the base coat is dry, apply two coats of white polish for a solid background.
- Using a thin nail art brush or striping tape, paint diagonal lines with red polish across your nails.
- Allow the red lines to dry completely before adding a top coat for shine and durability.
- Show off your festive Candy Cane Stripes and enjoy the compliments!
Frosty White Marble Effect
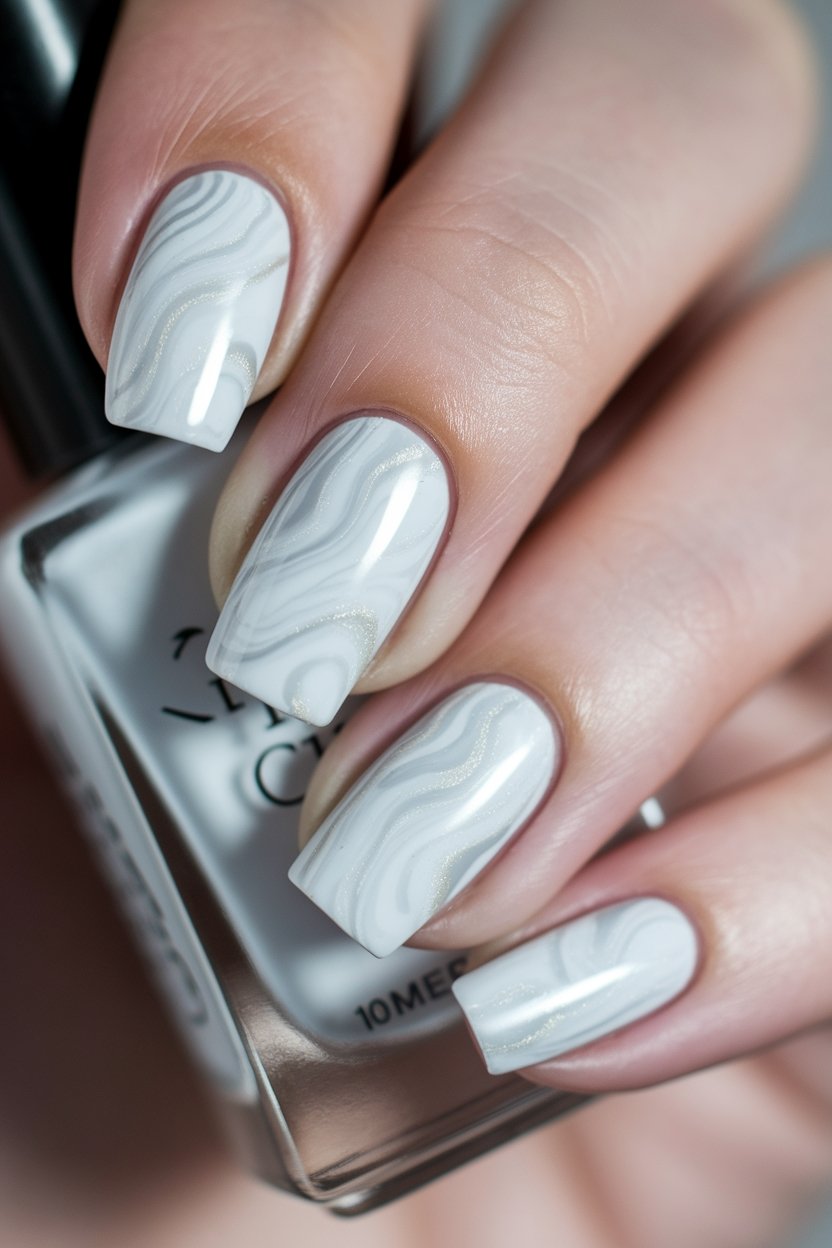
Frosty White Polish | Gray Polish | Silver Polish
How to Create This Look:
- Start with a clean set of nails and apply a base coat to protect them.
- Choose a white nail polish as your base and apply one or two coats for full coverage.
- Once dry, take your gray or silver polish and put a small amount on a palette or a piece of paper.
- Using a nail art brush or a toothpick, dip it into the gray/silver polish and swirl it gently into the white base for a marbled effect.
- Use a small sponge to dab lightly over the design to blend the colors slightly for a frosty look.
- Finish with a top coat for shine and to seal your beautiful winter wonderland nails!
Snowman Nail Art
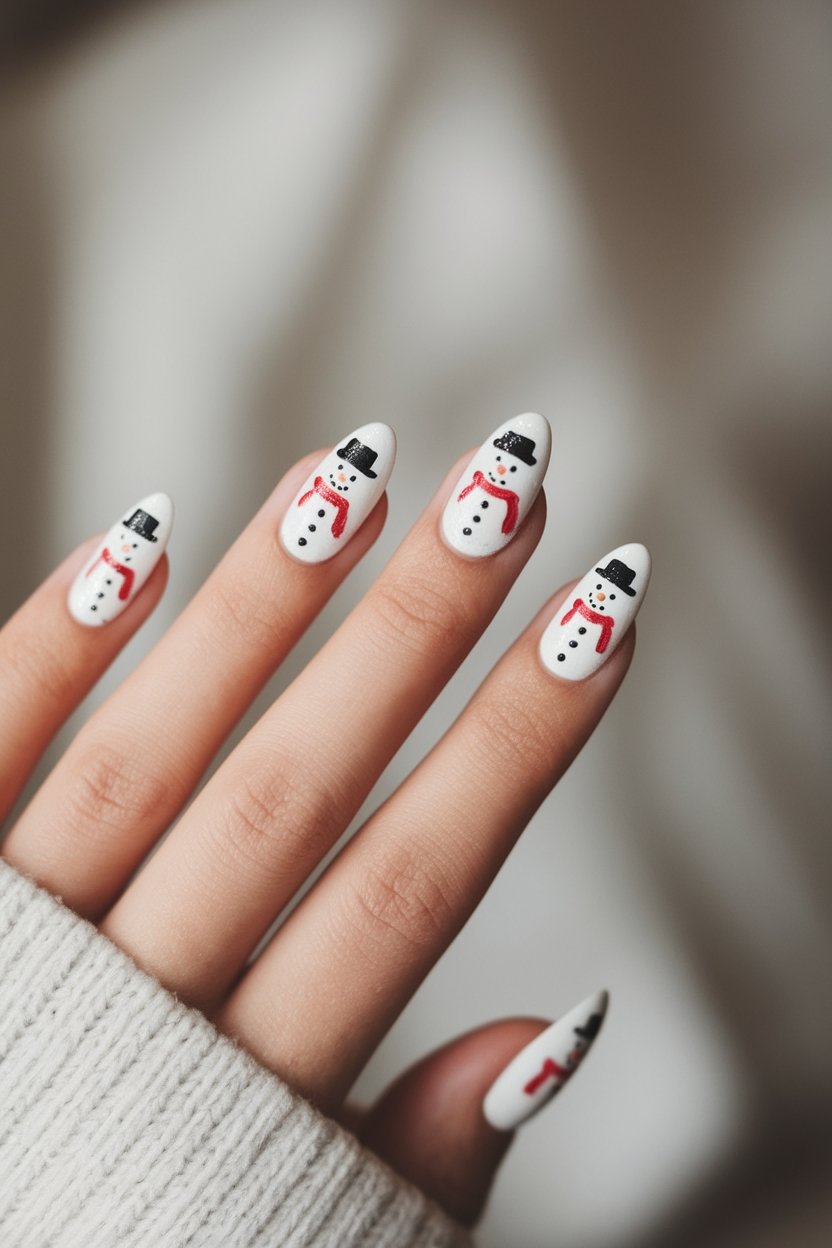
White Polish | Blue Glitter Polish | Orange Polish | Black Polish
How to Create This Look:
- Start with a base coat to protect your nails.
- Apply two coats of white polish for a frosty base.
- Using a dotting tool or a toothpick, create tiny snowmen with white and add orange dots for the carrot noses.
- Use a fine brush to add glittery hats on top of the snowmen with blue glitter polish.
- Add tiny black dots for eyes and buttons.
- Finish with a top coat to seal in your design and add shine. Enjoy your whimsical winter nails!
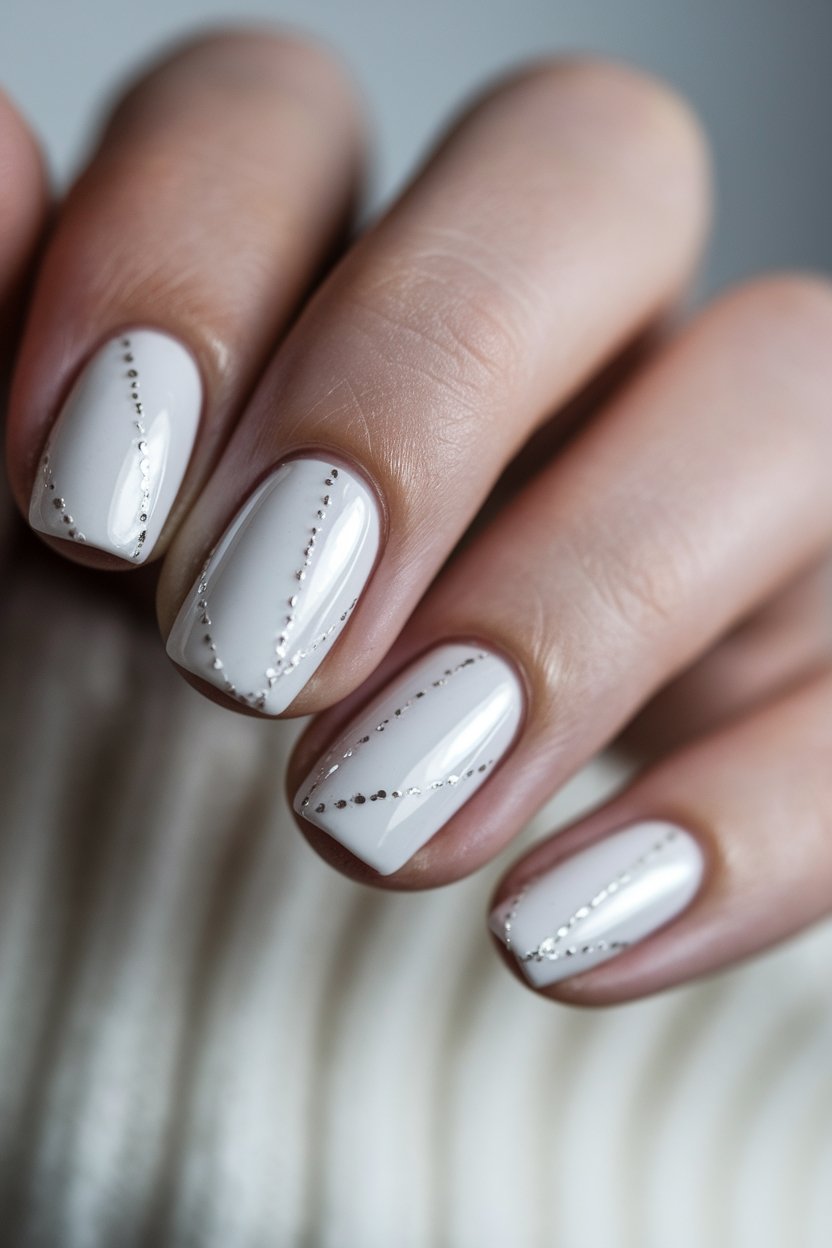
Pearly White With Silver Accents
Pearly White Polish | Silver Glitter Polish
How to Create This Look:
- Start with clean, dry nails and apply a base coat to protect your natural nails.
- Apply two coats of pearly white polish, allowing each coat to dry completely.
- Once the white polish is dry, use a thin brush or nail art tool to add silver accents. You can create lines, dots, or even small stars for a festive touch!
- Finish off with a top coat to seal in your design and add extra shine.
- Let your nails dry fully and admire your winter wonderland nails!
Frosted White Snowball Accents
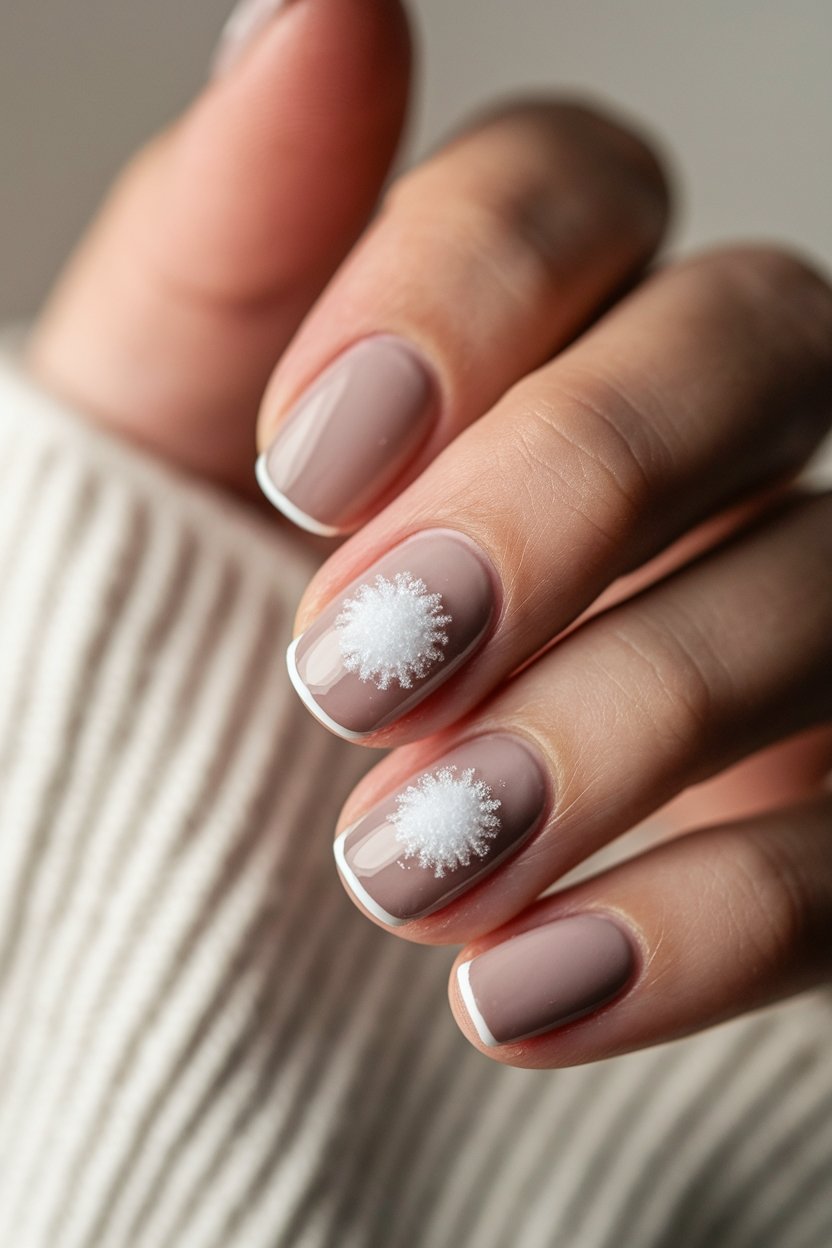
White Nail Polish | Silver Glitter Polish | Clear Top Coat
How to Create This Look:
- Start with a base coat to protect your nails.
- Apply one or two coats of white nail polish for a solid base.
- Take a makeup sponge and dab it into the white polish, then gently press it onto your nails for a fluffy snowball effect.
- Once dry, add a layer of silver glitter polish to bring in the sparkle.
- Finish with a clear top coat to seal your design and add shine.
- Let it dry completely, and you’re ready to flaunt your frosted snowball nails!
Icicle-Inspired Nail Art
Shimmering Blue Polish | Frosty White Polish | Silver Glitter Polish
How to Create This Look:
- Start with a base coat to protect your nails.
- Apply two coats of shimmering blue polish on all your nails.
- Once dry, use a thin brush to add sharp, icicle-like lines with frosty white polish.
- Add a few dots or lines of silver glitter polish for that extra frosty effect.
- Finish with a top coat to seal in your design and add shine.
- Allow your nails to dry completely, and enjoy your winter wonderland nails!
White Christmas Nails
So, are you ready to transform your nails into a winter wonderland?
With all these fun designs, your fingertips will be the talk of the holiday party!
Regardless of if you choose sparkling snowflakes, frosted tips, or adorable snowman faces, there’s a style for everyone. Just remember, it’s all about having fun and expressing your festive spirit. So grab your polish and let your creativity shine … because who wouldn’t want nails that look like they belong in a holiday movie?